2.2 Straight Six 5 Speed Manual Convertible Titan Silver 2171ccm 170HP 125KW Petrol
My Diary Of An BMW Z3
Z3 2002 Engine 2.2 5 Speed Manual
Nigel G Wilcox
click
'Looking Good!
The Positive!
24.04.22 This afternoon has been forecast rain and I was looking for an excuse and couldn't find one. The oil needed changing and it wasn't going to do it on it's own, so up to the garage...
The New Year 2024 - it is now 7 years on with my Z3 Daily Driver and it is still going wellish! This year the Z3 is ready for a good service with those irritating little things to be cleared up, such as the seat bushing replacements to stop the chair from rocking. I can blame the MOT garage for that last year. I would also like to change the headlight bulbs as they are not so bright at night, sort out some wiring and the list goes on. With changes in Government legislation many of us are uncertain on how long we will have our freedoms to drive our classics without the ongoing abuse from politicians, but we can only guess and see what develops!
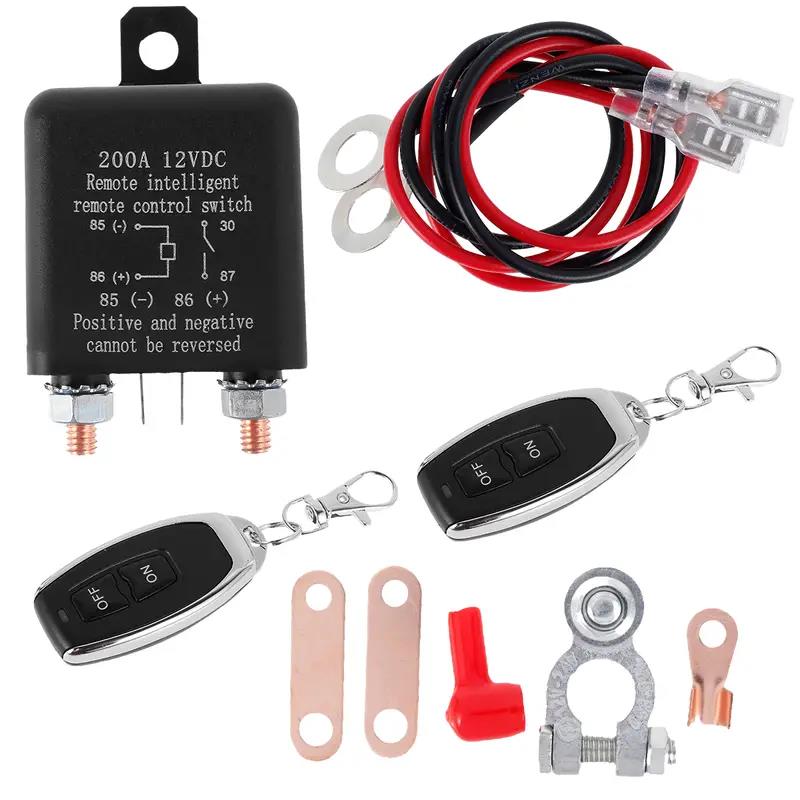
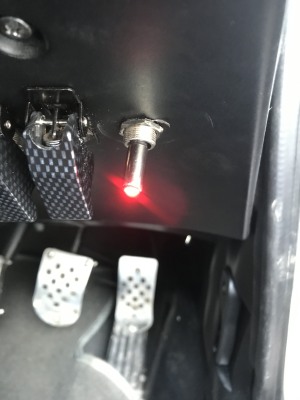
09.01.24 - Just waiting on one or two items ordered, such as stronger headlight bulbs, down to Christmas postage backlogs, like most years : (Arrived pm). In the mean time, I have received a new battery isolator that has been on my shelf for a number of weeks. I have just taken it off the shelf to have a look at it.
12V Battery Relay Switch Dual Remote Car Battery Disconnect Relay Anti-Theft Battery Shut Off Switch Isolator Compact Battery Isolator
I have been having to open my Boot/Trunk to isolate the battery using a quick release clamp when storing the car in the garage, I was looking for something better or more efficient and this could be the solution.
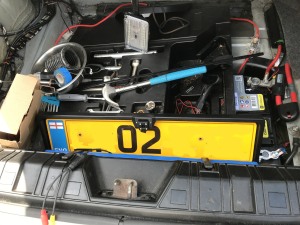
As many Z3 owner's know, if one has a full sized battery, there is not much room within the battery well, and anything above the battery will prevent the carpet board covering the battery and tools section this spoils the aesthetics' of the boot compartment. so I really needed to devise a D.I.Y upgrade to make it work:
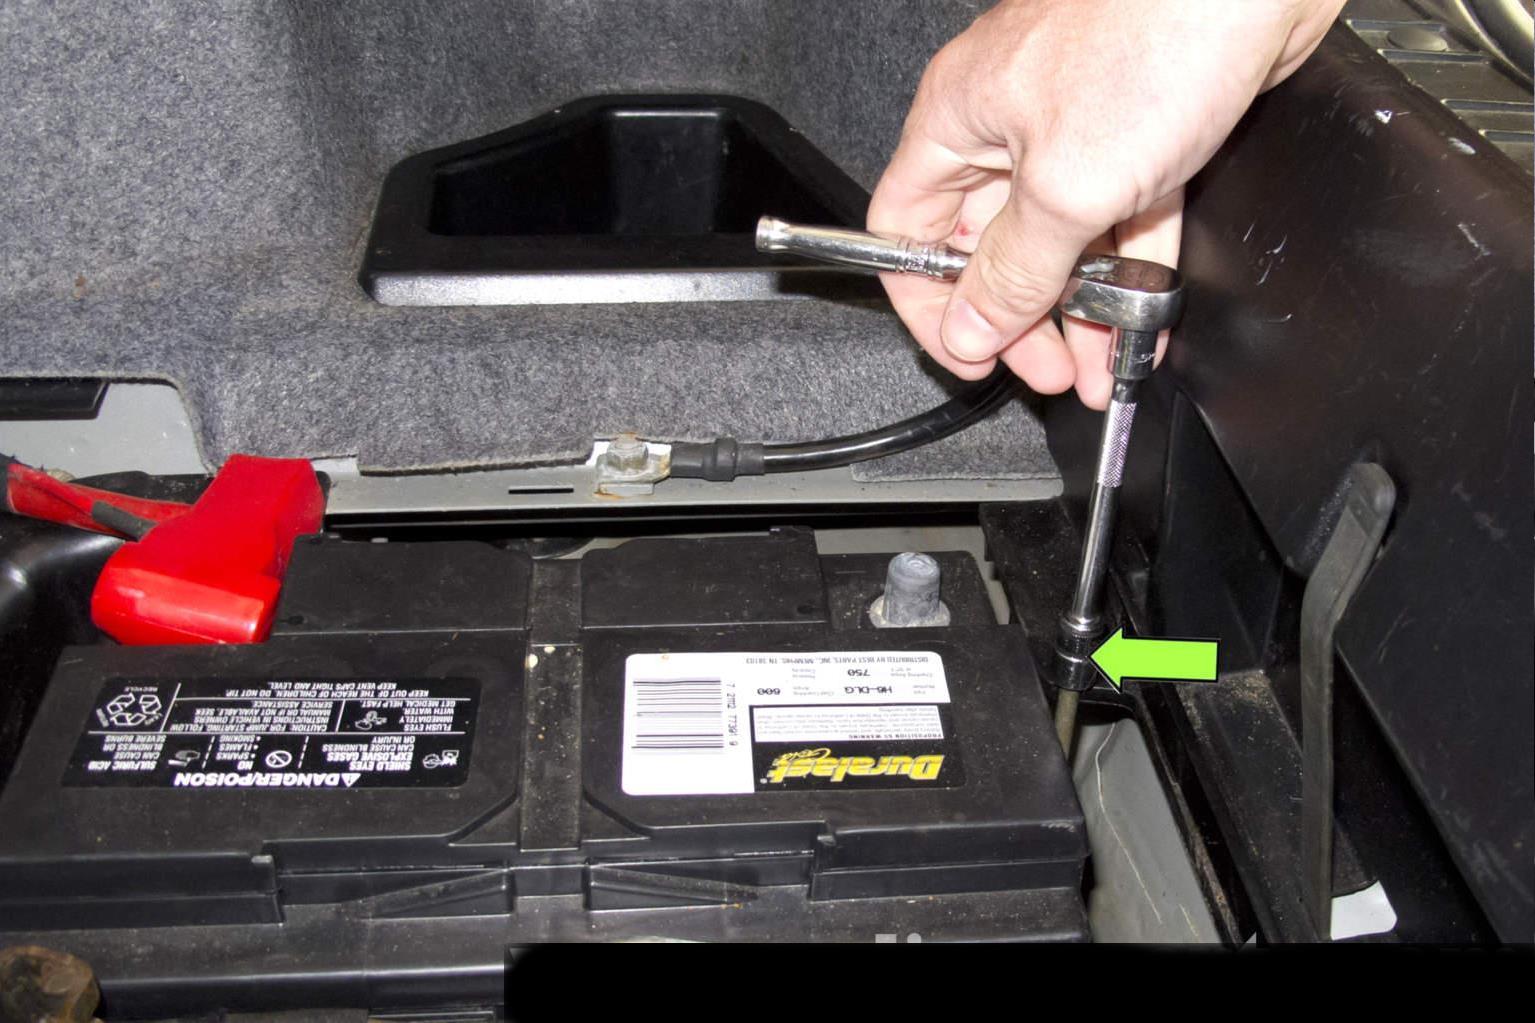
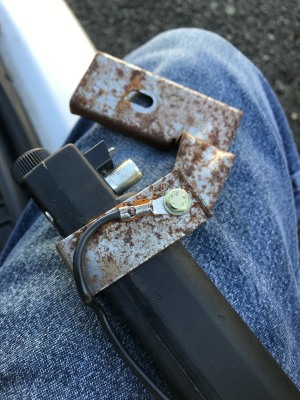
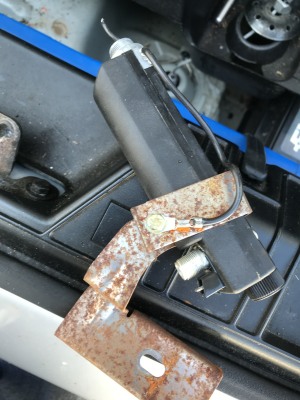
This is a 'mock-up' of what I came up with. My battery fills the compartment up to the lighting facia, however there is space under a plastic shelf towards the corner 'bin' as indicated within the image...>>>
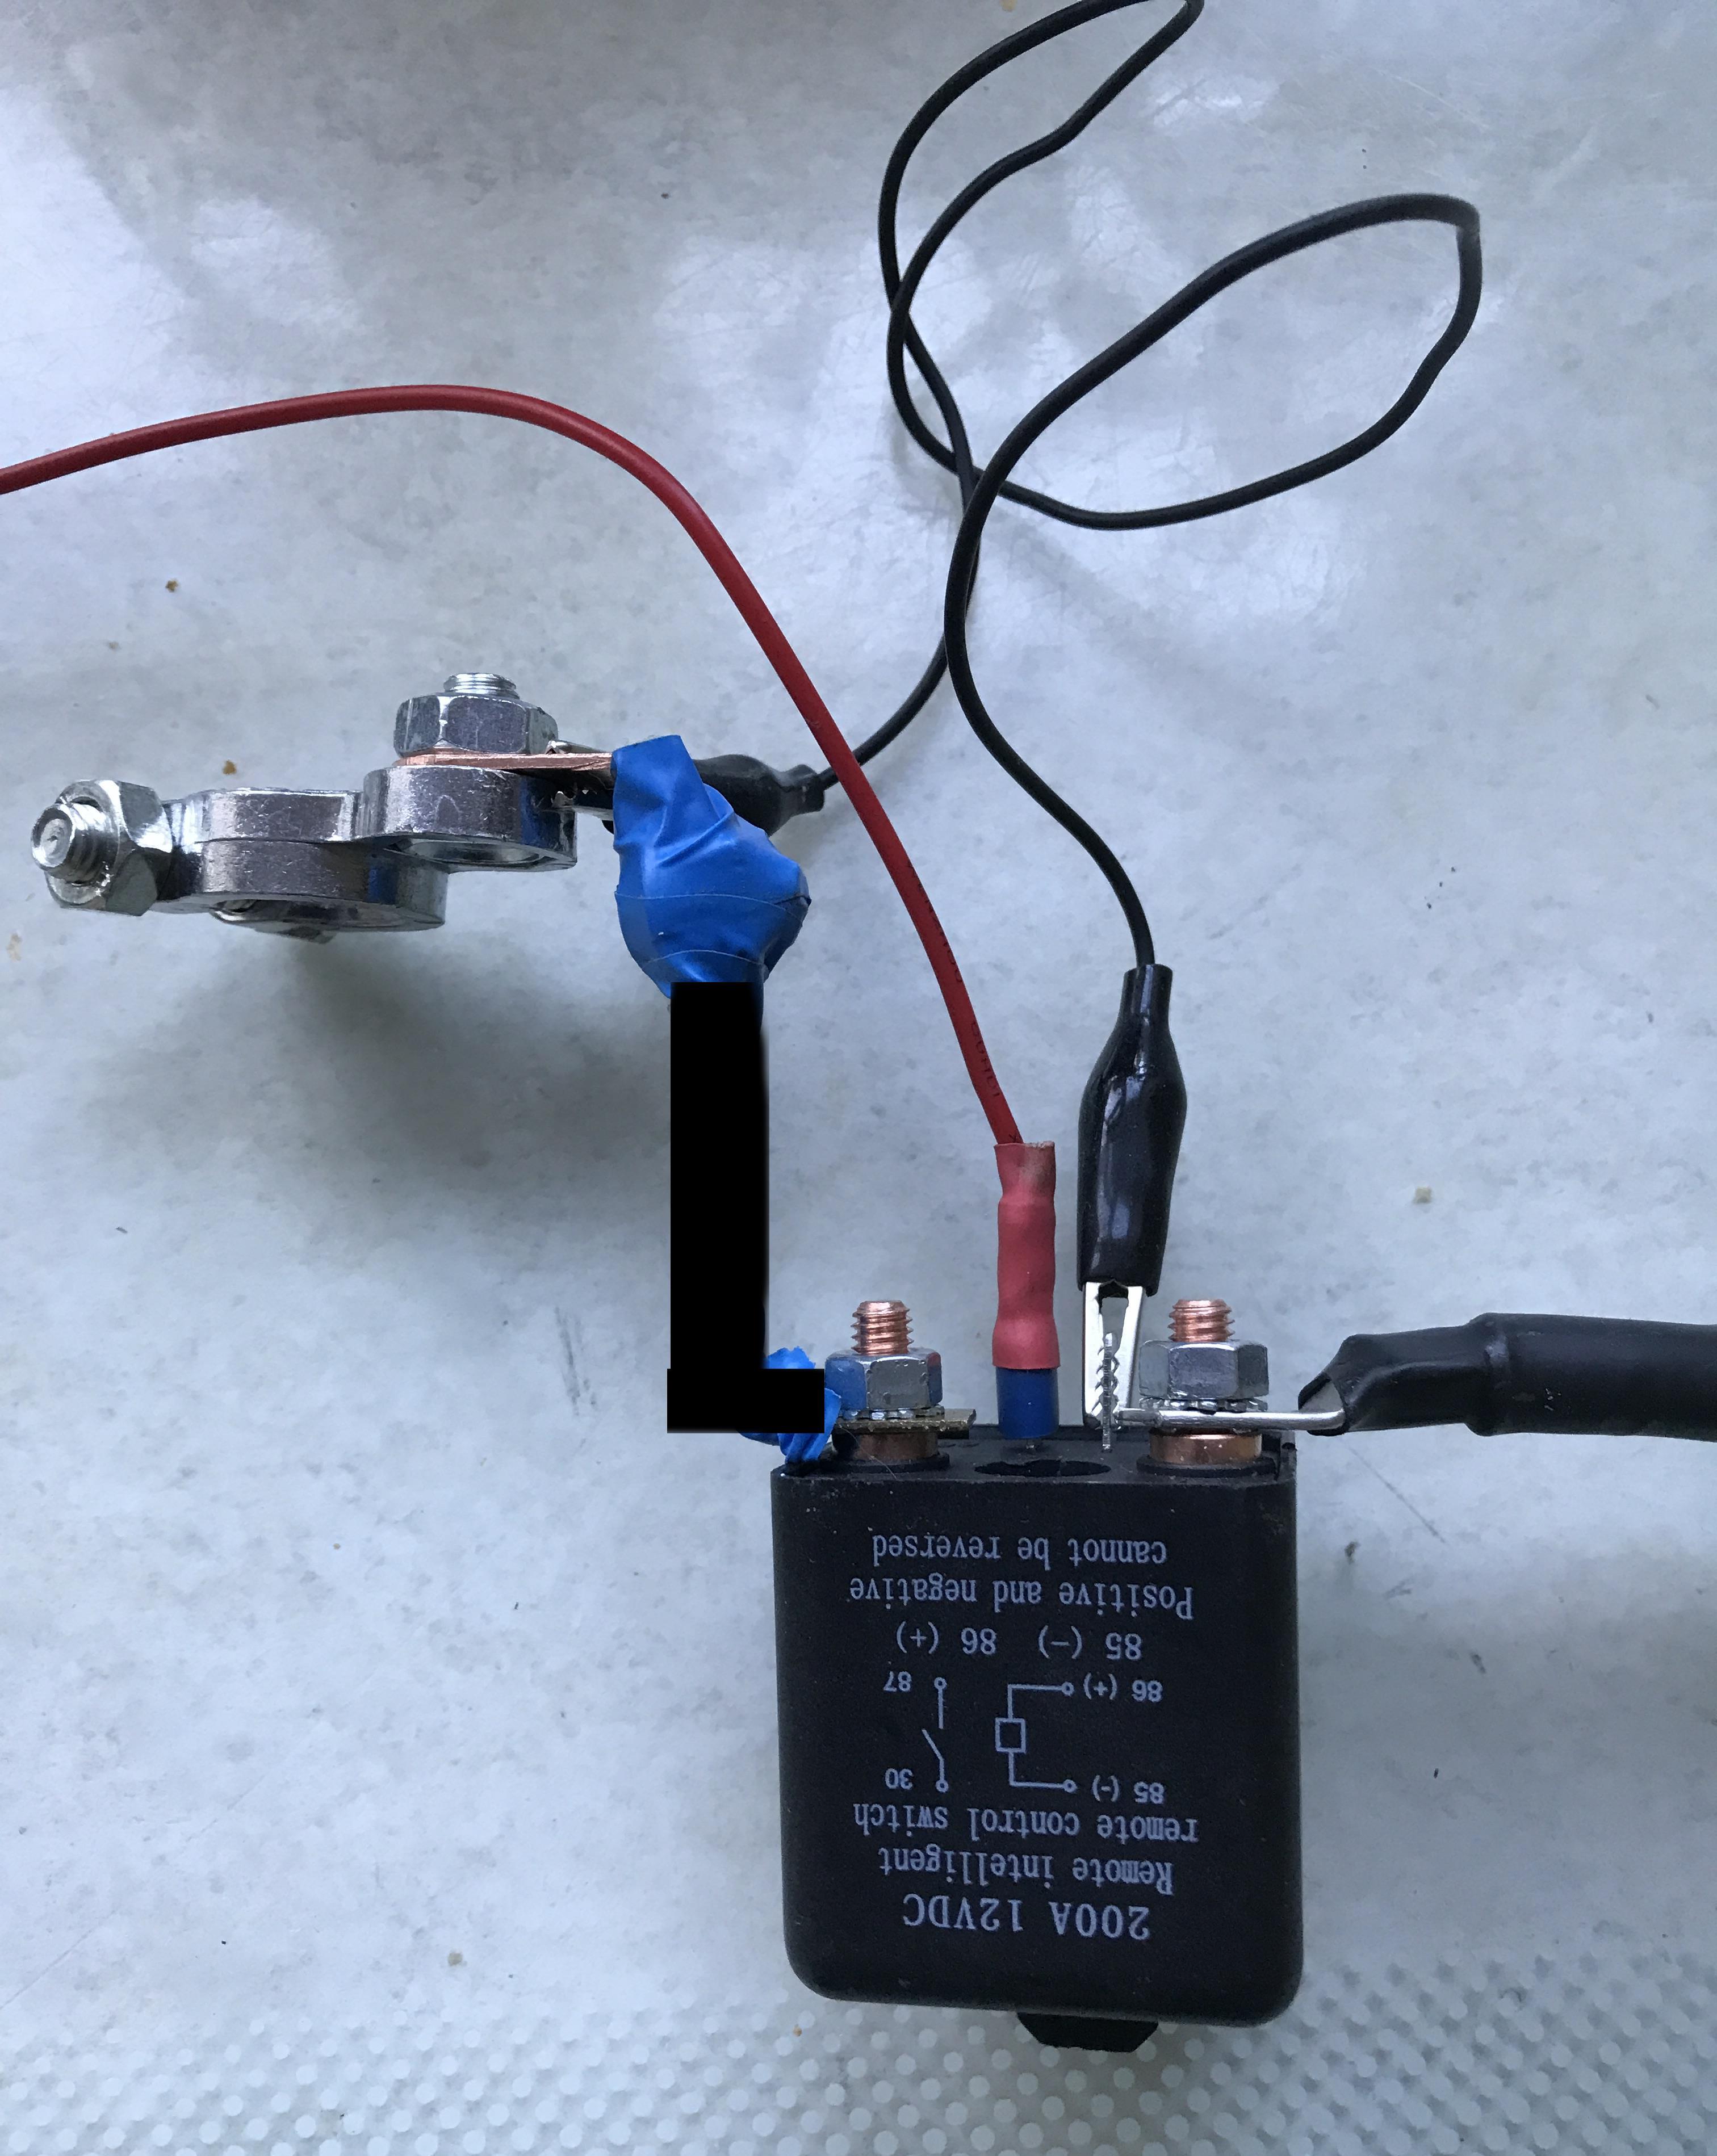
With a piece of metal plate extension from the battery connector, (attached with small bolts and nuts) to the the relay (30) the unit can now be tucked under the shelf and this will also prevent anyone tampering with the connection to the relay, it is more time consuming for a potential thief and like with any security, 'time' is the thief's worst enemy. Added to other deterrents this can only make the car a little more secure.
So what does it do? One may well ask. By using a remote, the relay acts as a switch isolating the battery 'on' or 'off', this is a quite a simple concept really and it saves time in manually unlocking the Boot/Trunk remotely or via boot/trunk keys.
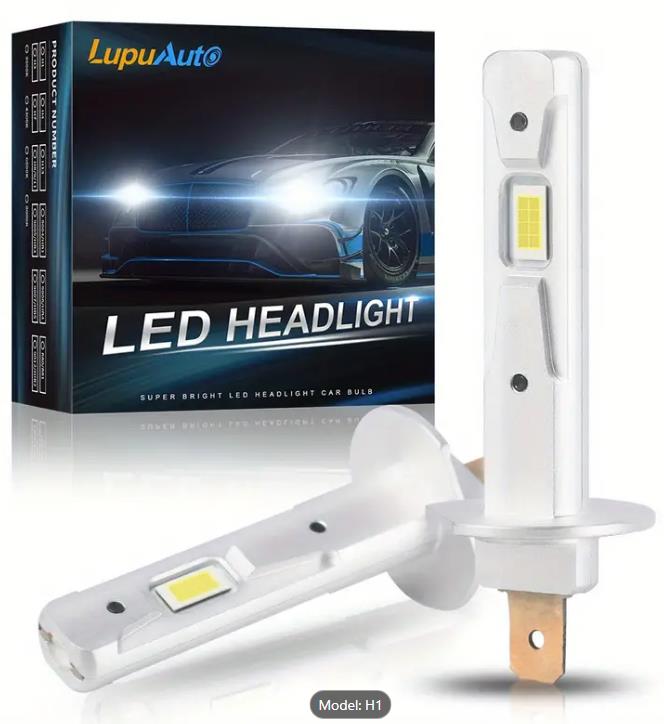
OK, decided to choose two potential headlight LEDs (details listed in purchases) for some reason there is almost a mistake on orders either from my side or their's, this can be frustrating especially when the advertisement is not clear, however, mistake or not; I have them for possible future projects. When choosing bulbs of any kind, check your patterns and spacings of bayonet lugs and soldered connections on the bottom of the bulb, some sockets require a single connection and others require a double connection on the base of the bulb. Check this out, if you can as it is not always clear to identify - what happed to universal standards?:
26.01.24 - Just need to attempt to fit them, that is if they fit...;) (will wait until after the MOT to fit them)
Note: Check you bayonet lugs on the sides of the bulb and also check the bottom of the bulb for a single or double soldered connections. The lugs can differ on the same light cluster, depending on the bulb functionality. This can cause problems and damage to the bulb when extracting your bulbs.
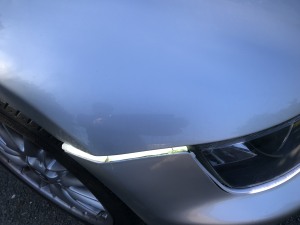
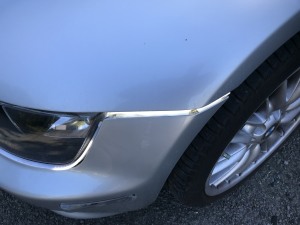
29.01.24 *** As many of you will know from reading my diaries and comments, there were some problems with the front bumper, it drops about 10mm leaving a slight gap below the bonnet/hood. The consequences to this gap clearance to the road or when going over speed humps can be noticeable. To rectify this problem the bumper will most likely need to come off, to be reinstalled and re-aligned accordingly.
The gap could be down to the attachment brackets on either side of the vehicle, these could either be broken, bumper bolts maybe missing or both. I have sourced two salvaged brackets, (Stored on a shelf for a couple of years now) - They just need to be fitted; that's if this is the cause of the problem, personally after a brief inspection I am doubting it). This just leaves, tightening of bolts, (my initial thought is, a bolt or a couple of them may have been crossed threaded and not extending to the correct tightness, allowing the bumper to drop, this is only speculation until a thorough dismantling and inspection is carried out. That's for another day.
Currently, I have short LED strips wired up and are effective to a point, the running light feature is not working, only the direction indicators, they are held on with cable-ties, not exactly a pretty image as aesthetics goes for those that look carefully...
Once rectified, the newLED strip (China - Temu, paid £4.04 'payday sale', normally priced £15-20, WOW! will they work?) will also help in tidying up the aesthetics of the vehicle .... It may also be a good opportunity to use one of the switches on the switch panel previously purchased (see listings) to illuminate the strip as and when needed and therefore will most likely require an update to or a change in the existing loom/wiring. The LED strip also incorporates amber direction indicators and these will have to be linked into the local indicator circuit, another opportunity to upgrade and add more convenient connector plugs.
An order has been raised, to start this process and to help my motivation into rectifying the problem that has been long awaited.
1- Running Light
3- Running Light
2- Running Light & Direction
Running Light & DirectionIndicators
layout examples
Which 2 would you choose?
1
2
____________________________________________
___________________________________________
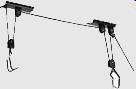
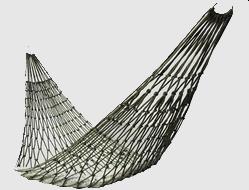
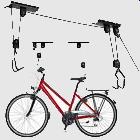
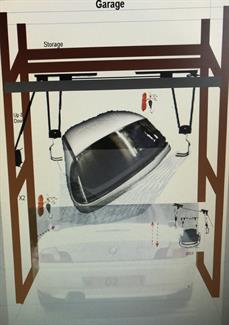
Obviously take away the bike, place an old hammock or strong cargo netting or straps across to both hooks and one can swing the hardtop onto a small frame above the vehicle... hopefully without damaging it. Return back onto the car in winter weather or long trips. I also have two more small locking pulleys to perhaps add to the other two corners for added support and security. (see purchases for costs)
X2
Up & Down
A net or lifting straps. Will this work? I don't see why not... unless there is a weight issue.
Received 12.02.24
Up & Down
Further details under the 'Tools' section Car roof/garage
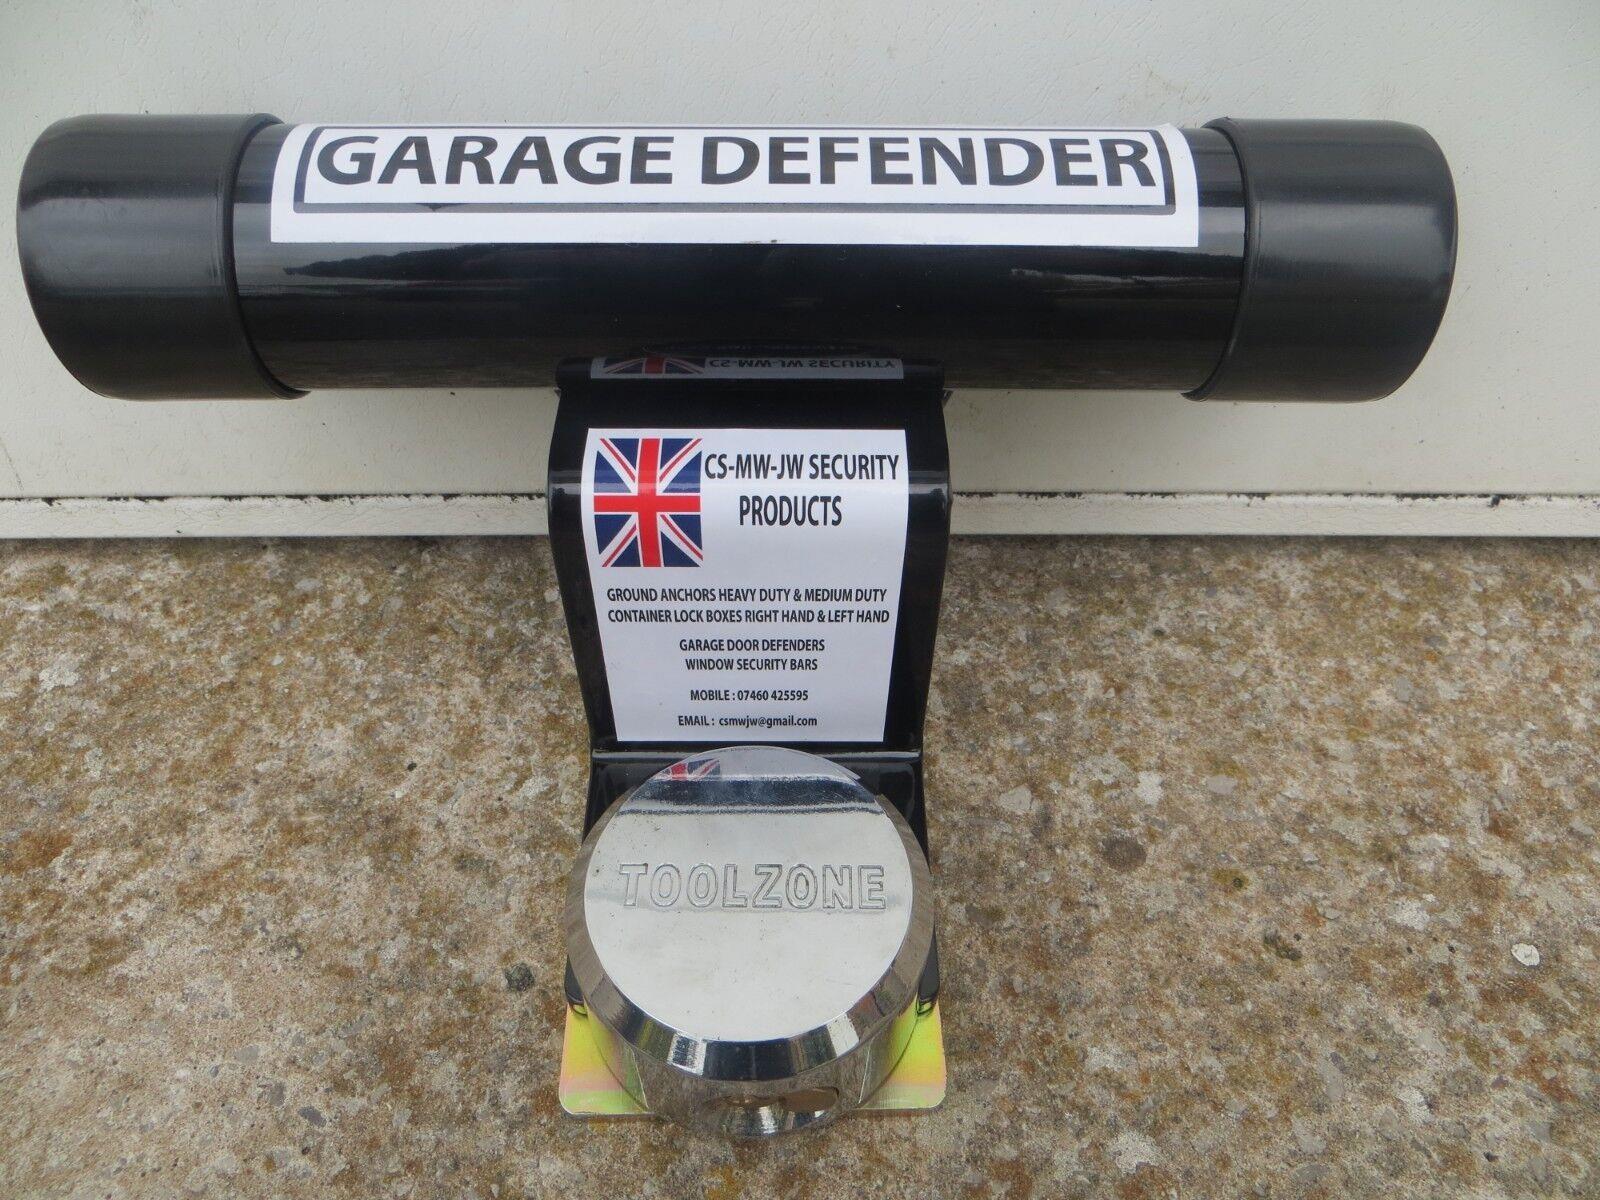
This 'defender' prevents the garage door from being lifted and the base plate is bolted inside and outside of the garage. The outside perimeter plate bolts are covered from access - a nice design and robust- this will be fitted soon to replace my current security that has also proven adequate, the new Defender will be fitted without having to spoil the aesthetics of the new door. ...?
I have recently noticed some of my neighbours having the same idea towards having good security - do your research and shop around as the prices will vary. Do also research the vulnerability as well as the quality of other designs that maybe available, before purchase.
04.03.24 - Still waiting for warmer weather in early March, hey! Being optimistic here!
11.03.24 - Wow! New Garage Door has been fitted and looks good. Just waiting for the roof to be replaced, as full of asbestos....the fitters will be replacing the roof with metal sheeting. (can wire a few hundred volts through that! Another security idea) ...Nice! - I do have a problem, due to no electricity to this garage and I will have to bring into service my generator or power inverter. The 800W hammer drill as this is required to make holes into the concrete for the security bolts for the new Defender now received. After testing the inverter of 4000W it only knocks out around 200W of continual power, not enough for the hammer drill. I do have another inverter with 6000W on order and this should knock out at least 1600W, hopefully this should suffice without having to service the generator - Inverter should arrive early April... (Update: arrived 3rd Apr 2024 - tested the inverter with the hammer drill 800W and it seems to work - just leaves finding the time to commence with the job).
31.03.24 - Over the past three years, I have conducted an audit and identified the costs to having to replace tools loaned out, or they have gone missing or stolen, this has exceeded £1000+ deficit, some tools are irreplaceable and holds sentimental value and having to replace these tools/items are taking time due to obvious financial constraints, this does leave a bitter taste in one's mouth and disappointment, feelings when chasing up these people to whom have blatantly decided to take ownership of my tools. I hope, they have a conscience of causing animosity, that is if they have a conscience, to date, I doubt it and this is very sad.
Initially this was down to me being over generous and trusting on my part.... - and these people have exploited me and the situation, there will not be another opportunity. 'They Know Who they Are!' So much for the individual moral standards of today....I have re-introduced the following policy, unfortunately. Tools are not cheap, unless one steels them and this has been considered the case based on the failure of returns - they are considered as being out of my inner circle). Note: The New - Or I should say the 're-enforced Policy' in terms of the borrowing of such items from this point on in time, will stand - generosity has ceased and I 'Don't care if those 'millennials' or 'Z generation individuals' feel offended, tough! I can only say, go out and buy your own tools! However; all returns must be returned; grow a conscience or show some decency. OK! I have said my piece for now. Moving on, I think the rain may have stopped....still cloudy, clocks have gone forward, early a.m., so, longer daylight time.... and World War III is just around the corner! That will be nothing if my tools are not returned! (See Policy). Obviously, I am still cooling down....
08.04.24 - Another day. Today looks to be a pleasant day, not too hot, not too cold a typical three bears scenario and an ideal day for sorting out and fitting of the 'defender' security bar at the garage. It is around 2.15pm in the afternoon, I have the Inverter 6000w and two legacy hammer drills, one Maplin 580Watts and the other is my favourite Bosch 800Watts (see drills) with some concrete munching drill bits. I started off with the small drill bits and worked up to the larger ones, (initially with the Bosch) and this worked quite well. The job then required the larger bits, (Too big for the Bosch 'pull-lock' adapter or SDS) This part was not of the best of experiences, as there was rebar within the concrete and the drilled circle, (sort of) was every other shape than a circle. A blister on the right hand, 'Really!' I drilled three holes sortof, I then discovered there were only two bolts available for the plate, 'What!' There were three holes in the plate? I had no idea where the other bolt had walked off to or even if they had even been supplied? Two will have to do. (update: two only supplied? - Come on Suppliers!) I found the Maplin 580w drill more friendlier than the Bosch 800W, (even though the 580W had given me blisters).It did hold the thicker masonry drills (21/2" Chuck). The whole job took about 2 hours or thereabouts, (yes! You heard me right, not the easiest of jobs surprisingly, must have been a good mix of concrete or something?). Another job ticked off the list. As for the 6000W inverter, it performed well and I am pleased with it, it did cut out on occasion when the drill bit became caught up within the concrete and rebar, however; the inverter did reset itself. (without blowing!) The Bosch drill for this particular job was not really suitable without a traditional Chuck and key, (additional attachment, the one I had was broken or worn - I am sure it would have done the job, if working, but not today). As for the Maplin 580w it did prove to be a better proposition, as one could tighten the larger sized drill bits within the chuck using of course, the chuck key, and this was often, as the chuck loosened continually after a rally of drilling attempts; it eventually produced the result that I needed. I still prefer my Bosch for my everyday job scenarios.
22.02.24 - Security is important today and if your garage is a little away from your residence it can also be a problem in the back of one's mind. I have found a good security system for the over-and-under garage doors. I already have one 'Defender' on a storage garage and I have been testing it out and it works just fine. I like it and it does the job well and I have decided to purchase another one for when the new over-and under-garage door arrives to be fitted to the garage that retains my Z3. (the storage garage already has an updated door with the defender lock) bearing in mind the original locks of the old doors of the 60s and 70s were not very secure and one needed to fit a very good padlock on the garage door as well for peace of mind. The latest doors however are a vast improvement on the old style locks of the 60s and 70s and with the Defender Security (2 Keys) it remains a very good time consuming deterrent.
X2
click
By using this relay/remote system, it also prevents the car from starting when activated to 'off' via a remote, it also prevents battery drain when the car is stored in the garage over night, (with old or weak batteries) or for any length of time without starting and recharging the battery via the alternator/charging unit. This is a common experience for most drivers with modern cars today, especially through having sophisticated alarm systems and multiple choices of electrical devices such as 24/7 cameras attached and connected to the vehicle and power leakage is inevitable whilst the vehicle is connected to a battery. By pressing the remote 'on' button, activates the battery connection to 'on or live, the car is now ready for 'start-up, using a reasonably full battery.' Many people are reverting back to basics anti-theft practices. Looks and sounds good, I just need to fit it... Ok, a few hours later...all done! It works too....! (Note: Another item made in China). Review: Works Well no problems 22.02.24l! WKShop27
13.01.24 My next job is to sort out my rear lights (n/s), partially working after correcting the (n/s) front angel eyes as they were not working, weird... possibly a bad earth somewhere, never found it. Replaced a fuse as to be on the safe side and adjusted some wires. They seem to be working for now at least.
14.01.24 - The rear lights took about 2 hours today to sort out, Saturday morning, nice, sunny and a reasonably warm day, to sort out, the rear lights, they are now working to a fashion, after wrecking the LEDs, I replaced them with some conventional bulbs I had stored away, however; I will have to order some new bulbs, the 'Chinese' bulbs were a total disaster, many falling apart or locked into their holders. The products were below Western quality standards and some broke when extracted from the holders. Unfortunately, looking on the internet, they all seem to be made in China, makes one think doesn't it, that most of us are paying for just rubbish. Bulbs have been ordered, guess from where? I Don't have much choice as most of the manufacturers here in UK are not manufacturing LEDs and if so, are three times the price. As the adage goes 'you gets' what you pay for'... but today, that is in doubt... we will have to see the next time around.
20.01.24 - The LED Bulbs have now arrived: (TEMU!) - Not Bad for the price, genuine named products can prove more expensive.
Framing is already in place - sort of!
Job Pending
Jobs I can think of that may need to get done this year: *1. Fit Bubs (LED) replacements headlights (after MOT 'PASS!) - Bulbs are again the wrong fitting required New order 19.06.24/ *2. Replacement Strip LED Lights on front of car to panel switch (maybe linked to *3) basics - 25.05.24 (See WorkShop)02.06.24 *3. Rewire internal Fuse boxes - (1 Panel remaining) *4. Replace Motor on Cut-off Exhaust again... as motor has stopped working - possible a wiring check)Now operational 12.05.24 *5. Use welder on rear Exhaust, (see previous diaries re cut-off Ex)… (maybe?) - *6. Sort out front bumper (requires a refit) (See Gallery)Currently Satisfied with it *7. Sill paintwork may require a rubdown rust treatment and touch-up? *8. General Fluid, Service? *9. Fit an Amp to existing radio system - Decided to delete it no need for two seater *10. Repair Leather o/s seat (Drivers leather bolster.) (fit leather patch) 20/26.05.24 *11. Rocking seat bushings need replacing... 10.05.24 *12. Fit the Defender Bar at the garage - Done! 08.04.24 *13. Repair Interior Door handle 13.05.24 *14. Fit Tweeters/Speakers (Partial) Tweeters L&R & Speakers Front only 13.05.24 Speakers Rear: Pending 19.06.24 *15. Order Replace Bonnet Release Cable (see Workshop) Fitted 23.05.24 *16. Replace Horns (see WkShop) 25.05.24 *17. The A/C could do with a complete top-up As one can see, some jobs have been put off and put off...and also (wait for it...) Put off. My poor excuses - waiting for warmer weather and cooler weather, in other words ideal weather in the UK ;), yes, perhaps...?
02.02.24 Ok, received the LED light strip, tested it and it works well, just need to find time and good weather to fit it, after sorting out the front bumper and the existing wiring to the newer internal fuse box... etc.
05.02.24 - So far, a number of suggestions from readers received, are going for option 2. Comments suggest it will keep with the aesthetics of the vehicle without being 'too in your face,' Both options are feasible and I am easy on both of them, it will be down to the fitting and possible unforeseen logistics/hurdles however; with little thought on my part, the reader's usually prove to be correct, so I will bow down to option 2, for now at least! I Thank those participants that took part. I will supply a photo update when the task has been completed. (update: see workshop)
07.02.24 - Tomorrow is the official MOT day however; I had been trying to book the appointment for over a week now, kept finding the contact number was unavailable, a garage I had been going to since I had, had the E39 and the Z3, WOW! must be nine years! Today I decided to go down to the garage that is a good 30 minutes away, low and behold it was open, with a laugh and a joke as with every time, they did offer to do the MOT there and then for me, nice! Like all my MOTs there was trepidation, anxiety, you know the usual. One of the fitters asked me "if it the Wife or the girlfriend"? I told them it was the wife, thinking it was a trick question and that would get me closer to a pass ;) yep, right!....(the wife being the boss, or was it the car comes before the wife....however; (I am single, seems less hassle, less mind numbing and less expensive) and NO! I am not politically correct or WOKE! I belong to a time when England and morals meant something!
I knew the car was sound and it was tested thoroughly at the garage, more so than previous years, (I say this each year). I had worked out the mileage since my last MOT, it seems I had only done 676 miles in one year, disgraceful!
My Z3 PASSED, (phew!) with flying colours, well it hadn't been anywhere really had it and yes, some can debate 'a still car will deteriorate quickly, locked away in a garage'... my reply is, "must remain positive now and blame the inactivity on fuel costs and the political classes destroying anything that proves to be enjoyable!
Today is not to think of the dumbasses in Whitehall, but a joy to celebrate with a cake and a cuppa. (I even managed to remember to get their new garage contact number)!
Talking about garages! .... (did you see what I did there...;)) I am still waiting for a new roof and door for my garage, being given the run-a-round and three months on, the Z3 may as well be out in the open.... services are definitely not what they used to be.... waiting is currently the game, back to the cake and the cuppa....
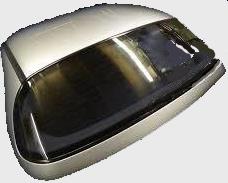
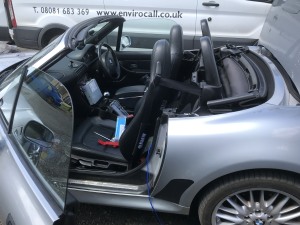
17.02.24 As some of you know, the hardtop of a Z3 can be difficult to place on or take off if there is only one of you, (it took me 3/4 of an hour one day before the winter months), and I have been thinking of ways to make my life a little easier. So how do you like the following idea:
click
02.05.24 - Now how long have I waited to get a new roof on my garage? Well the process started late last year. Today; after being let down about three or four times, with the proverbial excuses previously, my attitude was 'well, whenever!' Today, I was informed out of the blue, that the roof would be replaced... The date given was 21st June, yes! (the 'carrot and the stick' scenario sprang to mind) Hopefully; it will be this year, 'Proof will be in the pudding' so-to-speak! Well! We shall see! A date is just a date? The novelty of the new garage door has not quite worn off yet and it will give me some resolve, for a while.... (see Tools)
05.05.24 - Since the weather has been good this morning it was time for the shed clear-out and to index some of the contents for insurance purposes, checkout the tools section for the additions of a few of the forgotten legacy tools. Mind you as value goes, most of the electrical operated legacy tools are not worth that much compared to today's prices and what one can get technologically-wise, however; simplicity can at times be better and they have proven to last the years and they still work well, this tells me that they can be better than some of the rubbish that is within the market trade places today; only lasting five minutes, (metaphorically speaking). It took around five solid hours to move out and re-situate the contents of the shed, (it was a 'Tardis') some of it will have to be moved to another storage facility, as I still can't enter the shed, fortunately there was not much rubbish and some content would be better off being nearer to the vehicle so they can be used more. Those of you with sheds and tools know what I mean. So! A good and satisfying afternoon's work. And yes! I did consider the missing tools hence the search and clear-out and unfortunately they are still missing....
10.05.24 - Nice Hot day 23 degrees at around 12:30pm a list of jobs to do and the first one to tackle is the driver' chair bushings.
Actual Image
When I had the seats out a few years ago, I was never happy as to the way the drivers seat went back, today I investigated and low and behold found the slider (closer to the passengers side on the driver's chair) of a much longer length, it was no wonder I was struggling with it. ( I am sure this Z3 was used as a donor car, after the previous owner had damaged the vehicle and bad parts were returned to it). Fortunately, through many hours, I am pleased to say most of this carnage has been put right through hard work sweat and tears with deep pockets and this continues even today... This has been over the past seven years. It is a slow process with financial constraints. The chair breakdown and putting it back together has already been featured within the workshop section, so there is no real reason to go over it again, the only addition is to do with the replacing of the bushes, that really proved to be a head scratcher for side (R). Being the wrong size also added difficulty, as the slider would not slide off, as to be able get access to replacing the bushes. I tried everything, hence taking 6 hours to partly complete the job. One slider will have to do. With the one side of one chair out of the equation, all there was left was the the gauging and the balancing of the core screw thread to level both sides so the chair could work effectively.
Actual
The Left plate was fairly non-eventful and straight forward for the side (L), the bushes were replaced. This only left me the option to reinstall the chair with one side repaired/updated and after lining up both rails, I inserting the bolts and screws and the chair was installed, electrics connected and the bolts secured. Seatbelt anchor point and the test of the chair. Worked better than ever. That is just the way some jobs are dealt... Lose some win some 'great!'
Yes! The floor did get a clean with a vac before the chair was returned to position, I did the passenger floor too. These jobs were all completed by my deadline of 6pm!
Sliders
Sliders
(R)
(L)
Actual
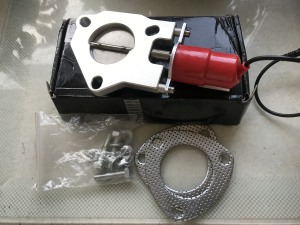
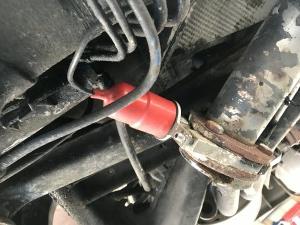
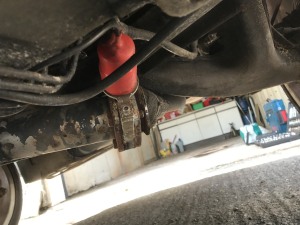
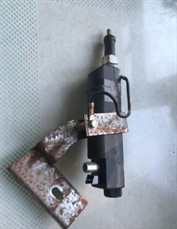
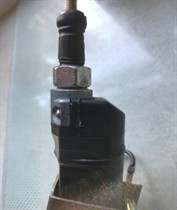
12.05.24 - Another day, another job, this time I needed to sort out the Exhaust cut-off and the need to identify why it was not working. Is it the motor, the switch connections or the live supply to those internal fuse boxes? Again, I have been here before, I have asked myself, (as one does) is it me or are these problems arising through just wear and tear, or worse, incompetence? Probably don't want to answer the latter in this case, (The Exhaust maybe a little too low to the ground and exposed to everything thrown at it in terms of environment like the road and weather. I will soon see as I start to inspect it yet again. It's another potentially hot day today 9:45am and 24c already. This time around, I would like also, to add to the circuitry, I am talking about a relay; switch in addition to using a five pin rocker switch, hence part of yesterday, I was working out how one wires this up, (I have added a circuit diagram
- It just requires me to probe the connections to see if my connections are feasible - for anyone that is in the know with electronics, please let me know if this circuit will work? Appreciated! (Update: It has not worked - more research required) A little while back, I did buy a spare motor from 'Wish', before the world turned upside down politically, good foresight considering the state of the world today and politician's chaos). The spare motor will be used if the attached motor has been diagnosed as burnt out. I am hoping that this is not the case, as this will be the third one I have needed to install and there's the dubious chances of the poor availability of future purchases to replace them to consider, hence the idea of using a relay to taking the strain off the switch and possibly the motor. The existing motor will need to be diagnosed first. I started around 2pm, I was required to jack up the car and inspect the exhaust, it looked a little crusty, however; I did managed to undo the three bolts holding the 'butterfly flap', the gaskets, it had seen better days too.
I had already taken the spout and clasp off. At this point; I thought it a good idea to check the two motors I had used before, and kept, before replacing it with a new one. I was surprised and pleased of the outcome of that inspection and quick tests of the old motors. For some strange reason two previous motors worked. Strange in the sense that I had checked them before on failure and there was no life in them. Today they had life so, strange, unless my testing gear was faulty at the time?
I decided to clean up one of the two older motors with a wire brush and sort through the better gaskets rather than use the new replacements and eventually re-installed them. This was a 3" the other was 2.5". The sound was much richer and deeper on this one. I had still not found the wiring diagram to fitting one relay to a 5 pin rocker switch. I spent some time trying to work out the correct pins without success and ended up just rewiring the switch to it's previous spec, just adding an inline fuse. I believe the reason for the switch and cut-off not working was down to not having a positive live or a feed to the battery? This was, possibly down to a broken wire connection, somewhere within the circuit. Rather than waste further time, I decided on new connections, new wire, just to be on the safe side - with new crimped connectors the exhaust butterfly came to life. The exhaust cut-off and the switch are now installed and operating well.
Again, time was not my friend for the period of diagnosis and it was 6:30pm already. I had finished and cleared up, I can record this as another success, however the relay was bugging me. After further research, I did find a diagram incorporating 2 relays working in tandem for the open and close and may try this at some point in time in the future one relay is obviously not enough it seems..... (see updated diagram).
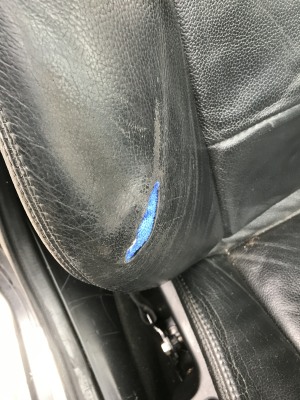
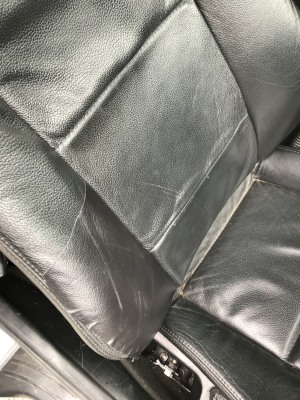
To keep the momentum going, the next job on the list was to patch the split and scuff on my leather seat, car chairs can be poorly designed concerning this; the rough treatment
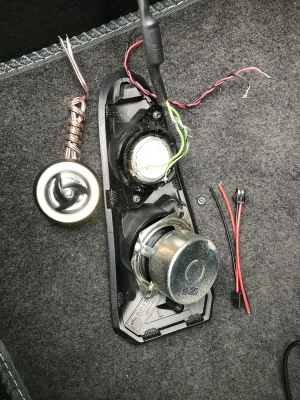
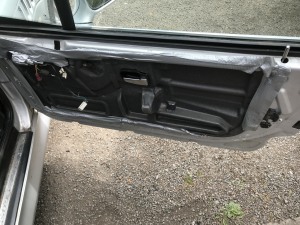
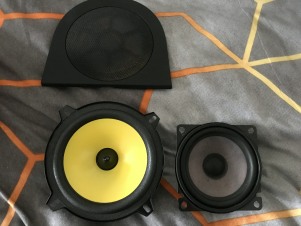
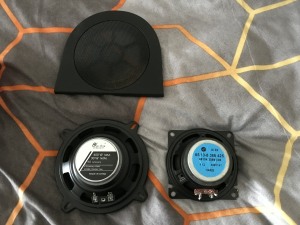
13.05.24 - Earlier, when the weather was ok, I decided to take off the door cover and replace the tweeters, one on each side, out of a potential of four, then carried on to replace the front floor-well speakers. they seem to work ok, when put back together, this was the prep for the Amp install, at a later date. So! So far so good!
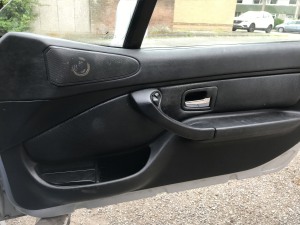
The driver's door handle needed some TLC and needed some attention and since the door was now already exposed for access to the tweeter wiring and install this was the best opportunity to address it. The problem originally arose after a heavy handed MOT tester decided to nearly pull the door off it's hinges from inside the vehicle, the action was more than likely to miss the ramp the car was sitting on. Putting that aside, (as it passed it's MOT that day - I digress). Before replacing the door panel there was the replacement of the 6.25" speakers in both footwell and the deletion of the Factory Amp on the passenger side.
Tweeter Replaced with Higher Wattage & There was the Door Handle Repair
Old
New & half the size
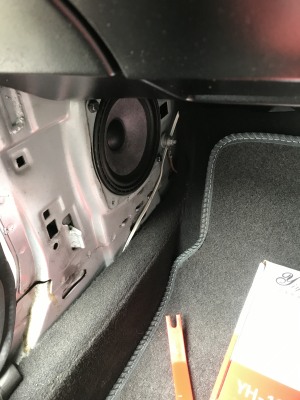
Whilst I was in the flow, the two factory speakers came out of the floor-well and were replaced with the new 400W, 4 Way speakers, this was an upgrade with the addition to the tweeters, they worked o.k. The factory amplifier was deleted, (I don't think it ever worked since I owned the car - hence, the speakers were always powered via the radio system, as I had wired them up independently of the factory amp, after briefly testing it.
Tweeter can take up to 450W
of everyday car use, even though the chair may be comfortable or not, over time the surface of the leather will start to wear. This car is no exception to the rule. I have tried to repair the area using pastes of sorts, but that doesn't seem to work for me, not sure if it's my technique, or the lack of it.
* = Have most of the resources - motivation ah! Debatable...
(see Purchases). I have decided on a large leather PU patch. They are advertised as hard wearing, waterproof, scratch resistant, so I will give it a go. Not sure if to just patch the hole or to lay it over the bolster fully.. (not sure if there is enough patch for that being square and not rectangle). A patch could prove more favourable option however; this is dependant on how far the scuff goes up the bolster? Decisions, decisions... still pending, as it had started to rain and I was getting soaked, It never stopped raining so the chair leather repair will now be for another day.
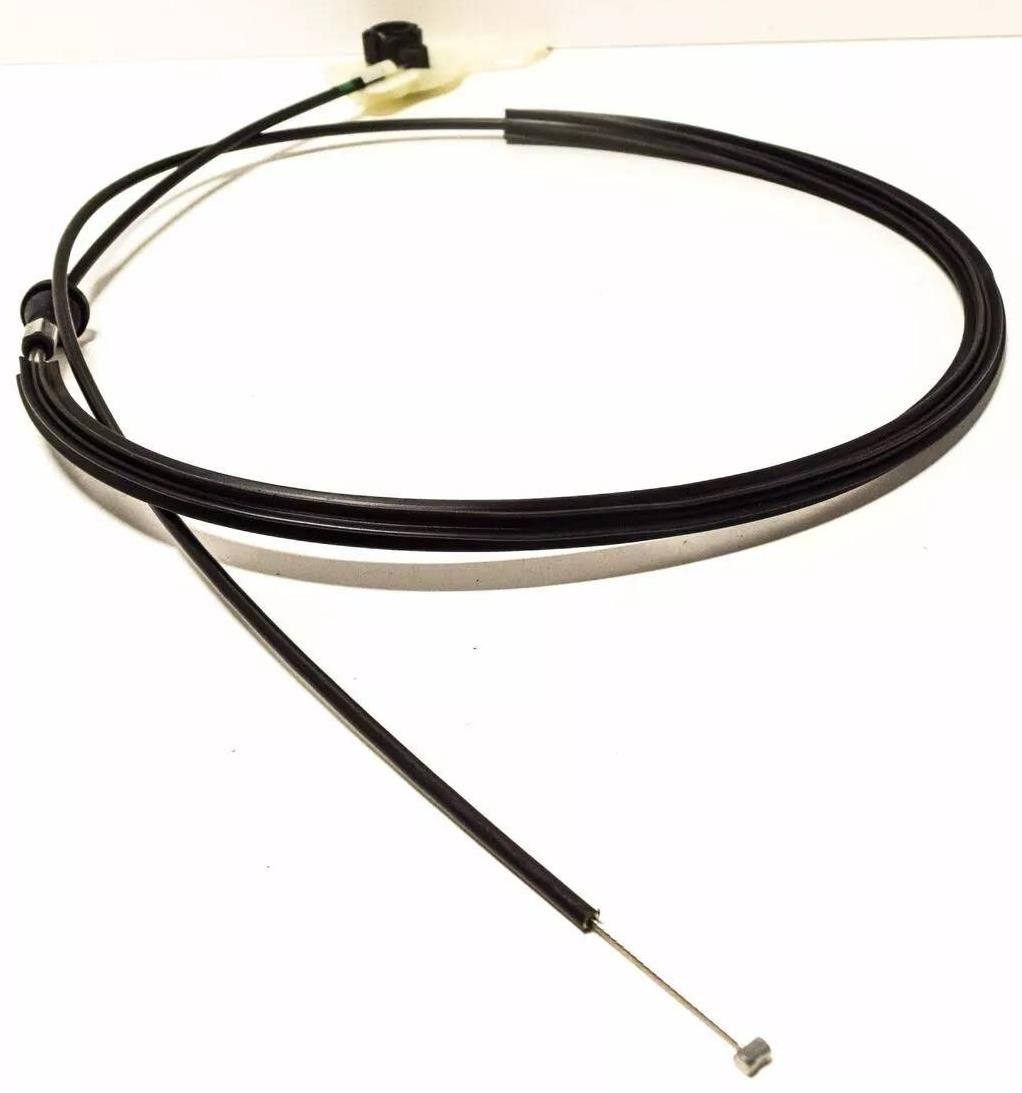
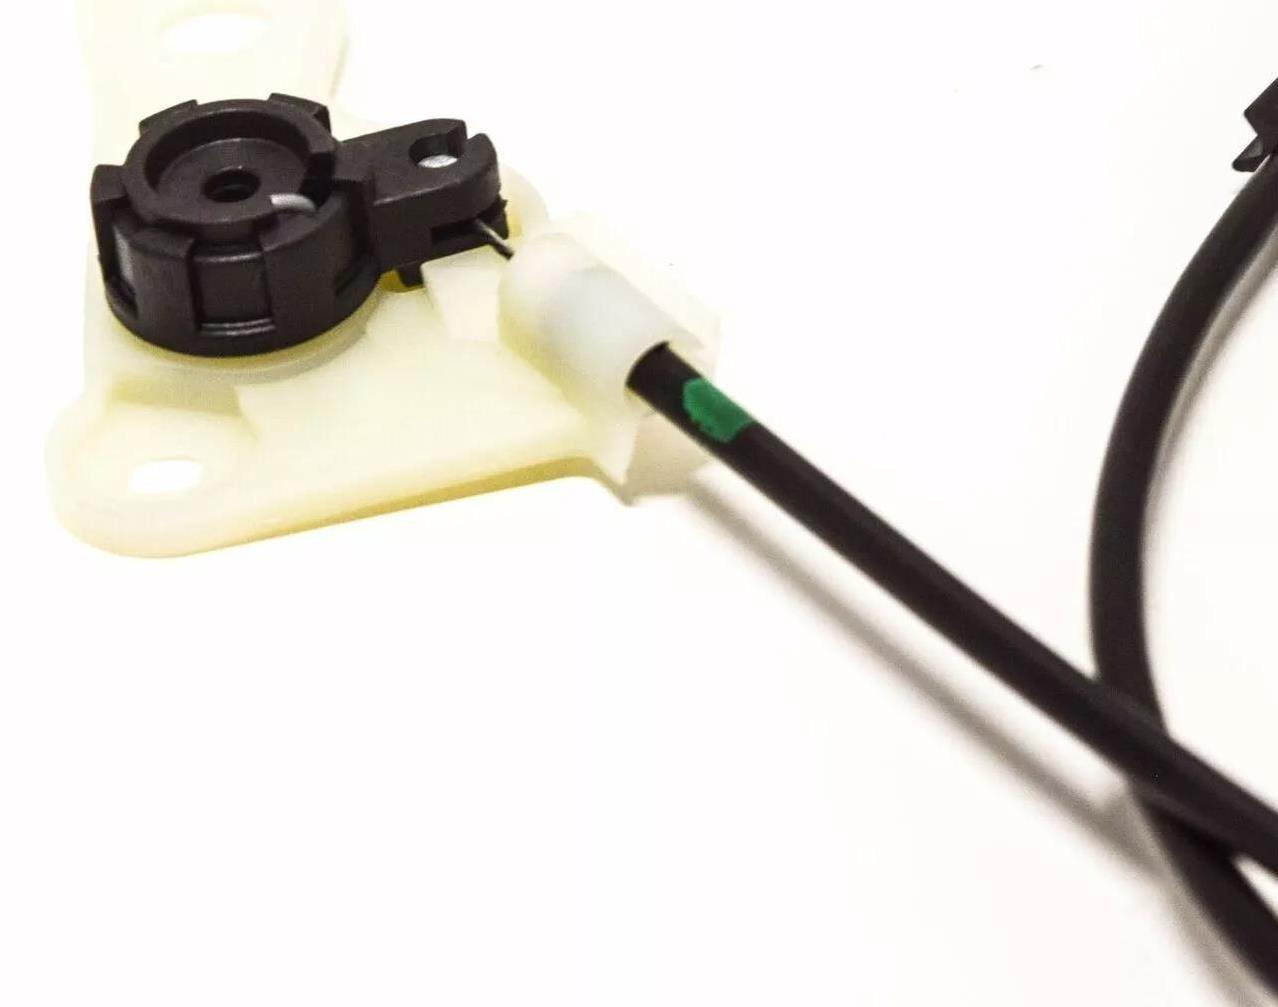
Also, 14.05.24 today, I had broken the Bonnet Release cable right at the interior release catch end, (under the dash, near the footwell) the lead ferrel had broken off the Bowden cable. (some may say, this was lucky, as one can still access it). I searched through eBay for a replacement cable however; the prices were extortionate, ranging from £40 - £120, there were a few opportunists out there no doubt of trying it on. (foreign, no doubt ;) )! Then I decided to check with the BMW Dealership local to me, as sometimes they can be cheaper, surprisingly the price was much cheaper, (still extortionate for a piece of wire, in my opinion, but better than the eBay prices, it seemed) one can always debate the pro's and cons. I reluctantly decided to order one over the phone and a few minutes later decided to go and pay for it upfront as I needed to complete some errands, since I was not far from the dealership, a small detour was not going to be out of my way... On arrival, I waited a good twenty, twenty-five minutes for customer service, (all four of them), it was slow, with two just looking like they were busy and I ended up just walking out to complete my other errands, just as a form of protest and later returned to only be told they didn't accept cash for purchases! (I was offering 'Legal Tender', not rocks!), this was a disgrace and I was astonished! Not really surprised of the stupidity we see today! I may have said a few words and walked out again. It also reminded me of a TV Bitcoin advert that we occasionally see on the TV, the one where we see a country road vegetable store ran by, an individual, looking a little half-baked, (to coin a phrase)', one with a particular accent local to our island of the UK, or better still let me pick on the EU woke kind of behaviour and poor logic, that only accepted bitcoin/Euro instead of cash tender for their products. Really! It is a totally brain dead, backward business scenario of how NOT to run any business. This is what we are now expecting and seeing and can only describe them as being 'Clowns'! Millennials! Or the Z' generations! 15.05.24 - So, Ok; and unfortunately, it was humble-pie time today, more based on necessity, and the price, (or determination to win, whatever...) and the availability of the product was local, reasonably suited to my pocket, so the decision was made, I went to collect the bonnet cable from the dealership, (they had already ordered it for me and it was there today). I ended up using a credit/debit card, something I try to avoid most times, mainly for the reason and hassle of card disputes or the other party having poor access and lacking the correct technology or trained staff, whereby I lose money at my inconvenience and at 'Their' Convenience. With a couple of seconds pause, they did give me a £2 discount on the price for my inconvenience, one can be thankful for small mercies, perhaps?.... The second hardest part now, is to motivate myself to fit the cable.
Looking at some YTube 'university' streaming, it didn't look as quite straight forward as I thought or it should be? Well, it was American! Starting with greetings and life history before getting on with the job and explaining in a logical fashion. I did require a selection of YTube videos before getting the relevant information...
23.05.24 - It has stopped raining, very overcast and I can't put off the bonnet/Hood cable fitting any longer, (go to Workshop for the details) - This job has now been completed.
25.05.24 - 12:35 - I decided to go up to the garage again today, possibly to sort out the front lighting LED strips on the headlights, (note: Mentioned above 21.09.24) at the same time if with enough time, some other jobs will be decided upon arrival... Since the headlights and dash were already out and down, this saved me some time. I did notice behind the headlights and in the well an old horn, never noticed it there before, it was the same on the drivers size but more difficult to get to.
Horns Since I had bought new horns, (must be around two years ago) it was about time they were fitted, (Go to Workshop- Horn Workshop - LED - Lighting for the details: Always test your wiring circuits on a test-bed first) - Both jobs have now been completed - sort of....)
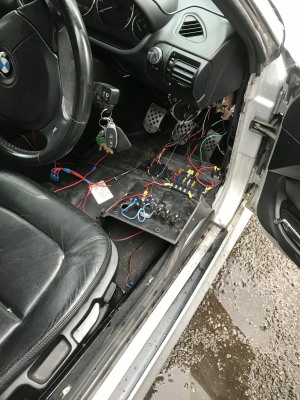
26.05.24 - 13.20 - Some have asked me if I am having a purge to finish off the jobs on the Z3, my answer is simply yes! However; as many hobbyist know, if some jobs are left, one will meet them again, somewhere down the line as they are recurrent, i.e. oil, filters or belts as a prime example and worn out parts, because one has not done an oil service for so long... Some jobs will never get done, based around finances, or current resources, (equipment, tools wise), logistics, location or the lack of. Finally, motivation and inclination. The latter description, can be described as arriving in waves, the spaces in-between these waves can be debated, either way they never come at the right time. So; my purge is based on one of these waves, I currently have the parts, the reasonable odd days of good weather, except for this afternoon, of course...as my timing was off, got drenched and it prevented me from doing much work outside the vehicle. What was done, however; I did clean up the wiring mess behind the drivers dash to a fashion. There is always, 'that point'... The race car panel switch, I found diagrams for that and as with most diagrams off YTube there were some 'points', that allowed one to second guess, based on multiple connection points leaving one back at square one, without explaining which, if one gets my drift. It was 18:30 by the time I had decided to finish for the day, there was thunder in the air, a rainbow, so I decided to clear up. It was about an hour later when I had return back to my residence. My feeling today was as if something was trying to tell me something....
I am not an electrician as much as one's ego suggests otherwise and I do blow a few fuses, mentally and physically on occasion, more often, this is the only way to learn, as long as we are only talking about 12V. (not to say this cannot be dangerous, especially with high tension leads, one's heart can miss a beat so to speak;)...) Usually, it is good policy and Common Sense to disconnect the battery Ground before commencing with electrical work. Yes....Right......mmmm! No, Seriously!
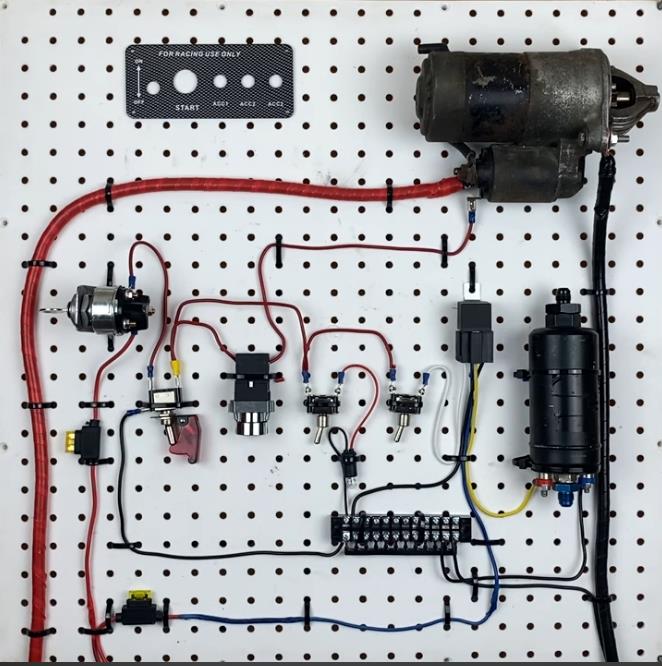
27.05.24 - Today I Threaded a wire to the front of the vehicle, through the firewall, now to connect the wire to the starter was another thing, mainly because of it's very awkward location. It is on the passenger side of the vehicle (nearside LHD UK) next door to the air intake however; the starter bolt 1/2" with nut is difficult to get to, one may need to disconnect the air intake and undo a couple of 10mm screw/bolts on the radiator expansion tank. As one or two of you may have noticed by now, I had connected the wire to the starter motor, it should have been to the Solenoid, (this will need to be changed) and I may have to rethink the wiring on the ignition switch, even though I had followed my wiring diagrams, my observation seems totally off, (see Workshop)
?
X
X
The two red crosses are areas I need to look into. So far I have not added the relay - sorting out the basics first or at least trying to.
Today, is no exception to the other 'garage days,' the weather has played games with me. Sunny, warm, when I go up to the garage, preparation of tools etc, 10 minutes into the work and the heavens open up, again I got drenched. To make things worse, the rain would stop for about 15 to 20 minutes, the sun came out and then the rain falls again. Not the ideal for working on a car and electrics. However; I started around 14:30 to about 18:30 it seems two paces forward one back with very little to show for it.
I did manage to get the PUC Leather patch put on the leather seat in-between showers and it looked quite good, how long it will stay on the chair in the damp air, is another question, even though it seemed firm. I could have done with a roll of the stuff, so far, it will have to be down to the testing of it's durability. (photo to follow). (Update 20.05.24)
So, now I need to change the wire from the starter to the Solenoid as the next step, failing that, rethink my strategy to the connection on the ignition switch. A general tidy up for now, reinstall the dash as the vehicle will need to be used... so this job is still work in progress. (Chipping away at the list slowly).
click
LED Lighting Update
30.05.24 13:20 - Just got back after running a few errands and noticed the passenger indicator light had corrected itself, (see workshop for details), and then as soon as I was to about to celebrate, it started to quickly go into it's quick step-flash again, this was not a bad thing as this was telling me that the bulb had either blown or there was a bad earth somewhere in the rear cluster and not down to the new install. After about 10 minutes and a good look through my bucket of spare bulbs (I had accumulated over the years), I had found one that worked within the rear passenger side cluster (N/S), it was also the correct amber colour. (Not sure what the problem was with the other bulbs they were flashing and therefore one could only conclude they worked?) As long as there was one added bulb that was also stable and worked within the cluster, that was all I needed, it was connected, firm and working 'great'! I can now say the LED strip is working 100%. I will not require to fit a additional relay, (There should be one of the main lighting circuit anyway as a matter of course). For now at least, other than possibly fitting a stand-alone-switch to allow me to turn the white LEDs on/off independently to the main headlights. (not sure how bright this light can be at night and therefore it would be wise to be able to turn it on or off)? This leaves me to concentrate on the other jobs.
02.06.24 14.15 - Further work on the light strip, I decided to add an illuminated switch. With no surprise and for some reason the strip amber indicators have stopped working, normal the indicators work independently to when the side lights are turned off or on. With the strip being on a switch the sequencing is out and the direction indicators have failed to work. All the circuits have been checks and they seem correct, however; there must be something that I have overlooked, It all worked on the test bed. Weird...
Perhaps my technique was a little off, it has been all week; it was a quick 5 minute job as the weather was a so predictable. If I had purchased a larger patch, I would have tried to take it further around to the rear of the chair and then possibly tucked it into the hard rear casing minimising any potential pealing. I may do that the next time around, I would purchase a roll rather than the small patch as to do the complete bolster. So far it is a big improvement of what it previously looked like, so can't complain. (See above for previous image 'torn bolster' at 13.05.24). See later updates...
Torn Bolster
Red = not completed or in progress)
New Switch connection
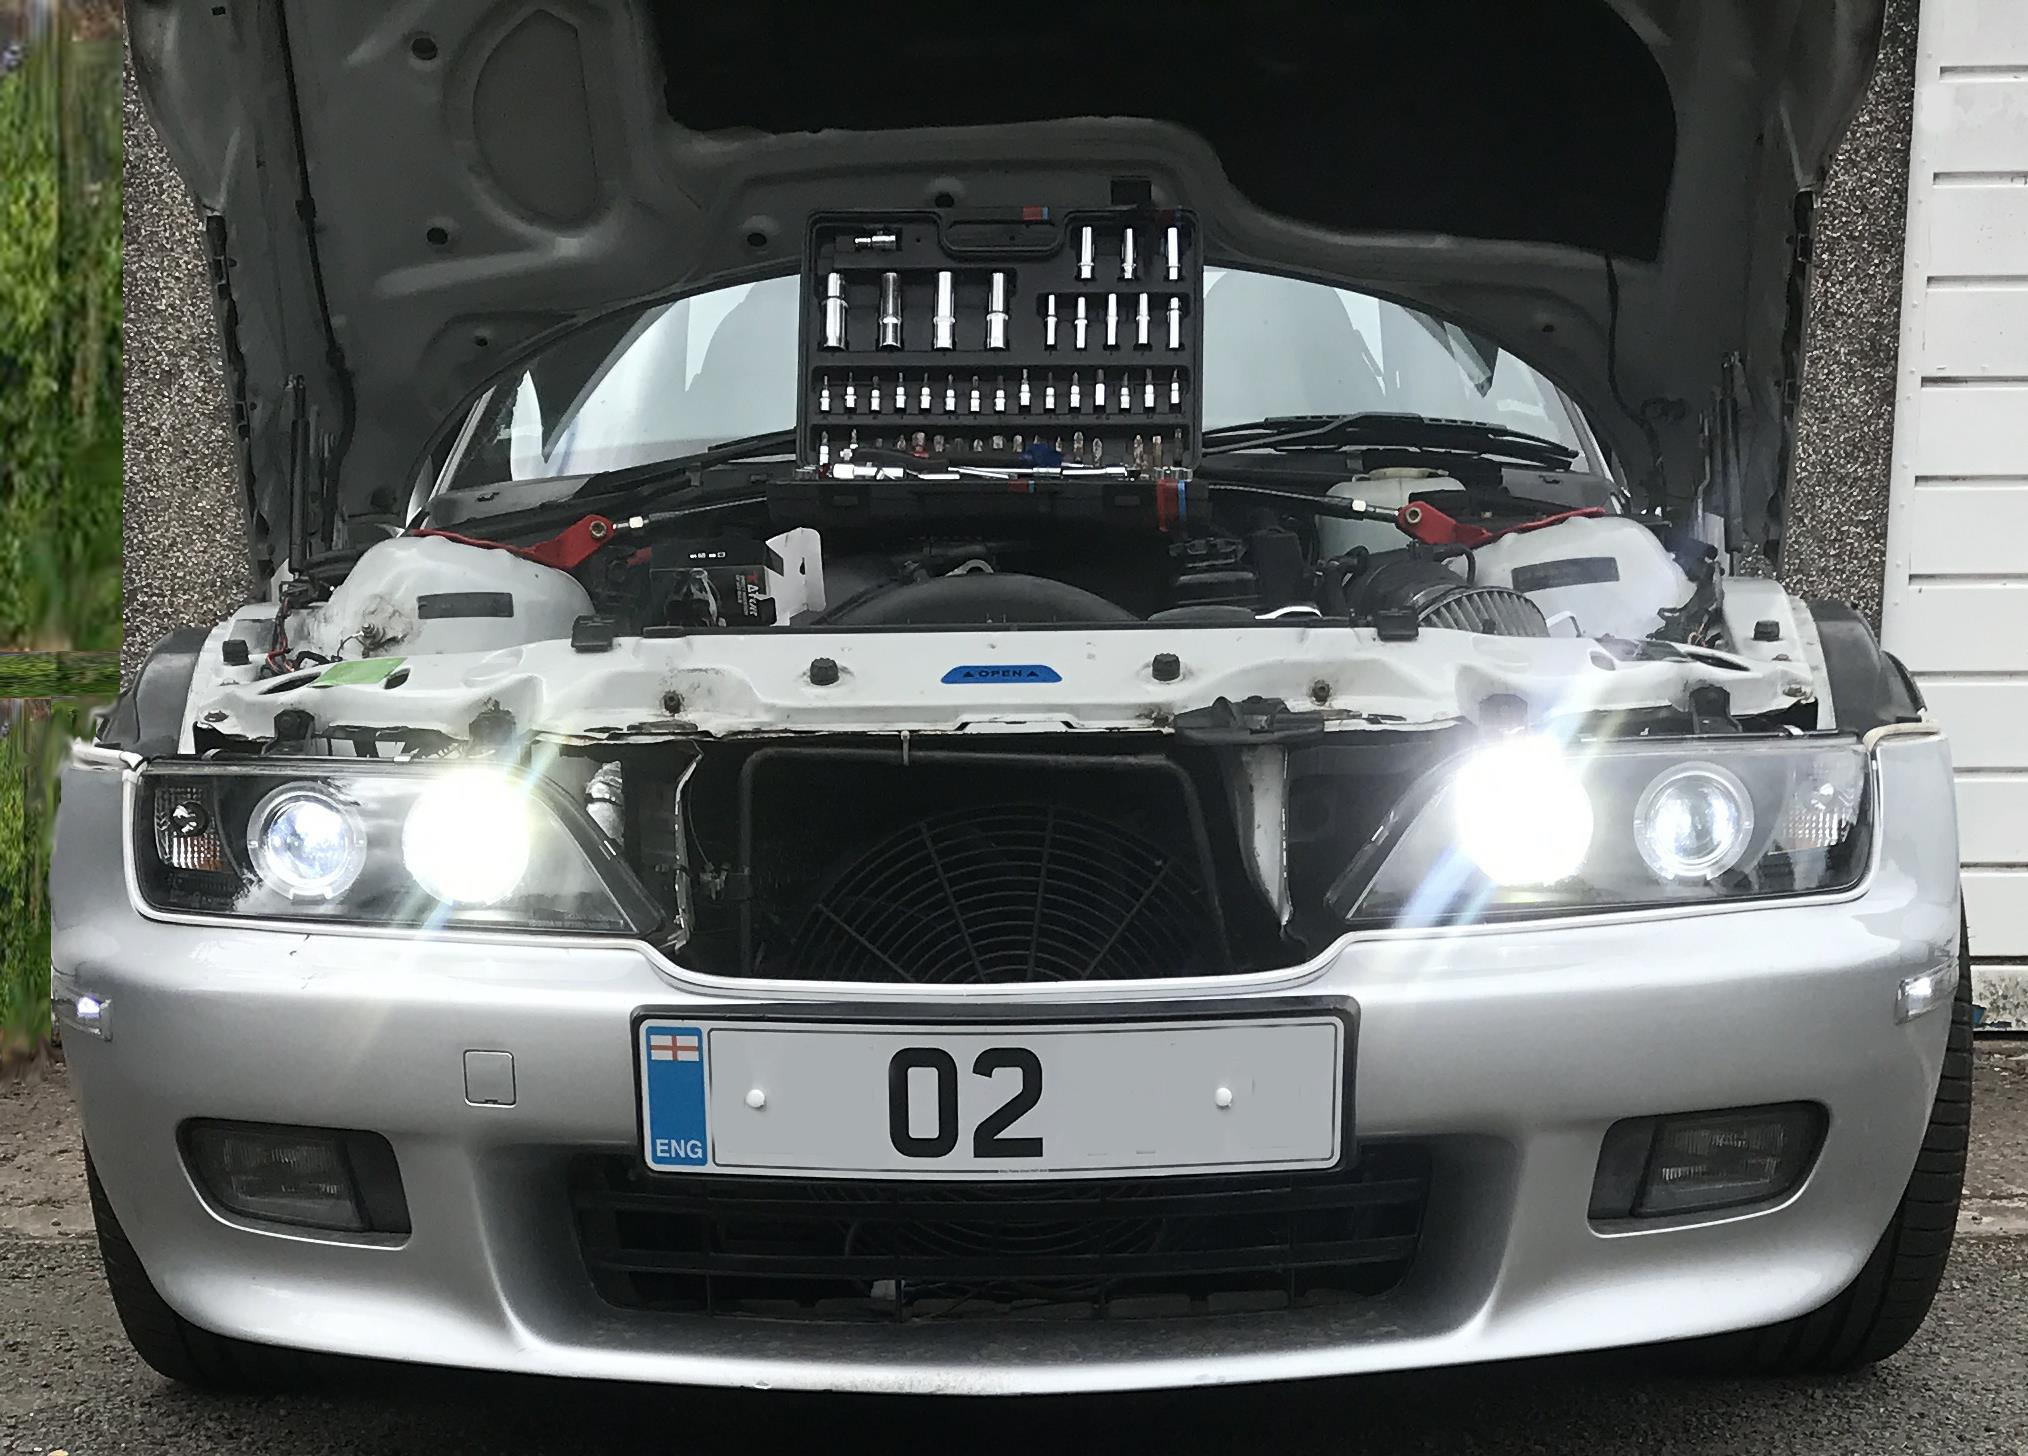
Right white light -bonnet gap filled
Left white light -bonnet gap filled
Light sequencing - will not stay in full stable or static illumination
Surprisingly, the setup has tidied up the appearance of the car, perhaps currently it looks a little gimmicky with the sequencing and I can agree with that, a case of two steps forward and one back until I can sort out mastering the wired remote under the bonnet.... Another setback, I also need to point out the headlight bulb replacements, again they are the wrong ones and I am starting to get a small collection of them, I have sat down this time to double and triple check for the right one's. I have made the
same mistake a couple of times now, putting it down to memory, by leaving the task to one side for a period of time only to forget and assume, thinking I have the factory light cluster and of course these light units are not, they are the 'Angel Eyes' third party 'Spyder' upgrades, different connectors and different bulbs. It has been frustrating to say the least...The right bulbs have now been etched into my mind for a future order... To end on a positive note, it has been a good day weatherwise, blue skies, moderate sun and plenty of time to potter around on the Z3. Again, finished today's tasks around 18:15.
Side lighting sections are separate - These are previous donor short strips tied in to circuit
08.06.24 - 09.06.24 I decided to have a quick look at the rear audio speakers behind the driver and passenger seats, pre-amp installation, one assumed, (wishful thinking) they would be the same sizes as the front footwell speakers, nope! Not that simple. The front footwell speakers are 5 1/4" or 13.33cm, the rear's are 3 3/4" or 9.5cm. (using a tape measure). I am hoping the 5 1/4"(9.5cm) will fit... (Speaker sizes seem to be rounded off to the nearest inch or cm - I hope the speaker manufacturers had a bad day!)... I don't want to even consider destroying any more trim let alone even starting to.
Actual
Actual
Actual
Actual
Actual
Actual
Actual
Actual
Actual
Actual
Actual
Actual
Actual
Actual
Actual
Actual
Actual
Actual
As much as one tried, it is like putting a square peg in a round hole, it will not fit. The original speakers, go back in for now, with new connectors. Done! (Found the Passenger side with one broken wire, explains the poor sound... now repaired and working).
(I may find the equivalent speakers in the correct size if funds allow.)
After that setback (ok; with new connectors and all speakers working can be considered a minor success...
To keep going with any small positivity of success, I now attempt another job in the setback list, I even had a further look at the LED strip, (fourth time I think....) for some reason there was a problem with the internal fuse panel from what I could make out. I decided to piggy-back another identified live supply from the main 'race switch panel', back tracing to the same fuse panel on another contact point that seemed to work ok, (I had checked all the fuses and earths, they were ok) and the white LED worked and then with using the same independent illuminated switch. Only the driver's side directional indicator worked, (to a fashion), the passenger side direction indicator did not, even after testing via one or two additional options numerous times and one could only conclude it had most likely blown an isolated part of the control unit on the light strip. This control unit will probably need to be replaced at some point, suggesting a new replacement, (it was cheap, Temu what else can I say...) however; the driving light part (White LED) is currently working, to how I want it to work, the indicator aspect of it has now been deleted for the time being. I believe this had happened before, (daja-vue) with the shorter LEDs on an earlier projects with the previous LEDs on installation. An obvious collation of poor quality from the East. The normal factory side indicators are working fine all around.
The third setback is that I am still having problems with the starter motor push button switch, I ended up cancelling this too, for now. (Wire to Starter) the switch, switch panel press button illuminates as it should. It seems obvious to me some of the general wiring is suspect. If reader's refer back to 2018 when I purchased the vehicle I did find a bunch of wiring on the passenger side under the glove box, it was a 'rat's nest' of potential problems and I had decided to make safe where possible and left it where I had found it. (I do prefer the easier life, if I were an electrician I would have traced and repair it and deleted what was not necessary, I am not an electrician, however; I normally do get by, with a song and a prayer. A 'rat's nest' that is not going to happen anytime soon unless of course I invest in getting further qualifications or wait until something vital is exposed and it requires me to attempt to trace it back to that local vicinity. I will choose the latter, I will keep chipping away at the problems as and when the needs arise....
click Image for more details
Changed both speakers to yellow - upgrades
New
11.06.24 - Driving at night has not been a good experience recently, even though I do like night driving, there was a desperate need to replace the earlier replaced LEDs sooner rather than later, for now I have concentrated on the main beams, mainly for the country roads, I may consider a further upgrade, possibly next month. They should arrive and be fitted around the 17th-24th this month. (see Purchases).
13.06.24 - My 4" speaker arrived by Royal Mail this morning, this was quicker than normal so nice one by 'Rock Bottom Audio', and I thought of outwitting the weather, by hanging on until the afternoon before fitting them. Yesterday afternoon was perfect, blue skies, the sun was out, not too cold, not too hot. Today, that was a successful idea! It rained, it's a case of remaining humble, fortunately, I am not in any rush... I May just wait until the one new set of LEDs arrive and then fit both.
19.06.24 - The New LED Headlight bulbs arrived today, so the combined fitting of speakers and bulbs, a fairly trivial task and nothing really unexpectedly difficult. The speakers fitted well and sounds good, there seems to be more volume than before, a little more bass. The Amp will be the next to install and is also on the 'To Do List' within the next few weeks.
The LED Headlight Bulbs are now fitted for the main beams and will need to be assessed when I go out for a drive at night, however I still want to upgrade my normal driving beams to compliment the lighting upgrades. (now ordered)
The delay is really based around the new garage roof install, in addition to financing future orders and the scheduling for the 21st June 2024, I am having to take the framework down and clear my tools and other items out of this garage and into another one, more items than one thinks and more bolts and screws concerning the framework.
This doesn't help after being hospitalised for a day and having to patially bus it and walk home from the other side of the City, a very long day on the 18th however; we soldier on, of course we must provide for those boat people and varied demographics before those born here, they are priority when it comes to any services; (Not!) it was a case of being at the back of the queue or missed out, because a demographic becomes the priority based on bias for those giving the 'service', their countryman is given top precedence. One probably, gets my drift, I was not happy, let's just say that and they knew it. This type of thing needs changing and very soon or Civil War may break out. Many seem useless at their 'job-for-buddies' from what I witnessed and why this has not being picked up on is, well! The Woke, the mentally deranged, recruitment and the system. (Winge One, my excuse, still not feeling as well as I should)!
20.06.24 - Continuing with the garage clear-out, some items will have to remain within the garage such as; a stretch of old kitchen units for garage storage, holding anything and everything, stuff I haven't seen for years, so no doubt will be checking on the work team crew, (I am not saying they would not be honest and divine during their activities..;)). Am I cynical you asked? What gave you that idea? NO! I just expect people to be honest and fair without having to oversee everything. Yes! I know I am grasping at straws here and this is through experience, I live in hope. It is a world of 'dog eat dog,' (to coin a phrase, my other winge for the day, give me some slack, I am still feeling the remnants from treatment). O.K.! Now for positivity...Update: Garage now cleared, internal shelf scaffolding has been taken down to give access to roof - Now let's see if the contractor turns up!
21.06.24 - 'Fix Garage Roof Day!' During today, I will be working on the car, at the same time just checking on the two man work team, the car radio is exposed to some more tinkering, the Z3's hard top is off with help, courtesy of the two man team. It has proven to be a beautiful day, perhaps a little too hot for me, but we must get the rays when we can.
click
Remains static on race switch
Remains static on race switch
Actual
Well! No asbestos this time around, it seems even though I was told there was asbestos by the previous team.... it is just cement composite, one just can't get the staff or in this case, knowledgeable contractors nowadays, fortunately we have a new contractor team that seems to know their 'stuff', today at least....
The new wiring has been fed through part of the way to the rear of the vehicle, up to the rear softop window area, my biggest problem now is to find a route for the wiring into the boot/trunk region, without pulling the car apart, this is proving a little more difficult, as access so far, is camouflaged. In the meantime at the front, the double bass knob unit has been wired in.
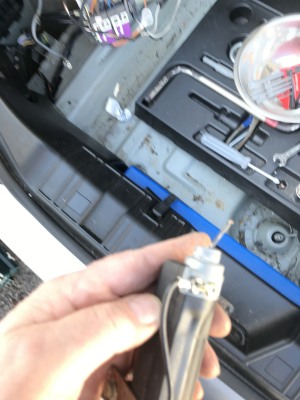
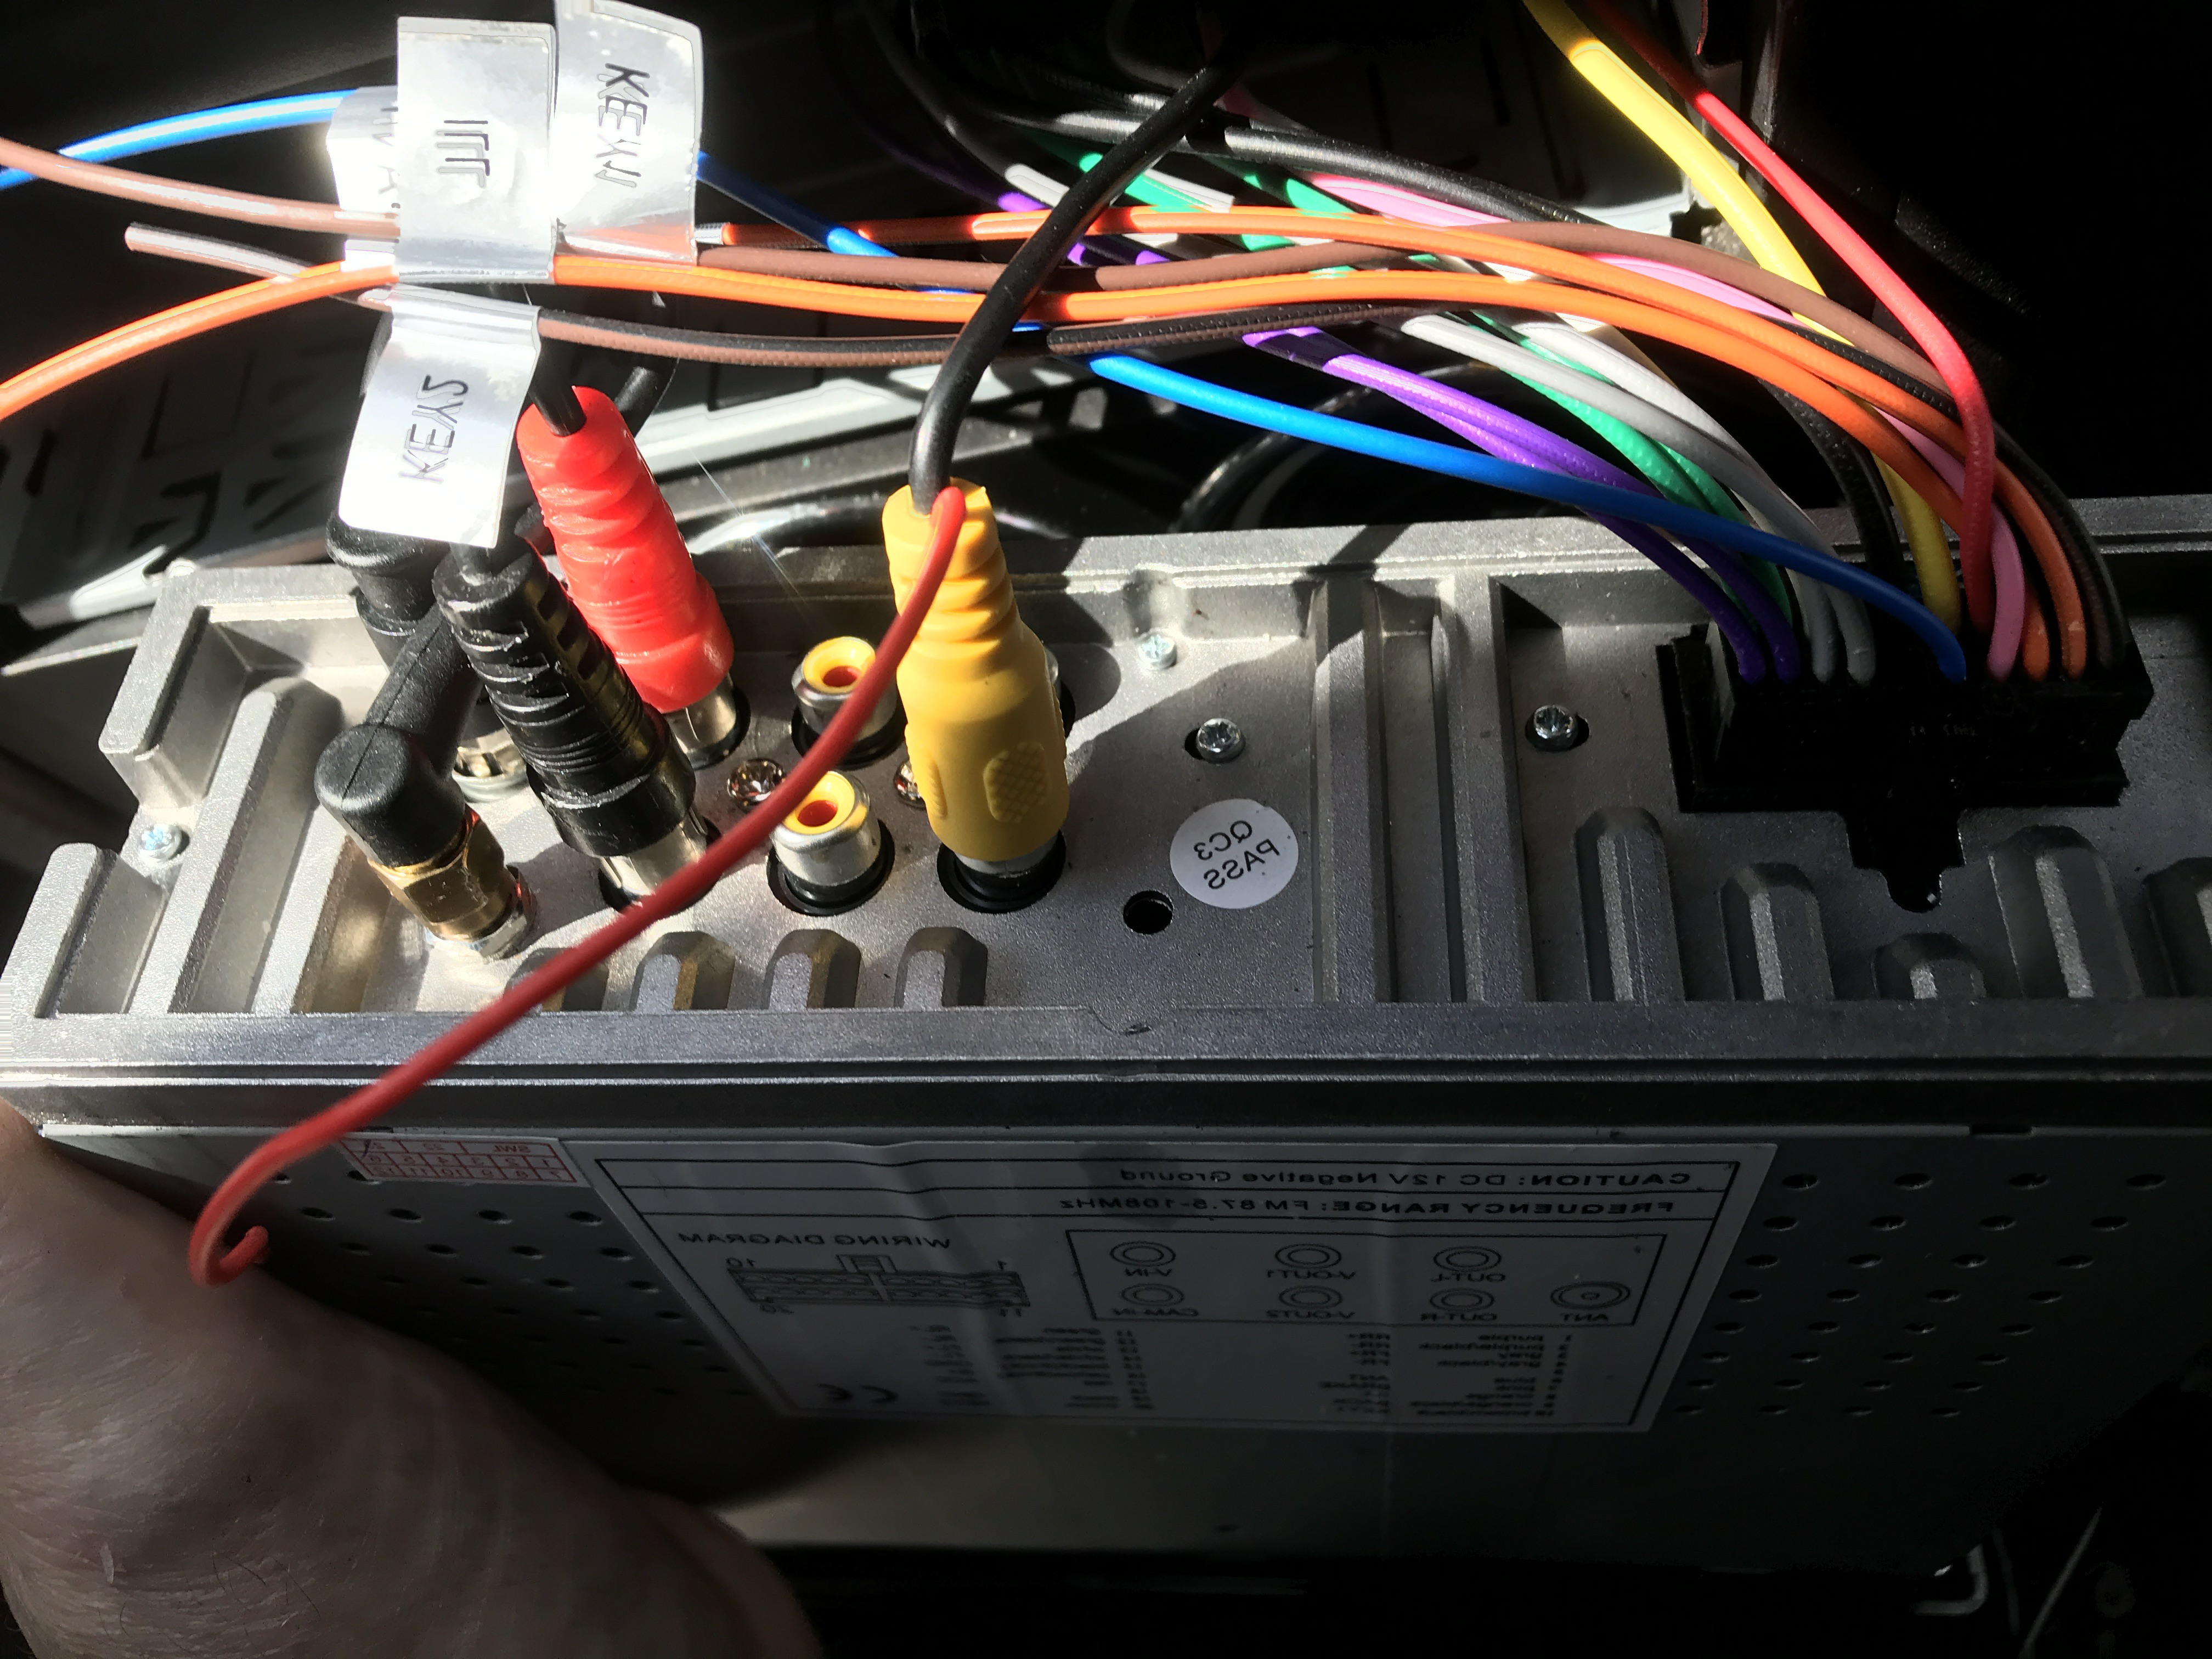
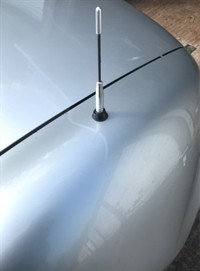
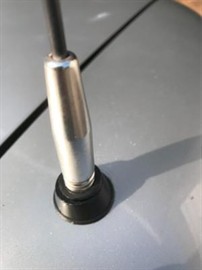
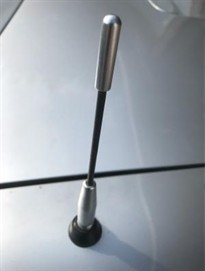
The radio when switched on was not tuning in, however; the small Sim card with my favourite tracks on it is working fine, so it was a quick investigation into what was going on, this meant extracting the aerial unit. I must say I have not seen an aerial unit like this one before, perhaps you have?
As you can see the problem jumps out at you:
This is what the aerial should look like all together
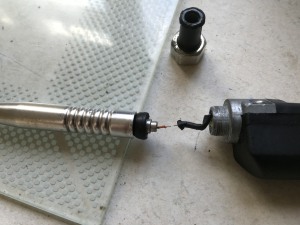
Requiring a quick solder and it should be back to normal and allow for the radio to tune in
I will be honest with you, this is about the third attempt at repairing this 'simple' soldering
joint as the solder is not fusing even after a rub down. The casing of the lower part of the
unit will not open, without damaging it any further, so replacing the whole wire is out of the
question for now - Failing this repair a new aerial may have to be purchased adding to
even more expense. Watch this space..... OK! managed to get some solder around both
wires, will need to see how long it will last, so, ready for refitting. Update: Wire came apart
replacement required. OEM over £100+, really!
I have also threaded the wires for the long awaited rear camera, (purchased a number of
years ago) that comes with a number plate surround. However; left the numberplate
surround off for the time being until I can find some suitable longer bolts. Returned the
basic numberplate without the upgrade for now.
(Two paces forward and one back....see below).
22.06.24 - Another few hours, up to the garage to reinstall the car aerial, the garage framework, left half of my tools behind, I will most likely try to re-erect the framework now the roof is done, this needs to be done with some slight modifications as I forget the low height much of the time, hitting one's head too many times is not good for one's health and I have the scars to prove it... Update: Scaffold framework is partially up, needing other tools etc, the car OEM Aerial was a bust, due to poor solder, will need to replacement it, see what tomorrow brings.
24.06.24 - Today is 24.6C Degrees and it is 8:30am, (25.9C 10:30am) so it's going to be another hot day, I still need to install the Amp; however; the wiring route is proving to be allusive, pondered over it yesterday, only to conclude a hole will still needs to be drilled and the wires routed through into the boot/trunk. Never straight forward on a Z3 as this area houses the softop and I believe the carpet liner is glued down to the inner car body. (update: no it isn't). There is an alternative route into the boot/trunk and this will require me to take out the storage compartments centre rear, the only problem with this is a). it is extra work on a hot day, and b). some of the bolts and nuts are seized and I have tried to undo them during past projects without much success, so the drill hole route proves to be the way forward. Feeling a little deflated in the little progress so far, but will chip away at the problems until success. One of my mistakes is not to concentrate on one particular task at a time and finish it, before starting the next. I have at least two to three others on the go, this will need to change and I should focus on completing one job at a time, is really the order of the day, the success rate hopefully should be higher, in theory: with less self-deflation, perhaps....
So much for that, The drilling of the hole was easier than I had thought and I managed to get the wiring through to the boot/trunk, rerouted speaker wires again, with their return wires back to the speakers, with the amp wired up it was ready for switch on. a few bass pulses and..... nothing! So! The next 20 mins was dismantling the Amp and then the radio; to investigate further, at home, on a test bed. More delays and more things not working. Plodding on slowly....
25.06.24 - 29.7C It seems like the attempt to improving the Z3 is incurring a phenomena that comes across as something unnatural; for me at least, as everything attempted, is foiled in some way. I know my skills are not that bad so; I am fighting back and tapping into my home inventory/legacy resources and this means:
1 x Replacement Light Strip (recent new one sort or partly worked - Chinese y'know and a deal, I wonder why?) Update: Received: 01.07.24 Fitted: 1 x Replacement Radio/GPS, (screwed up by the Amp - the amp maybe faulty - (Chinese y' Know!) - the wiring/fuses and connections were checked and were OK! No Volume. However, I have now taken the add-on Amp out). Not Fitted 1 x Replacement ariel /antenna, (original fell apart, 'really!' Chinese y' Know!) The original one must have sympathised with the radio, will be glued in for Aesthetics, I like the look of it, the new aerial will be window mounted and notnoticable..Update: Received: 01.07.24 (currently useable to a fashion) different one on order Pending Fitted: .. 1 x Fuel Cap Rubber 'wire', (rubber perished, mmmm! was on a list of to dos, since 2018', better late than never!) Update:Recieved: 01.07.24 Fitted: 16pc Stainless Steel License Plate Security fasteners, (only 4 needed, the rest are spares, require the new bolts hopefully they are longer)..bolts were standard - found some that will do.(Received: 01.07.24 Fitted: 06.07.24) Rear cam connection on no plate backplate - din plug broken replaced and Installed 23.07.24 (revered image!!) 4pc x Tyre Indicator Valve Cap Sensors, (1 Broken, to be replaced, it happens....) Update: Received 01.07.24 Fitted: 1 x PU leather patch for chair, it came unstuck, (poor glue - disappointed, especially only after couple of weeks - Chinese Y' Know!)(have replacement) temp patch Fittedso,so. 2pc x Atur Headlight bulbs, (this was an earlier order and I am quite looking forward to receiving them in the next few days). Update: Received27.06.24 fitted 28.06.24 2 x Bulb collection found H7 Fog light bulbs replaced old ones - change to LED fitted21.07.24 Note: Red = requires completion - Definitely a pattern here, I have decided to delete the Amp, blown! As pointed out, I only have a two seater, (no doubt my young heart and days of loud sounds had previously kicked in)..., a little disappointed. (I must remember I am getting older, that is an excuse I am using). I had even drilled a hole into the boot/trunk for the wiring, well, it will save the hassle later on, if deciding on anything else requiring boot access i.e. reverse camera, (wire already threaded through) or possibly a replacement Amp - (however, once bitten!) the hole is hidden, so nothing to cry about, may even place a grommet there. (This amp addition has screwed up my multimedia radio - (Chinese Y' Know!) Not happy, as I liked listening to my music choices. A new one ordered. The amp is not really necessary, since the speakers were upgraded, I fitted it because I already had it from new and stored). The replacement radio should also knock out around 65W, previous one was only 45W. so an improvement and the speakers were also upgraded. Yes! I know, two paces forward and one back, or even three back this time. There has been more expense from my labouring time, than anything else, attempts to make repairs for the price of the items has proven, 'not that cost affective' and they were initially cheap Chinese rip-offs, hence, no doubt the failures, (a false economy, however sometimes they work, most it seems don't) so, this is the last ditch attempt for now, on the positive side, it is better to find out in the warmer months than later in winter. Let's just say, this was the trial run and now I am going forward, any future mistakes should be rectified as and when, within this new spat... The joys of motoring.... love it!
Looking at the first list, it is near enough completed, requiring just the general cyclic maintenance, however; another list has now been created, weird that... (in red - green is completion, blue's are a maybe or are page links).
28.06.24 - Quick hop and a jump up to the garage, to install the new received LED Bulbs to complete both sets of headlights.
Before
After - looks better
I believe I can see some differences to the headlights during daylight hours, from a warm white to a more of a white, white or cold white. The main confirmation will be to see how they perform at night... may need to calibrate ie. leveling.
Since I do have another lighting strip on order, (price was cheap) and to address the fault in the direction indicators on the existing lower one, I have been contemplating the following: What do you think?
<<< I have penned in an example here's what I envisage it looking like. The lower strip is already installed, (without the indicators working) the upper strip would be an additional new install ? (As the indicator circuit should be working - shown in amber). I will sleep on the idea... Let me know what you think via email? (ngwilcox100@gmail.com)
06.07.24 - O.K.! Some time has past, feedback, a majority suggests 'go for it', a strip had been ordered and it arrived a few days ago, just finding an appropriate timeslot to fit it. (Thankyou for those participating in the feedback). I will probably install the strip and the reverse camera when the replacement radio arrives within the next few days... and commence putting the car interior back to some form or order... it is a mess at the moment. Speaking of radios, it just arrived by post 11:45am, today as writing this. Nice! Only problem today, it is now downpouring with rain....
07.07.24 - Back up to the garage this afternoon, a little cooler today, concentrated on fitting the numberplate cam, din plug broken on the yellow cam lead, so moved onto the radio reinstall, there are problem's with the live feed and odd showers of rain. A very slow progress... and wet.
08.07.24 - I left the radio for now; as this will need a new positive supply wire, most likely, plus further after investigating why the system is not working, the radio was tested thouroughly at home and it had worked very well; I was pleased with it. The new numberplate caps were also fitted as with the backplate holding the reverse cam, the one rear, (yellow) din plug had broken off, as I was feeding it through the grommet within the boot/trunk, (really!) So! I now need to either purchase a new wire or find a replacement din plug to solder on, (one forward two back). I have asked myself....will I ever get these jobs done and these are just the simple ones...? (I didn't get an answer). On top of this, I now have been accepted on another study course, where my time will be less available to work on the Z3 - If it takes another few months, then so be it...(no choice really).
13.07.24 - I have a little time today on this weekend to attempt to rectify the defeats so far... (watch this space...) the weather is a little overcast with the sunlight peaking out.
The radio is now all up and running, it took some focusing especially on the unlabelled wires and the extra LED Strip above the headlights, now running too! The added top LED strip will switch on, on start-up automatically, this will also activate the direction indicators, (note: indicators will not function without a constant live and will only work, when the running light is on, how it is wired by the manufacturers one assumes). The strip when running, supplies to direction indicators constantly as and when the indicators are required. There is a need for some tweaking here and there, but the main thing is they are working. The boot lining is now refitted and the general rubbish accumulated throughout the car has been sorted and cleared out. It just needs a good clean inside and out and a good wash. Seemed like the number of days doing this, the Z3 has fought against me, tooth and nail, this is just on the basics, today it has fallen together... ! I haven't really done anything spectacularly different during this time and I am mystified to why this was not plain sailing days ago, very weird. The new aerial has been connected, however I do need to find a place for it on the window somewhere, or down one of the pillars (a little on the bulky side and I may need to uncase it to reduce the bulk, the lead is very short). It works with the radio and it does require manual positioning for a 'perfect' reception, until I can find a permanent receptive position for it.
14.07.24 - A few tweaks and may be a few more, a good wash, polish and a vac, taken half a day but worth it. She is beaming... or should I say 'bimming'? That really sounds a little black country dirlect to me.
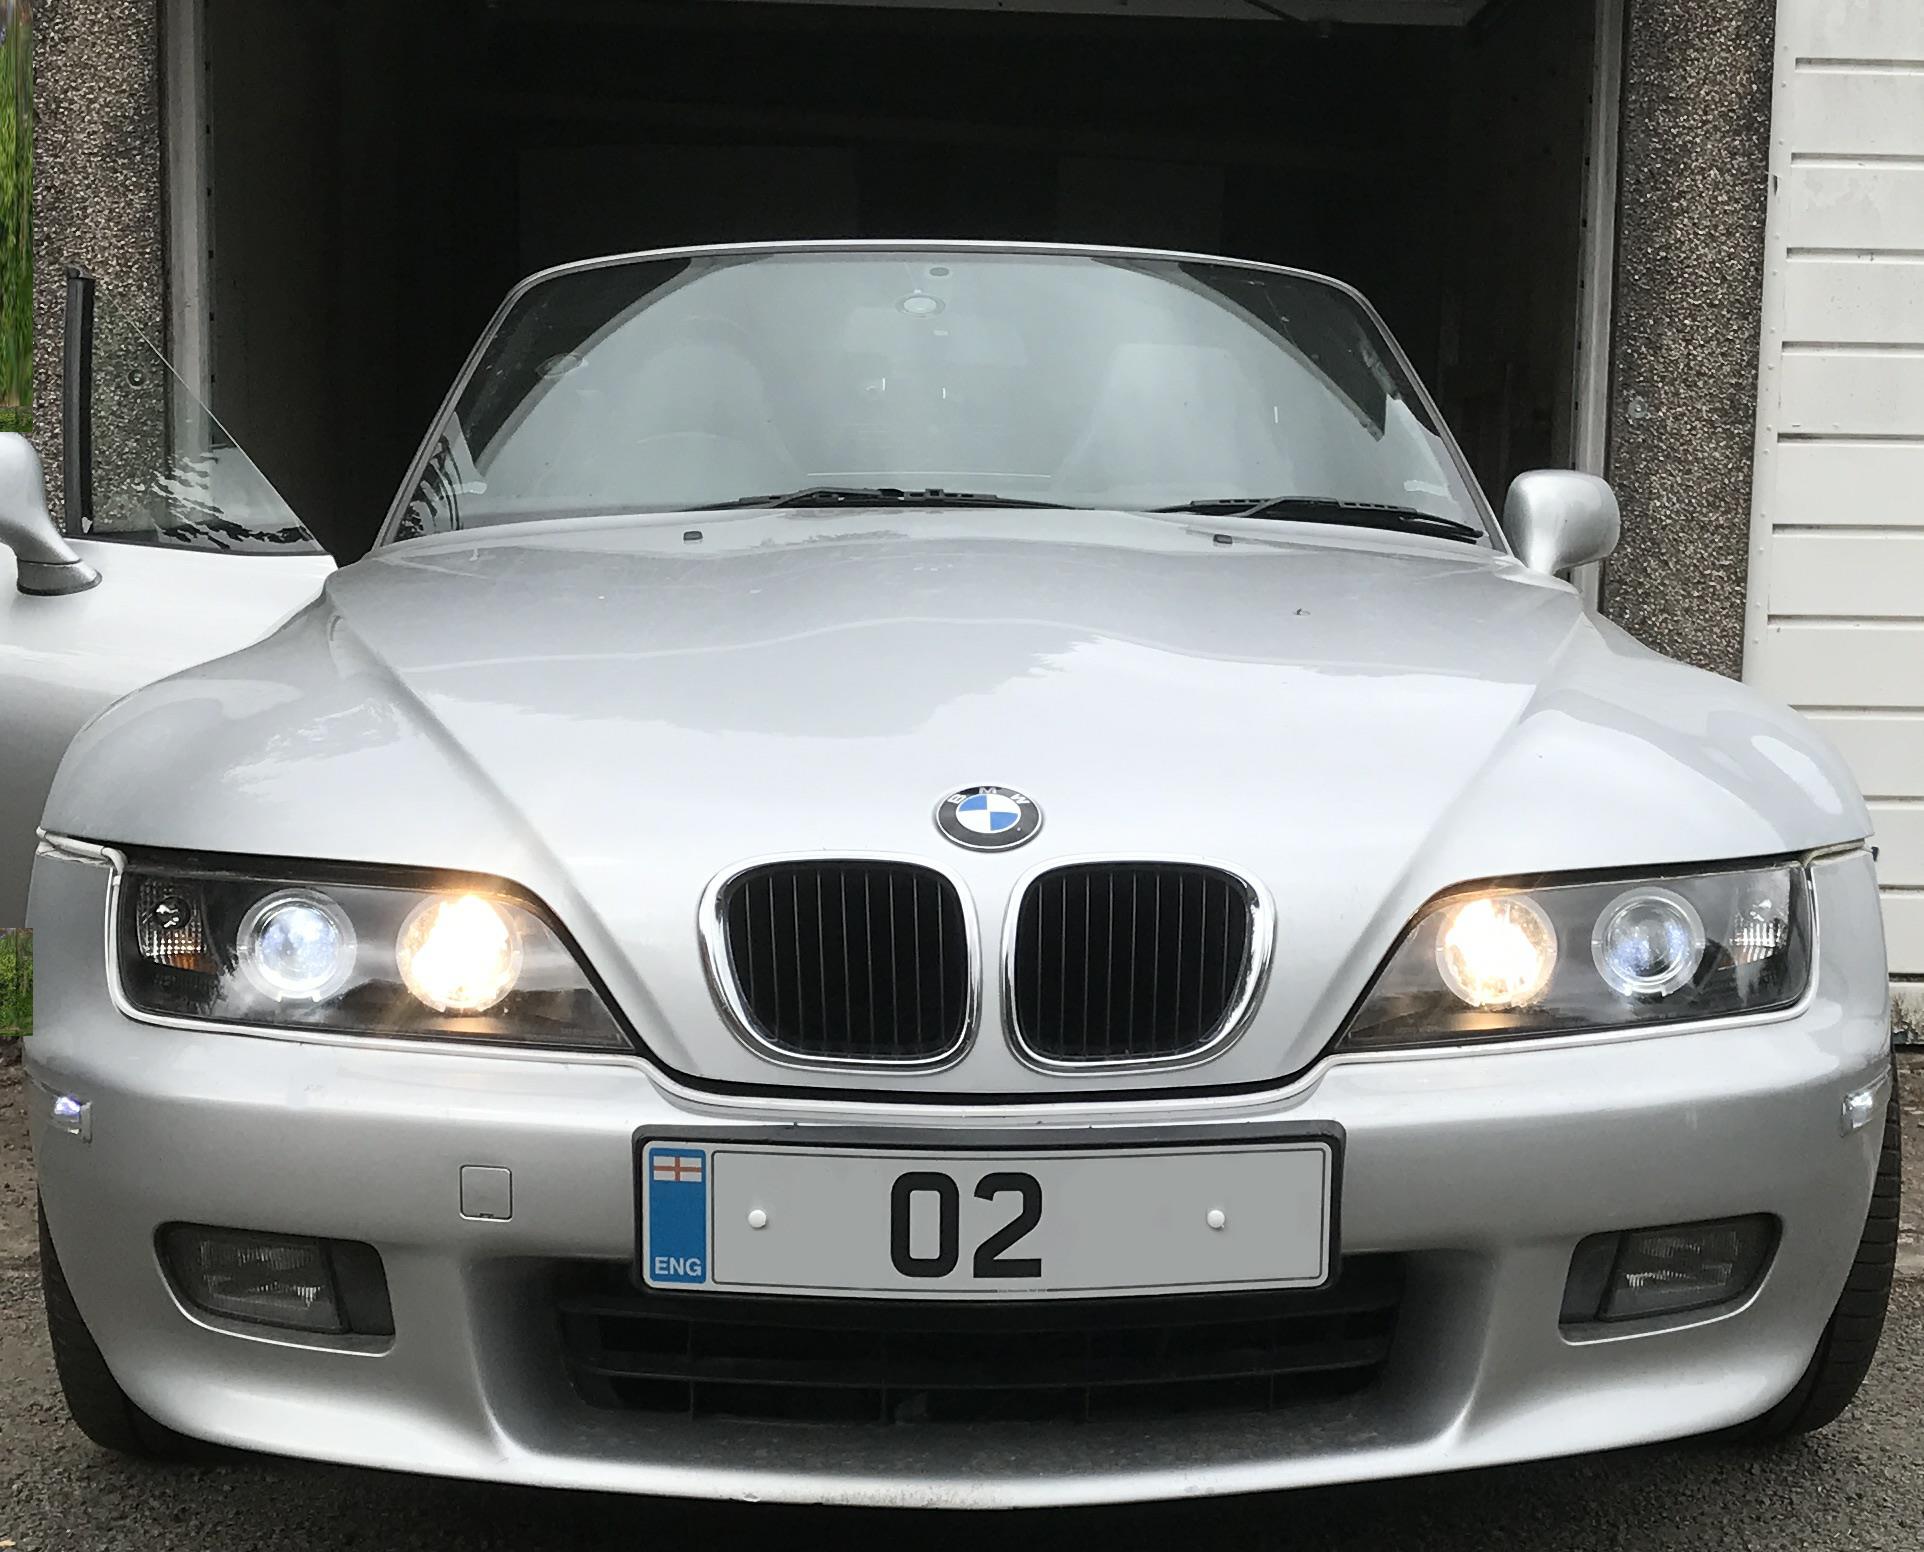
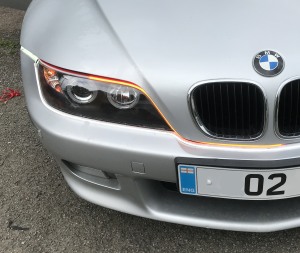
<< Indicators working
Angel eyes & Running Lights ON >>
OFF
Reverse Cam
This goes to the first bonnet catch on driver's side (R- offside) A small cable goes from (R) catch to left catch (Passenger side) (L - Nearside)
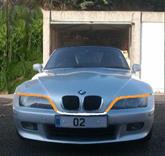
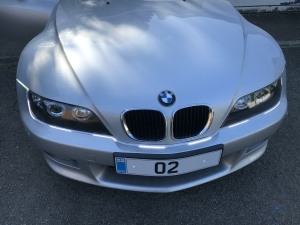
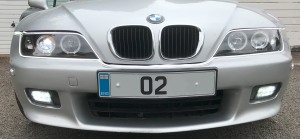
The 'Sassy look!'
BNW Z3 with Top Down - Looking Good!
The fog lights have that warm look to them and I may need an upgrade them, no rush there, I will need to check the bulb fitting style. I may even have a spare set in the spare bulb-tub pile in the garage. update: The replacement rear cam wire has now been ordered to replace the one with the broken yellow RCA din plug.
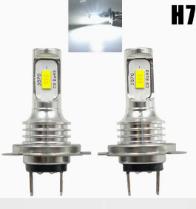
21.07.24 - A nice Sunday; a stroll up to the garage, thought I would just check the 'Bulb stash' and see if my previous failed purchases would fit the fog lights and low and behold, I found a set and they were the H7 bulbs previously purchased for the Spyder clusters that were the incorrect fit, (I needed H1for the headlights).
Fogs look a little too warm...
All the front lights look uniform now and this upgrade has really knocked years off the Z3's look, I am very pleased with this outcome. This sensation is unusual, I may even cry....
Fog Light Bulbs
😉
Replacement-RCA Rear Cam Lead
23.07.24 - Rear Cam Lead arrived today on the morning am (RM) post, so I may have a go at sorting that out today, it is a hassle especially having to feed the wire through to the back, it will be another job ticked off the list. 6m is enough length however; the order suggests it is 10m. It is what it is.
10m
click
click
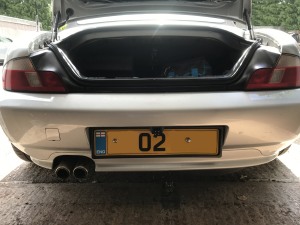
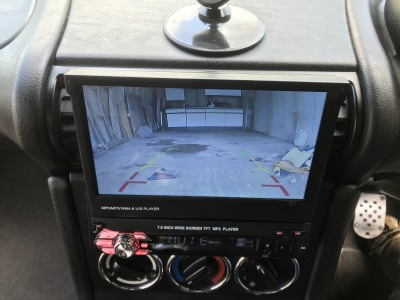
The lead has now been fitted and the rear cam is working, this can be useful when the hardtop and soft top is up or on, as the rear view can prove inhibiting with varied blind spots.
1. Flip screen manually. 2. Switch to Aux via home menu. 3. Place gear into reverse. (this will activate the rear cam and the view of the rear of the vehicle). Red tail wire is connected to the blue wire at the back of the radio, within the harness. This is used as a trigger for the 7" display.
The red tail on the boot/trunk end of the RCA yellow din plug is
The new rear LED bulbs I had replaced a while ago, are surprising still bright and clearly lights up the reverse area well, the lights on the reverse cam are made redundant at this point and not really needed. For the size of the cam, I am impressed with the span, depth of view and focus, using the flip screen, this should do the job if and when needed.
The image may look a little dark on the screen, as the rear view is in a dark garage only illuminated by the reverse lights, not bad is it! (Note:After looking carefully at the image - Left side is what is viewed on the right and right is what is on the left, this is common by all accounts with most reverse cams from what I have been told and researched... not sure whether I like that, and I am sure I will try to rectify this with my personal preference I like the 'Wysiwyg approach'. It still gives a visual illumination to any obstacles after juggling the image around in one's head, that could take up some crucial seconds before hitting something; I will look into it, click on 'Reverse cam' <<< for further update information).
25.07.24 - The Radio Aerial is another story in itself, I did purchase a cheap replacement aerial from a particular company, (I am sure I've mentioned somewhere ;)) that sells products from the East, unfortunately, with this product, the lead was not as long as it was suppose to be, even to reaching up to the windscreen, this was frustrating and the construction was poor. It did fall apart both ends, after trying to make a 'square peg fit into a round hole, so-to-speak, so, asking it to do what it was suppose to do was a big no! I was not impressed. I have ordered another type, this one is even cheaper, but looks better in construction and the wire is longer, (in the ad at least). At the end of the day, one gets what one pays for, it is a case of waiting for delivery to see. False economy springs to mind yet again and using 'win a few, lose a few' styled terms can be a little more comforting in words... will help for now, until I can get the radio to work as it should, the aerial should be delivered within the next 8-9 days.
02.08.24 - Someone has asked if my study course is still going well, simple answer, yes, at the moment and thanks for the enquiry, it was difficult to get started, however; received divine intervention to motivate myself and at this point in time, finished 2 out of the 5 Units, so...progressing in-between other tasks. (update; 09.09.24 - Completed course - TM-passed waiting official confirmation)
Back to my car radio aerial, I have received it and fitted it and it works very well, (with the roof down) it is half the size and weight as it was depicted within the ad, however; it works fine and it is the ideal size to have within the window pillar surround, reception is good, however, not so good when the roof is up. This job is now done for now until I can find something better. As to the reverse camera, the more I have used the existing camera whilst waiting for the replacement, the more I have come to understand the concept of the mirror image and the way it is used, I have decided to leave it it as it is for now. I do have the new cam if I choose to use it instead of the current one and I can flip the image with the new cam if I decide to install it.
A new product addition, I have added two solar led lights one on each of the doors, near the press lock, ok a bit of a gimmick or bling, however; it doubles up as a security indicator for evening/dusk/night parking as a warning deterrent if parked in the street, this is only to accompany the internal vehicle's legit and active security system.
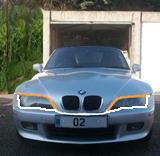
13.08.24 - A number of people have also contacted me recently, asking about the name of my Z3, those that are familiar, know that this Z3 has the affectionate name of 'Kate' and the name really stems from the letters and numbers within the registration, 'she' named herself really and it is as simple as that, the Z3 couldn't have been called anything else. Not even something derogatory, as she has been a 'good girl', in terms, mechanically. I have now made her name more prominent on each year diary image for those that enquired.
(I chose this based mainly on availability and what worked,
connected to the reverse light wiring circuit.
14.07.24
click
Stobe Lights
Today! 7th Anniversary Kate
Going back to <<< 2018, the Start of the Renovation and Ownership
20.08.24 - Today it crossed my mind to check the headlight alignment and grab my old aerial from the garage : 1. 2' (61cm) away from the wall 2. 21" (53.04) from the ground, (Headlight Centre) 3. Headlights centred and marked on the wall with tape 4. 2" (5.1cm) measure below the line 5. 25ft (762cm) backup vehicle 6. Adjust, according to the beam height - just below the bottom line.
Well! Was near enough spot on, it was a good guess when I had been messing with the strip-lights previously, also checked the hi/lo beam adjuster on the separate dial on the dash, the hi, brings the beam up to the main line. Obviously the low beam takes the line well below this line to about 1' (30cm) from the ground. I am quite happy with that as there is plenty of room for beam adjustment, for dark country roads, from low to normal and this will prevent me from blinding oncoming traffic at night when on the move. Not forgetting I do also have my main beams if and when required. If only other drivers were as considerate. (Just a quick note: for those that are Millennial and the Z generation, or GenAlphas, or the illegals, that watch YTube University America, remember the beam is for the UK and is for oncoming traffic and this is opposite to the USA, the left side beam should be slightly higher than the right as we drive on the left facing right oncoming traffic).
>>>My main purpose initially; was to go to the garage and to find my old aerial and try to fix it, in a short space of time I had misplaced it from the previous tidy-up, couldn't find it, so headlights it was. A change of topic - sort of...This is, by all accounts; the 'spider season', the garage didn't disappoint, 'Spyder headlights' and those of the 'arachnid kind', some quite big ones, than the normal run-of-the-mill, crawling out of cupboards, keeps one alert, based on current foreign stowaways that have been reported recently, well, they keep the flies down...! And Yep! They are 'That Big!' Meet my friend 'Harry'.
Another change back to topic - It looks like I will have to order a better aerial, at a higher price to get possibly better quality, no doubt I have put the original aerial (1st) in a safe place somewhere. This is becoming an expensive game, (not really, thinking about it, as they were dirt cheap however; it's more my time or wasted time, and repetition of installing) this will be my 3rd one so far, now going to be the 4th. I have decided on an automatic aerial, this time around, controlled either by the radio or a separate switch, I will decide on when I install it. I am now waiting to see what is sent me. I am trying AliExpress online, as this is a promo and this aerial has been reduced in price, mainly because it is my first order with them. 'Introductional Deal' see aerial <<< purchases.
30.08.24 - The aerial arrived today, I had a strange feeling it would be the wrong one, now that it has arrived, it is, so now going through the process of Refund/Return (AliExpress). Do I need to say more....a really drawn out exercise, I just don't have the energy? (...and this is what they bank on).
01.09.24 - I still have the pillar aerial as I call it and the original lead that goes to the rear of the car with the wrong end fitting, I will most likely take these two out once the electric aerial is fitted. I decided to open up the electrical aerial package, to just check and to see if it worked, it did, rather than sending it back and potentially risking no refund, (as happened in the past with other products and dishonest companies, from China), I decided to purchase in addition; an aerial extension lead from the UK, (it was nearly as expensive as the aerial), so; no savings there, there is something wrong here in the UK with pricing, a total rip-off, so much for exporting out industries or destroying them altogether, must be a politician involved..... I digress; delivery pending, (update: received 04.09.24) (the existing lead in the car will need to be bypassed for now, as the connection fitting is totally wrong at the aerial end, this is a little frustrating as this is just box shifting from the supplier, however; it is what it is...I did have a spare extension lead somewhere, searched high and low for it, but that seems to have gone walk-a-bout also, so, no surprise there, (a little like 'Harry' with free access) talk about a false economy...I believe I am justified in reinforcing my tool policy and tool/garage/shed access), sign of the times....the new extension lead I have received should do the job. I am now looking at the aerial and hoping it will fit, (lengthwise) or it will be back to square one...
14.09.24 - This weekend the sun had decided to revisit and therefore a good opportunity to install the electric aerial, to cut a long story short, it didn't fit; it was a few millimetres too long, it meant taking the rear wing off and for me to get it all aligned up and attached. This was too much work, especially with having to get involved with the sealant or bonding that is sometimes used by manufacturers, this can be very messy. I did find my original aerial though, you know; the one I had previously misplaced.... (refitted) it was back in the vehicle, where I had left it. Possibly thinking I wouldn't lose it and could repair it some day, as replacing it would have cost over £100+. Today was the day for another attempted repair.
Headlight Alignment
click
Double click to start editing the text
'Harry'
This lower section costs over £100+ to replace and £200+ if new...
After removing the screws and nut on the aerial body, the Aerial body seemed to be molded or two pieces stuck together really well. (or why have the screws, right!) To overcome this, I decided to use a hacksaw and cut into the body at the top towards the brass screw thread, (where the aerial stalk attaches). At the bottom of the unit there is another form of screw thread, I had hoped this would give me some access, of sorts, it didn't as there was just a hollow tube leading up to the top brass thread, (the tube possibly used for water drainage). It was reasonably easy to hacksaw through the bonded plastic and I levered it gently apart. This exposed a top part of a circuit board where there was remnants of a wire attached to it and it looked as if it was leading out to the brass screw thread at the top, seemed logical.
My wire had obviously broken, (see previous images above). The remnants of the wire was also surrounded by what seemed to be expanded-foam. Some of this was gauged out to clear the old wire remnants. (I did use a small drill to drill a hole, just enough to get a new wire through. (I used a piece of old copper telephone wire I had lying around). This I soldered onto the circuit board where the broken wire had been attached and then I threaded the wire through to the brass screw-thread at the top. This end I could not solder, as it was what seemed to be brass or some non-soldering material however; the pressure of the screw-thread for the aerial attachment, screwed down onto the wire held the wire in place and I am assuming this will complete a circuit. This just left me to put everything back together, the cut out plastic, with the screws re-inserted, the black wired earth strap from the bracket onto one of the screws and black tape on the cuts of the plastic to make it a little more waterproof and pretty. I also used Shrink-wrap on the top, above the nut to keep the 'brass' screw-thread section together with the nut section; as there was no other way of keeping them together on their own, this was what I had available at the time and it seemed to work; the repair was near enough done.
This just left me to reinstall this aerial unit back onto the vehicle and to test it to see if it worked with the radio. (see Workshop)
cut
cut
Hollow Tube
Top Aerial Brass Screw Thread
Aerial Lead Connection Point
cut
Shrink Wrap &/ or insulation tape
Black Tape
2x Scews
also note: earthstrap connection
also note: earthstrap connection
Nut
Nut
Update: Fog - New LEDs A much cooler look
Rear plates seem to be more secure and it doesn't look too bad with the black surround of the backplate
15.09.24 - The rain had stayed off and it was a walk up to the garage to reinstall the aerial, déjà vu. The external aerial fitting proved a bit of a hit or miss, as the Chinese or imported rubber grommet that originally came with the electrical areial was not going to work for the original factory aerial, this was expected. The aperture was too wide, (remembering, that the pack of grommets came with a number of different, styles, types and designs of grommets, for the electrical aerial however; these were only suitable for the electrical aerial). I decided to use a customised approach by deleting the rubber grommet, (as the old one had seen better days, it was porous and cracked) and using a plastic purpose surround instead, (this also came in the bag of grommets). I was not sure how I would fit or anchor this plastic surround down to the bodywork, reluctantly; I decided to use some strong glue, sticking the plastic surround to the bodywork or the rear wing, the aerial poked through the wing and the aerial stalk was screwed to the main inside fitting, the aerial stalk now also poked through the plastic surround, (also making sure there was the thread making contact with the exposed wire and I added a few of appropriate sized rubber ring seals over the aerial stalk, two were inside the boot and there was one on the outside, so three in all. This slightly overlapped the plastic aperture giving a small lip all around. Hopefully, this will keep the water out. The aerial seemed firm and was as secure as it was going to be. The appropriate wiring was connected from inside of the boot/trunk and this just left me with the testing of the radio. The radio tuned in ok, it seemed better than I expected and better than the previous attempts of trying to install the purchased newer aerials that failed dismally. The initial tuning was done partially within the garage and was a good gauge for the potential reception, this was even better outside the garage and with the soft-top up so; it looked like this job was done, not before time.....another way to look at this repair; it had saved me over £100+ by repairing the original factory aerial and with held breath, for a change, it worked! It seems one can lose most of the time but on an odd occasion, have a win as it seemed in this case. Great!
Job Done!
Rubber Grommet Delete, New Plastic Surround-Glued, plus added Ring Seals
Surface mounted on the Top only
Diary
03.10.24 - As the weather was getting wet and remaining wet, it was time to put the hard roof back onto the Z3, something I don't like doing, especially when I am on my own, as this top is heavy just for one person. (I haven't got the lifting contraption up and running since the garage roof has been fitted and we have had a reasonable summer, one of those jobs one puts off for some reason). Today, was the day; a comedy of errors, or a divine intervention? However; I wasn't laughing at this point. The car was pulled up to the second garage where the hard-top was stored, normally I slid the roof across the ground on an old narrow mattress, to prevent scratching and then raised it onto a tall bucket and then rested it onto the car seat/headrest for support, before adjusting it to the correct fitting onto the door and window as support. This was obviously done in small stages. Today, I had the energy to lift the roof onto my head situated underneath of the soft inner lining, with back slightly bent over and then glided the hard-top to the car, the problem was getting it onto the car without upsetting my balance, as one end was heavier than the other. The aerial I spent hours repairing came straight off and a surface scratch appeared on the rear wing, my heart sank, however; I did managed to get the roof on. I came to line-up the roof and the two screw bolts that were surpposingly retained within the holes on the roof were ready to go into their housing on the front of the window pillers, the tool that I normally used had gone walk about, a quick search and nothing, screwed the one bolt in using an alternative torx 'Allan' styled key, and it seemed o.k., I went to the other side, (passenger) no bolt. For the next few hours I looked high and low for the legitimate tool and the bolt, absolutely nothing. At this point, I was quite despondent and decided I had had enough for the day, drove the car into the garage and shuttered the garage doors. The hard-top remained unbolted and the aerial had been thrown into the boot/trunk. Knowing I couldn't drive the car without the missing bolt, as the roof would be ripped off with the wind, I decided to search for bolts on the internet, prices again were just stupid around £20 for just one and this was on eBay. I managed to find one for £16.70 reluctantly; and after a couple of hours with further searching I ended up ordering one, it was going to take a week or so for delivery... I did need it before then.
04.10.24 - I knew it was going to be a pointless exercise, but I needed to get back up to the garage with a fresh set of eyes to look for the missing bolt and torx key/tool as I needed the car and there was no way I was going to take the roof off at this point in time and there was the process of a sulk and a cry concerning the scratch on the bodywork. Again, it took a number of hours searching through nooks and crannies' within the car, tool bags, toolboxes cupboards, screw/bolt bins, on top, under the boot/trunk carpet. Nothing! I resolved my despondency with the knowledge that there was a bolt that I had managed to order, even though funds were tight so; the price suggested that it was either made of 'solid gold' or it was like 'rockin' horse dropings' to get hold of. Well! That was my justification for it for costing so much and for buying one. I decided to move onto repairing my aerial for the umpteenth time. It was fairly straight forward as it seemed like it was fairly familiar to me by now.
The aerial was repaired and the radio was tuned in successfully, as I was cautiously expecting with some welcomed relief. The next hour, I continued to search again for the missing bolt and missing tool, trying to remember where and when I last used it and this was on the day when the garage roof had been fixed, (I did leave the two young guys to get them a couple of long crow bars I recollected, I had also noticed a brake adjuster as well as the torx tool, had also gone missing, after they had been, no other people had, had access to the garages...however; how could one, prove anything)?
05.10.24 - I had a few items I had ordered from Temu, that had been delivered, a couple of small press-on lights for the boot/trunk and door LEDs, cheap as cheap and I proceeded up to the garage to fit them. They were more gimmicky however; were functional to a point and the quality, well; as one would expect from China. Another check inside the car, a quick look around the garage and repeated searches where one had already searched a few times before as a final resolve for the missing bolt and tool, as one does with hope of hopes... A few hours on, before returning back to my residence. The boot was open and I was ready to just close it, low and behold, I could see a bolt staring at me as clear as day, in the face, it was just lying on the boot carpet, this carpet had been pulled out numerous times before during the search! This was just not logical! Why would it be in the boot/trunk and on top of the carpet? I quickly checked to see if I hadn't taken the other bolt out to use it as a pattern or something; to order the new one, really knowing I hadn't. For the next ten minutes I was dumfounded, how did it get there? I preceded to bolt and clamp down the roof using the alternative torx key as the original one was still missing - I was now doubting my sanity, and hoping at the same time, I would find my torx tool in the same way, I didn't, and I didn't push the idea... at this point, this was, just weird... was this a slip in the matrix or was this a reminder of divine Intervention? I put it down to stupidity on my part initially, but it would be comforting if it were either for former options.
14.10.24 - After a recent thirty mile drive, I probably experienced every rattle one could imagine and it all came from the hard-top or roof, bouncing on the car pillars, for some reason the front bolts were not seating correctly, I may have to change the bolt positioning around to see if the threads bite better. I am still waiting on the delivery of the new bolt, so this fitting or repair is still pending. Perhaps with the new thread, it may secure the hardtop down better?
Changing the subject, as to the lights, the LED headlights and the driving lights, ('multi-functional' strip LEDs; these were set to static). These are a great improvement and they looked good; as I was travelling back in the dark I could actually see where I was going, using dipped headlights. (I don't think I checked the full beams). I am pleased with their performance in general. In addition, the door LEDs were also impressive in terms of their spontaneous or pulsing illuminations and added some additional safety if and when required. They run during the day or night effectively and they run off their own battery power and is rechargeable). The blue and red illuminations may be considered questionable and they do match the door lock night illuminations. It may be perceived as an emergency vehicle (if one can perceive a sports car as an emergency vehicle.... at a distance and at night possibly..)? I may need to address the colour coding in the future, I can do this by manually adjusting the inbuilt multiple choice colour sequencing, that it comes with, bearing in mind, they only work when the doors are opened and they shut off when the doors are closed. It is not too much of a problem for me, at least it does get the traffic to slow down when the door is opened and on the side of the road and that can only be a good thing within an emergency. (I am not sure if the Police really care in this day and age, as they do seem to be into their rainbows and wokery, my only problem is I am not foreign, I'm white, English and live in England and could be given a long sentence in jail, therefore this could be a problem - too much? )…
21.10.24 - After what I had considered a longer than normal wait, my roof bolt did decide to turn up via Royal Mail, yay! I just needed the time to fit it in-between rain showers. The basic Torx T30 tool/key set I already had in my toolbox; has short, stemmed, these are without T' handles and has proven after a number of attempts, not to give me the correct positioning for my hand or the length of stem to purchase within the deep bolt holes within the roof, or be the right length for me to exert the exact pressure on the bolt without having the tool dig deep into my hand leaving indentations, so another case of 'chasing my own tail', so-to-speak as in regards to having the right tool to do the right job! I really needed to purchase a new replacement Torx T30 with a T' handle, replacing my main original torx tool key that was missing, (see tools) update received 28.10.24) definitely seems to be a false economy, annoying and weird!
05.11.24 - Now, don't laugh! Today; I was going through my 'electrical items' stored in one of those green Bosch stacker boxes, within a personal dedicated tool area within the box, I challenge you to guess what I came across? Low and behold what should I find? Yes! My Torx key, however; it was a T40 and not the T30 that I assumed it was. This was possibly another reason why I couldn't get the bolts to tighten up on the hard-top. However; it was a welcomed sight. The bonus here is: Ok, I now have two Torx keys and they are both different sizes, the T30 may be of some use within my tool collection, perhaps? I can only take back my thoughts and suspicions that was going through my mind at the time when I was searching for my original Torx key, I just now need to find my brake valve caliper tool in the same way, this would be a plus. What would be the chances of that? Life works in the most peculiar ways doesn't it....
06.11.24 - Hard-top bolts are now fastened tightly, I did have to swop one of my original bolts over, as the one bolt looked to be a little stripped, I may need to replace it at some point in time for a new one, to have as a spare; even though I consider this to be rather expensive however; it is not currently urgent, so not today.
11.11.24 - After careful consideration, I am now looking to make a move from my present location, as there is nothing holding me to the W.Midlands anymore, no family or friends from what I can see in this area either, not sure when this will happen. I will inform you as and when the changes have taken place, (I will tell you the area; not the location, as I like my privacy), let's just say, it will be a new start. Out with the old and in with the new, so-to-speak.
13.11.24 - It has been a number of weeks since the aerial has been 'fixed', and I have noticed the brake exclamation light on the dash is now cancelling out, it is now functioning correctly. If you remember this light remained on and was quite annoying, especially during the night driving and also tiring when it came to convincing the MOT garage that it was a faulty earth, (they did accept and knew it was a bad earth throughout the six years of going to the same garage and it did became a longstanding joke). I just left it as it was, after an exhaustive search and diagnosis and failing dismally to identify the whereabouts of the problem. As long as it didn't prevent an MOT pass, I will remain unconcerned, ok; it was still annoying, at the time however; that seems to be part of the past now, hey! I have now concluded it may have had something to do with the five or six earth wires attached to the aerial bracket in the boot/trunk, now this wiring goes some distance from the clock cluster at the front of the vehicle to the rear. Since the aerial was all dealt with, in terms of the aerial repair, I can only put it down to the problem being the bad earth at the boot/trunk location. So for those with the same problem, it may be worth checking your earth connections at the factory aerial, inside the boot/trunk on the nearside, location of the rear wing, (passenger UK). Give the bracket a good clean, sanding and clean any grease and any accumulated rust off the earth connectors too, it should hopefully; resolve your problem. (Workshop).
08.12.24 - Nothing planned this month, looking at the negative, too cold, wet and windy even though the garage roof appears to still be leaking, the bonnet/hood gets splashed even when the door is down during a rainfall, 'British workmanship' is not what it used to be. Well! There is no incentive for the Brit today is there, or is it down to the new 'illegal foreign Brits' and those politicians that are not patriotic and look for wealth that they can't take with them, that just don't care that much? From what most of us true Brits, we can see and the way our country is going, it will get worse before it get's better, reduced job satisfaction, pay, services, education, health services, jobs, housing... We are now looking for change, otherwise we will lose everything....Well! The cars will also and most likely be off the road in 2025 with the new road tax hikes; let's stay on the bright side of life for now, before the revolution starts or world war 3...;)
22.12.24 - However; looking at the positive side, may have to look for it... the Z3 is running well;
Will we have a white Christmas in the Midlands this year?
Hard Roof 1 of 2 Torx Bolt
Missing Torx Tool
Hard Top
Hard Top attached
Hard Top Bolt Positions
'Missing Bolt'
Part No.54218410534/8410534
Have A Good Christmas and New Year
Remember what Christmas is really all about... Christian Values that this country was originally built upon
"We all have a path to follow, sometimes it is good, other times it can be bad. This molds us into our character, our personality, individual's we eventually become, life makes us stronger and the experiences allows us to collect the skills for something higher. It is all down to divine timing for when we take on our full purpose! This is where 'faith' plays a large part in one's life. It is a life journey and we on Earth are all following a tailormade apprenticeship, we are all unique and therefore our paths are not the same."