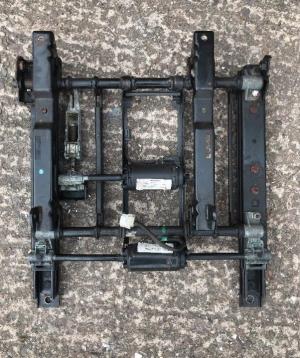
REPLACEMENT Passenger Seat Base Adjustable Electric Motors
eBay: £85.00 free p&p Seller: rkpz32014
From the write-up it is complete and in good working order - delivery within 5 days from 30.07.18
Front
Back
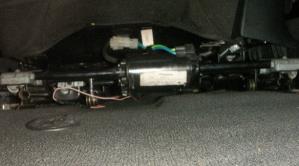
This is the base Unit of the Z3 passenger side, (left-UK) . This unit attaches to the bottom of the chair and is also bolted to the Z3 floor. This unit allows the chair to go forward and back and the base of the seat that one sits on to be raised or lowered, (on some models) in my case back and forward or incline of the back of the chair electronically. Two motors, two functions. The more functions the more motors one will need; based on the model of the vehicle and functions required....
I am not sure at the moment, whether to replace just the motors, (depending on their working status), this would be the sensible option normally. The other option is to see how the base unit is bolted onto the chair itself, if by four bolts then it would be much easier to change the whole unit and then plug in the electrics. The task will have to be assessed on the day of fitting, either way the chair will need to come out to allow better access. This could prove difficult as the chair needs to be moved forward to access the back retainer bolts. Without the appropriate motor, another solution to this problem will be required. On a positive note, with the chair out of the car, the carpet and plastic furniture can be thoroughly cleaned before the reinstallation of the chair. Pending....
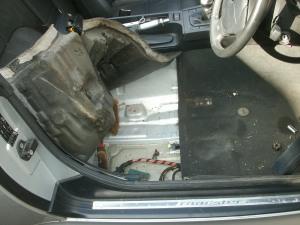
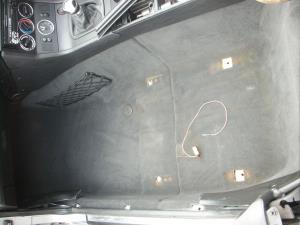
As time ticks on, I have spent the early afternoon trying to get my passenger seat out. The following images shows what is under the chair and what is missing...
Forward/Back Travel
Back of chair forward/backward incline
31.07.18
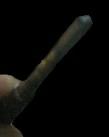
1. Missing is the one motor on the front
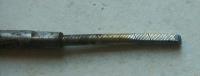
2. What had been left was part of the rod that was attached to the motor a little shaped like the end of the wire that goes into a tacho or the speedo.
3. Don't forget to undo the nuts on the front of the chair, before proceeding
By turning this wire, I managed to forward the seat a few turns at a time and then swopped over to the other side, (like a zig-zag in method). It took a good 45 minutes before the rear bolts were exposed. I was advised NOT to use a drill to speed the job along as this could cause bushes to break and any possible nylon type cogs to shatter.
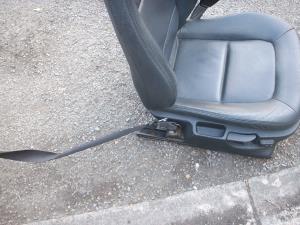
Eventually the bolts at the back were exposed enough to get a socket in to undo the bolts, the chair was carefully lifted up and at the same time, the plugs under the chair were disconnected. The seatbelt was extended outside the car and gently rested on the ground. The nut retaining the seat belt (the door side) was undone and the belt disconnected from the bracket. (Note on some models, this bolt is sometimes soldered
detachable
Motors for the Z3 are like 'rocking horse droppings', you just can't get them unless you buy a base unit. The difference in the price would be £15-£30 if one could get them and don't forget, the salvage business needs to make a profit, who is doing the favours, definitely a different breed today...it is ALL business!
Much better with a good clean
Not rich this week
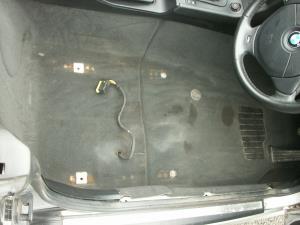
Floor pan doesn't look too bad!
Looks like a wire has been bypassed, evidence that there has been a problem with the seat in the past...
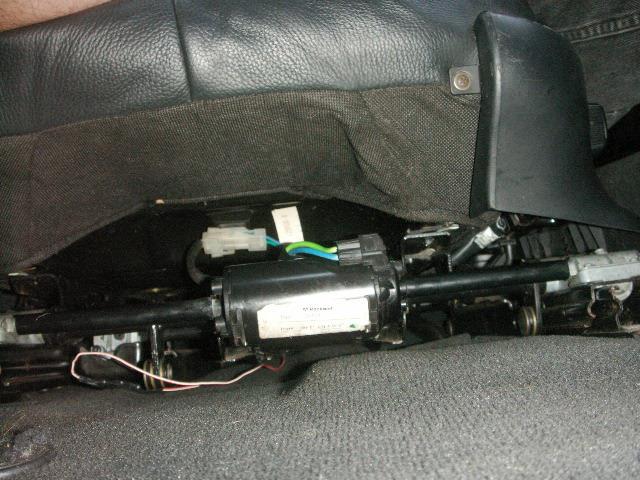
This is the replacement base unit. Arrived 02.08.18, very quick delivery and very well packed too! After a good ten minutes checking everything, there were some differences. Rather than replace the base unit, I decided to just install the Forward/Back motor. There were adjustment cables, and other changeovers that would have meant a fair few hours of work, some subtle differences in the drive mechanisms, I didn't want to make work for myself, especially if I didn't need to. So this job was checked out carefully. Seatbelt sensor, mechanism for raising the seat area also not evident on the donor base unit, (The subtle changes were possibly down to the original vehicle model the donor unit was taken off, useful tip, specify model and year, however this is no guarantee of getting the perfect replacement).
Looking over to the driver's side, I considered carefully what could be crawling under the seat if anything. To put my mind at rest, I decided to take out the driver's seat and repeat the cleaning process. Considering how long it took me to clean under the passenger chair. I was also curious to see if this side had moisture within the carpet. Since the driver's seat was operating ok, there was no real need to detach the seatbelt. A quick inspection of the chair and a brush down of the cobwebs and all was good.
This only left the inspection for moisture, it was sodden, literally it was a sponge full of water, plus three slugs, two spiders, and a couple of goldfish, ( the latter was a joke).
2. After squeezing the water out of the sponge underfelt, removing the slugs, spiders, mud and grit I couldn't do anymore. The floor and carpet needed time to dry out over night....
However, I was impressed with how solid the floor pans are and little signs of rust. Definitely a bonus!
Water Intake? Possible cause: soft top drainage holes blocked, leaks? Remedy: Clear drainage holes, or refit or replace soft top. Possible cause: Front/side window leakage around door/window seals. Possible cause softtop left open. Remedy: Close/replace, replace seals. Possible cause: Window(s) left open. Remedy: Close windows.
The carpet had a few oily marks and required some form of detergent to loosen the grime, I may have a go at this another day when I have collected the materials. It was accessible. However, the driver's chair was ready to be re-reinstalled...
A good feeling of job satisfaction, much better!
1. Seatbelt remained attached, remember to untwist it on reintillation
1.
2.
3.
4.
5.
Update: Given time for the carpet to dry thoroughly, the grease patches on the floor have now gone and a new surface mat has now been purchased to compliment the interior.
6.
With closer inspection, I did discover a slight cut in the leather of the driver chair on the left bolster upright (drivers - o/s -UK). This is quite common with older cars through wear and tear; of driver's and passengers getting in and out of the vehicle.
I have used the repair compound as ordered, (see diary and purchases) to fill the initial hole and left it to set over a few days, but without success. I ended up cutting up an old washing-up sponge to fill the hole and with my new repair kit, slipped the supplied gauze coated in the supplied glue and pinched the two leather sides together as described within the instructions. I held it for what seemed an eternity, most likely around the 25 minutes mark. The glue didn't seem to take and I ended up using some superglue. This was more effective. The black compound didn't totally go to waste either, as I used this to fill in any imperfections. The repair is not invisible as many of these adverts portray, however it has closed the tear and should now hold. I have left it a number of weeks and will eventually buff it up, I may even use some fine rough paper to lower any peaks or troughs and recolour it again. (Photos pending). Perhaps it may even become an invisible repair, we shall see...
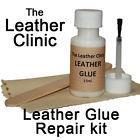
Leather repair filler compounds
Leather Repair Glue Repair Kit for Rips & Tears & Holes No sewing required.
<8>
will need the breaker bar to break the nut). The carpet had plenty of debris such as coins and dust/grit. (unfortunately, not rich today). I also lifted the carpet up to check the floor pan and it looked to be in good condition, however there was some moisture in the rear panel. By propping up the carpet, wiping up the access drops of water, (small amount) this should allow the carpet and underfelt to dry off.
When the carpet is dry, I will give it a good clean, before reinstalling the chair. While the chair was out, I did count two bolts attaching the base unit to the chair. This should make the exchange of units a little more straight forward when it arrives, as long as all the electrics are compatible - (the base unit is off a 2003). I also checked the other motor for the back decline, it worked but was hesitant, so the replacement base unit should remedy this. But not today!
A good opportunity to clean under the chair with a brush and to wipe down, clean, repair and recondition the leather if required.
to the bracket and
...not rich this week, during the clean...
I stayed with the old seat base unit replacing one motor, wiring from the floor to the yellow unit box had a bypass wire from the floor connector to the yellow junction plug in box, (under the chair) this needed to be repaired with electrical spade connectors, (as this allowed the two halves of the wire to be disconnected, for when the chair needed to be remover from the vehicle). On completion, the seat was positioned back into the passenger bay of the car. Before fixing down with the bolts, the wires and plugs were reconnected to the yellow junction box and the chair was ready for testing. It worked! It worked well, the hesitation in the one motor, as suggested earlier, seemed to be working well, so job done! Just left the seat to be bolted down.
4.
The chair returned, after the clean... Both chairs work and with a good floor clean to remove the grease and grime, it now looks more presentable...
6.
Powered by S-AM3l1A
Note: One recommends reading the diary first and then linking to workshop notes to maintain the continuity of the theme...
Condition: 100% Brand New - eBay Material: ABS Color: White Fitment: for All Z3 models for Z3 E36 E37 E38 1994-2002 Roadster and Coupe for Z3M M Roadster M Coupe Package Weight: Approx. 9g/0.3oz
Package List: 8 * Bushes
1pc 39.37*54inch/100*138cm Leather Repair Self Adhesive Patch Leather Sticker PU Paste Self Stick On Sofa Clothing Repair Multicolor Big Size Sticker Badge £1.18 - Temu