Note: One recommends reading the diary first and then linking to workshop notes to maintain the continuity of the theme...
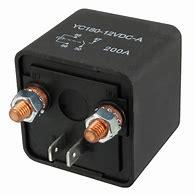
Battery Cut-Off D
Fuel Cut-Off E
In my case, due to the car being stored in the garage for lengths of time without driving it, the battery will inevitably drain. Most cars today have alarm systems, 24/7 cameras that operate on movement and the battery will drain quickly, some over night. To prevent this, fitting a battery isolator and without having to open the boot/trunk, manhandle the battery terminals, using up valuable time, especially when want's to be somewhere and there is also the case that the battery could be flat. Hence, this can be seen as a sensible upgrade.
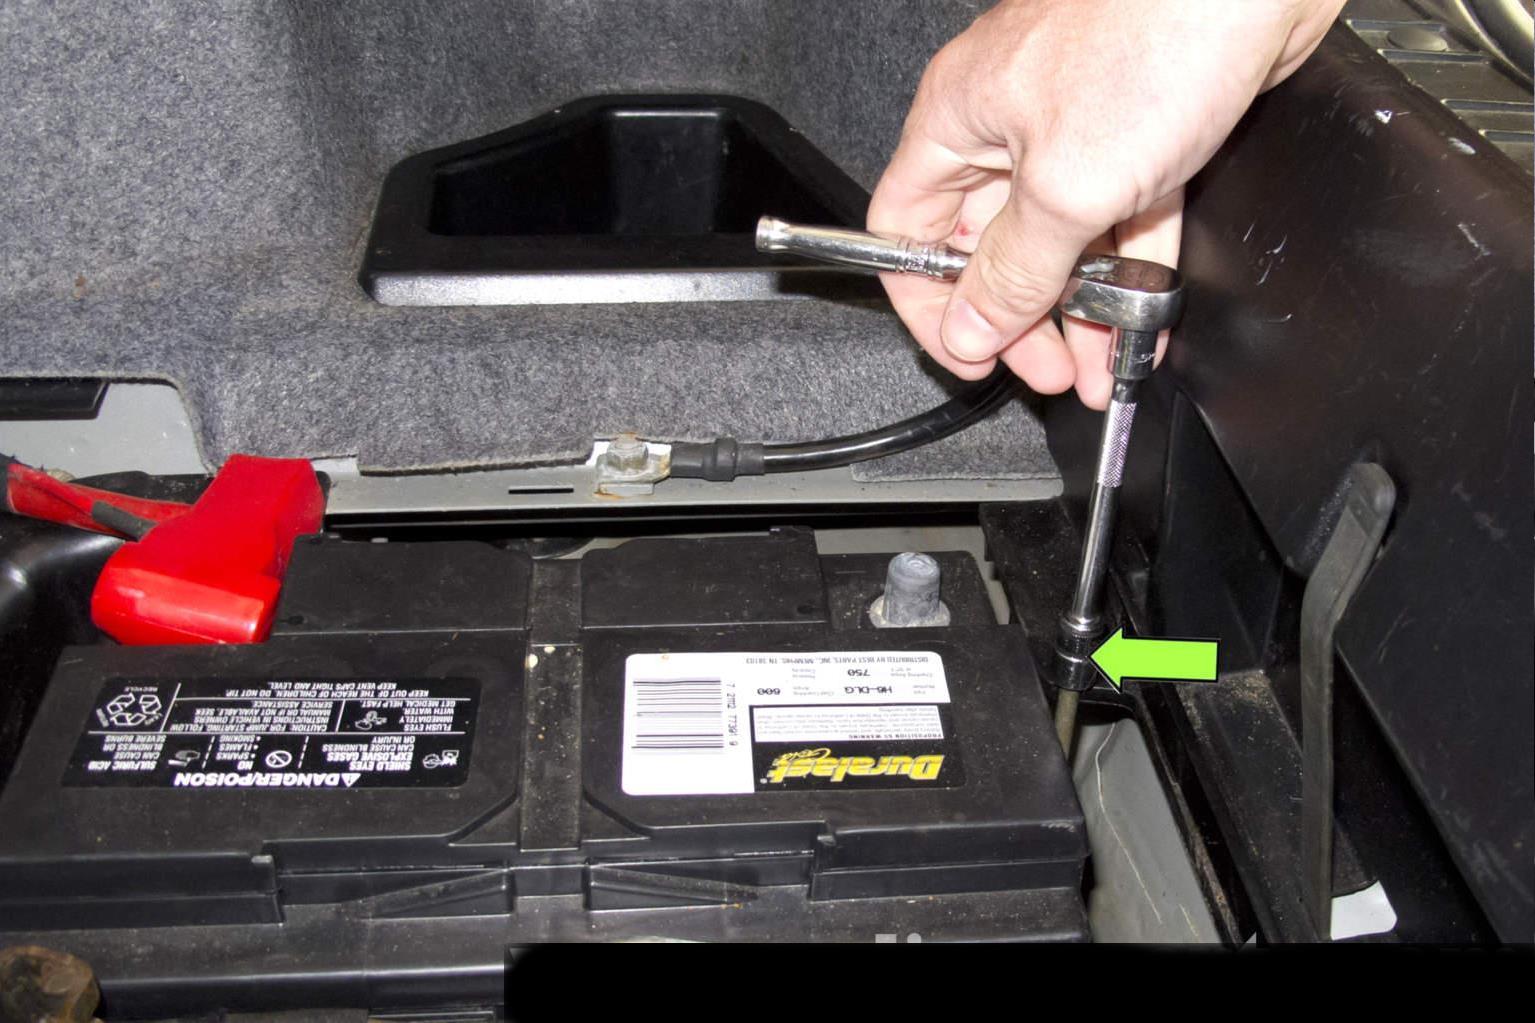
Now then, if like me you have a large full-sized battery, a mammoth of batteries that fills the battery well, you will identify a problem with this set up.
There will be NO room for the Relay to where it is suggested to be situated, as the boot/trunk flooring will end up raised or proud, preventing the normal use of boot space.
Being a simple and humble person, I pondered on this issue for a couple of days, (the weather was also cold..) and I came up with a solution that this set-up needed some modification of sorts to the Relay or kit components.
This is what I came up with:
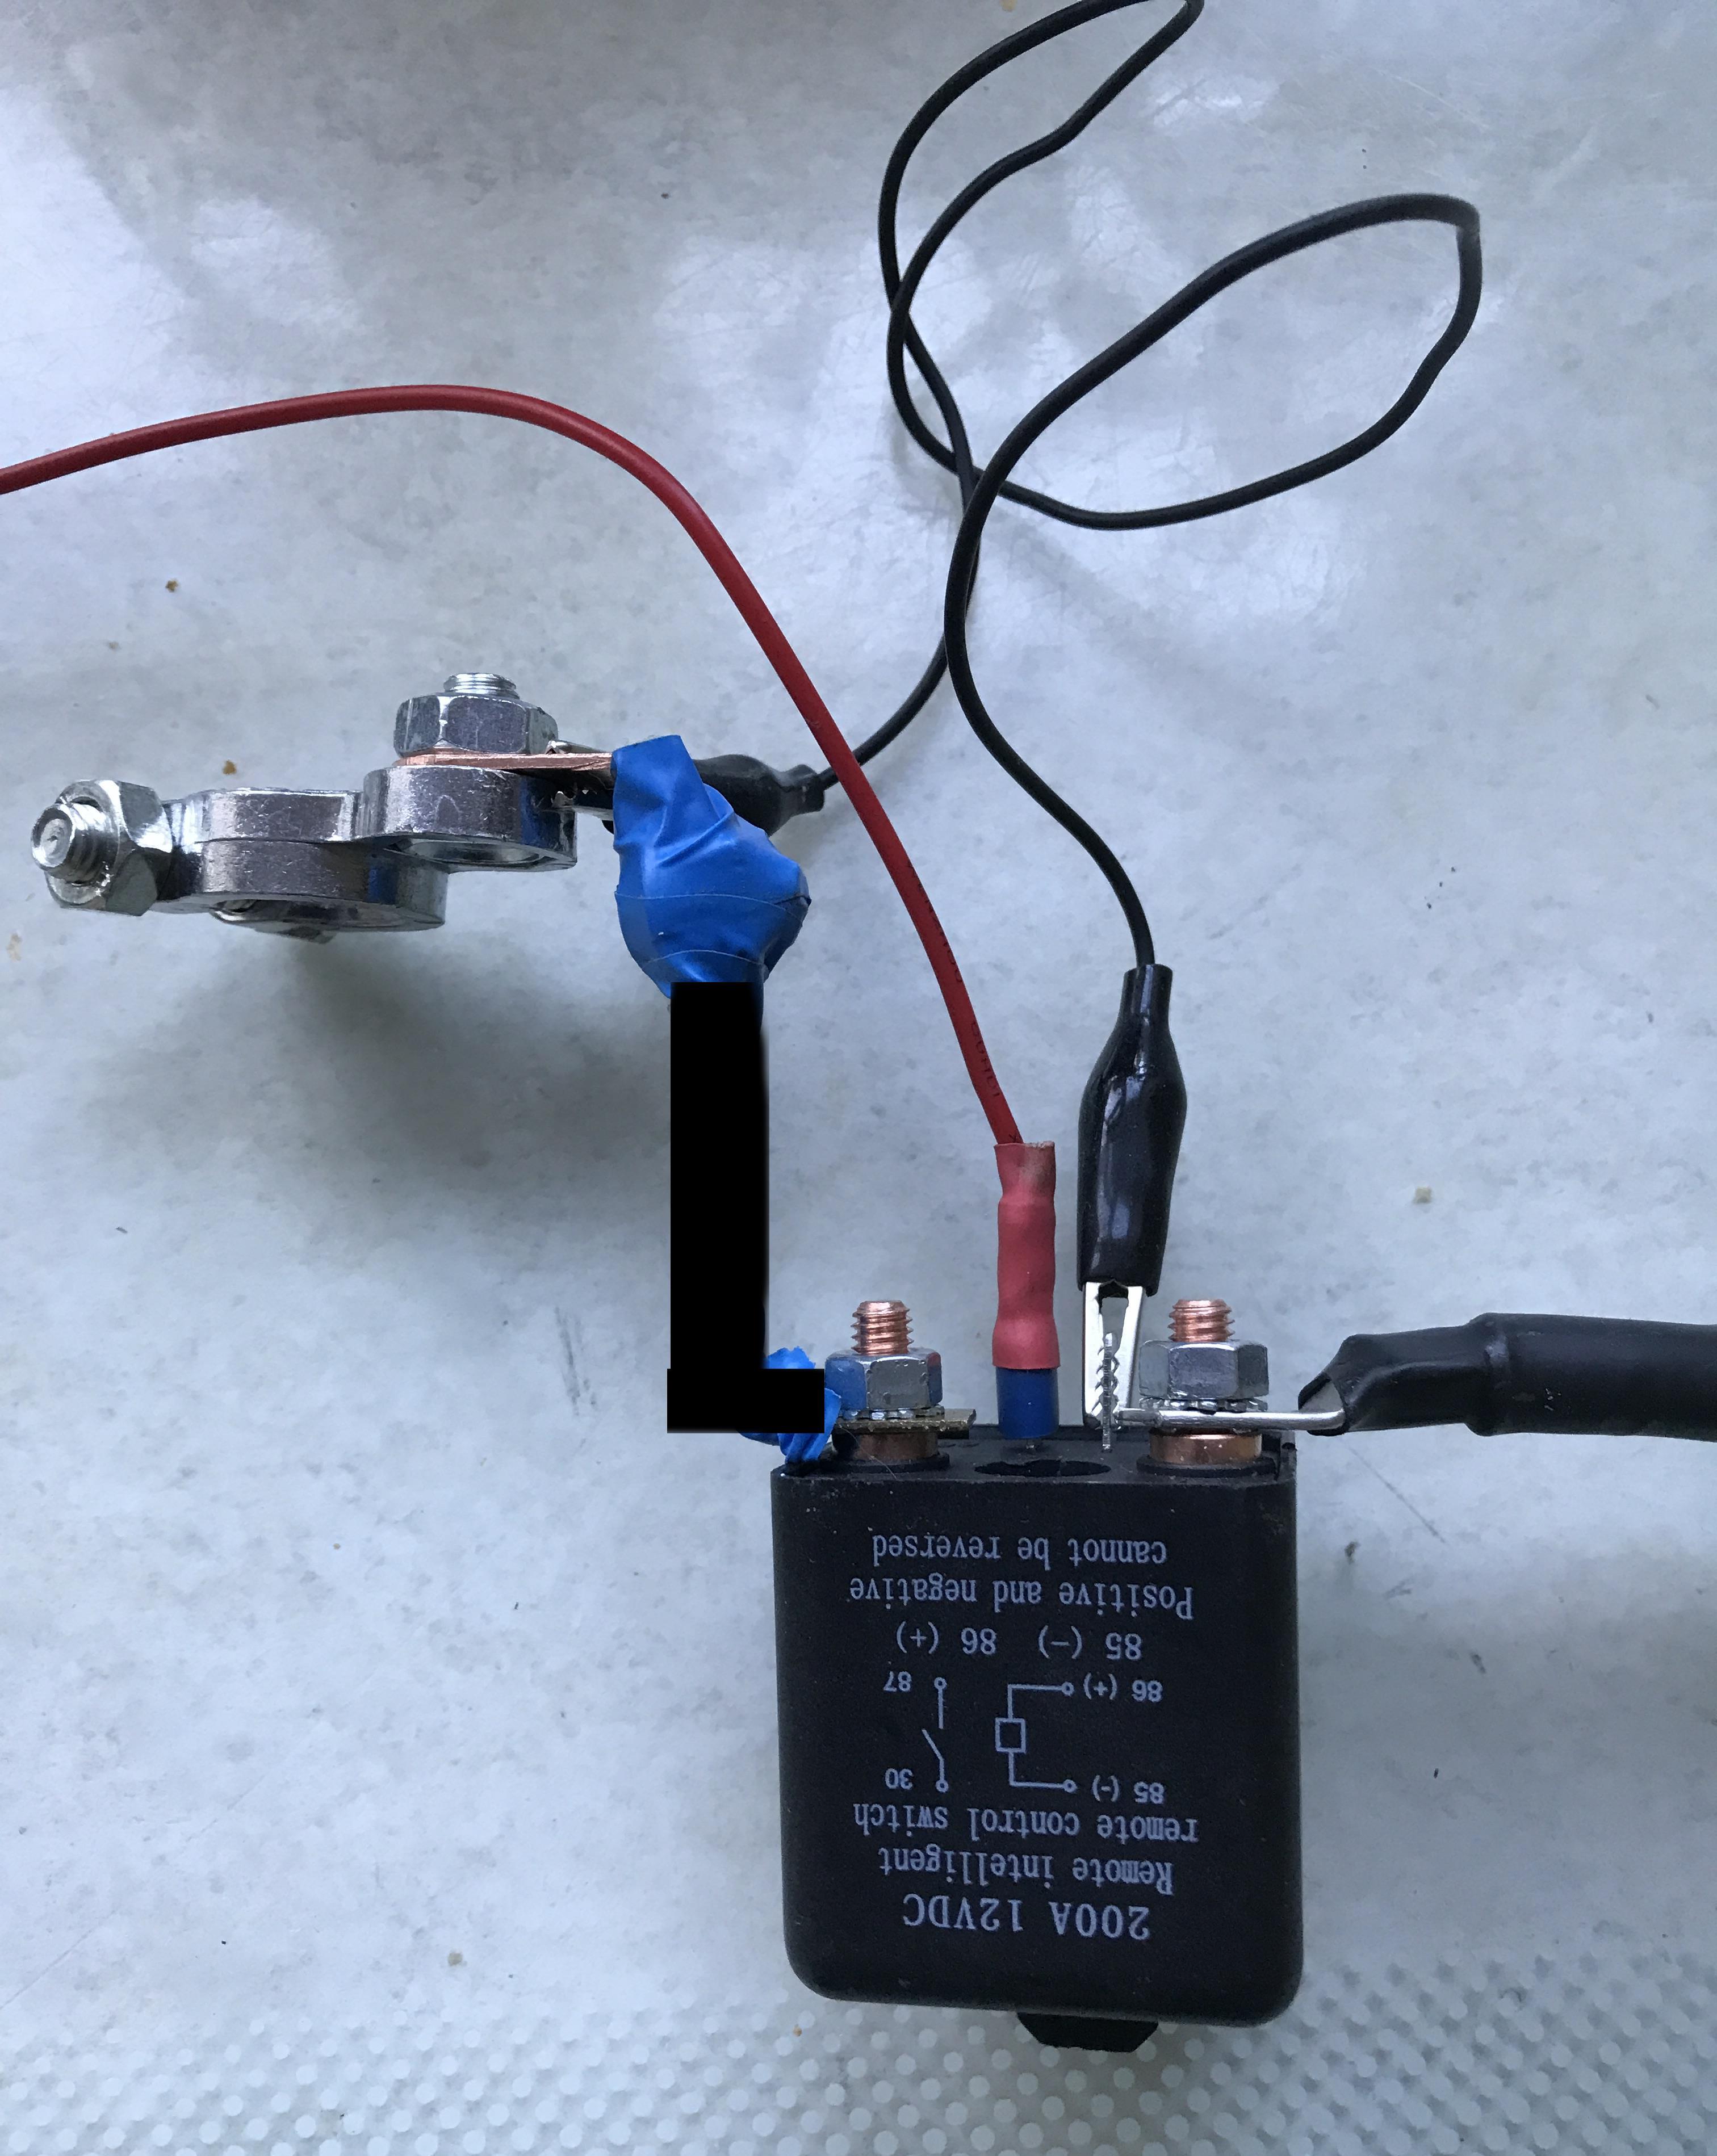
The only addition was to find a metal strip, drill out a couple of holes at each end of the metal bar, bend the metal 90 degrees at both ends as to allow the bolts to be connected. My piece of metal was a little short so I used the copper plate from the kit and joined them with another small bolt, indicated by the blue insulation tape - not a pretty sight, however, no one will see it. ;)
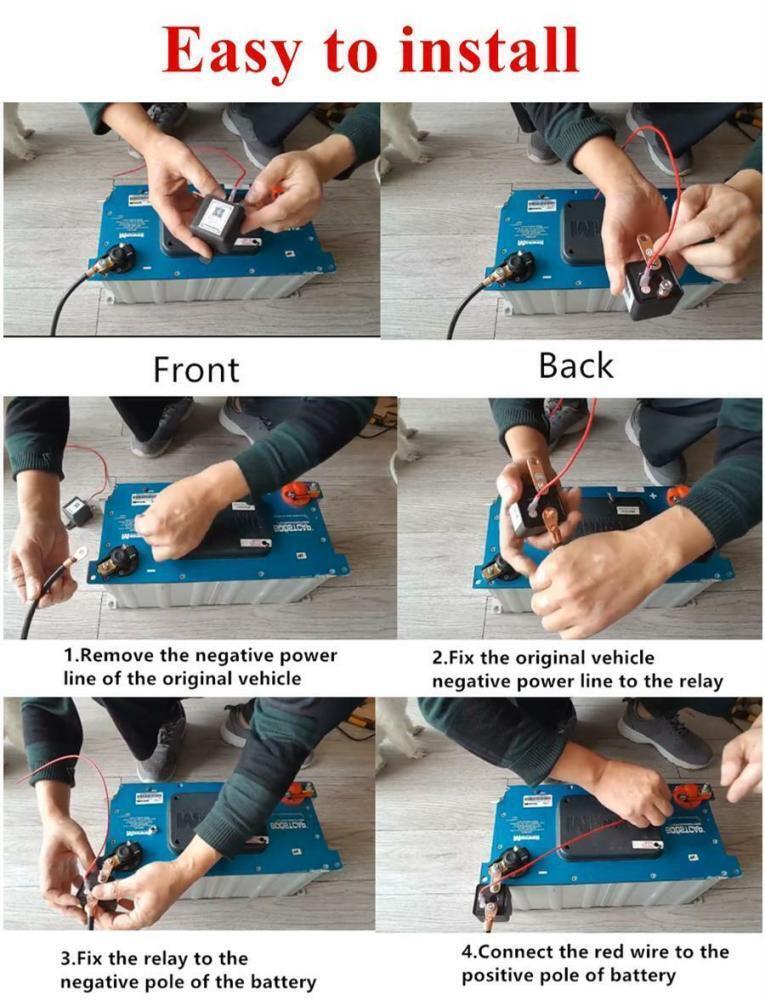
The next task is to disconnect the battery at both posts (Warning note): write down your radio Code/number of your radio before disconnecting your battery or at least switch on your radio before disconnection, as your radio will not work again on re-connecting without further expense, that's if you fail to note the code/number, (ask me how I know? Years of experience - whoops!)
<<< As you can see in this image, space it at a premium here, with the extension vertical metal bar on the Relay, one can lower the relay, slightly under the shelf adjacent to the battery, however the battery will need to be removed first to get the Relay under the shelf initially and the battery manipulated back to inside the well. This can be a fiddly, SOB, especially if working alone and having to justle with the positive leads and a heavy battery at the same time. Another useful tool to have during this task is a pair of long nosed pliers, so one can reach down and grab the extension bar connected to the relay, or if feasible to reach down onto the battery clamp, (Once the battery is back in place), this can make the job much easier. This can be an awkward task, but is definitely doable,
Note: The Wiring
<<<Red to Pos Batt Post
Blk wire 85 to batt post 30 Neg
earth/Neg
Black to Earth/Neg
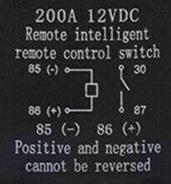
86
Bolt
85
87
Earth Strap >>>
30
batt post 30 to Neg Batt post
Mock-up
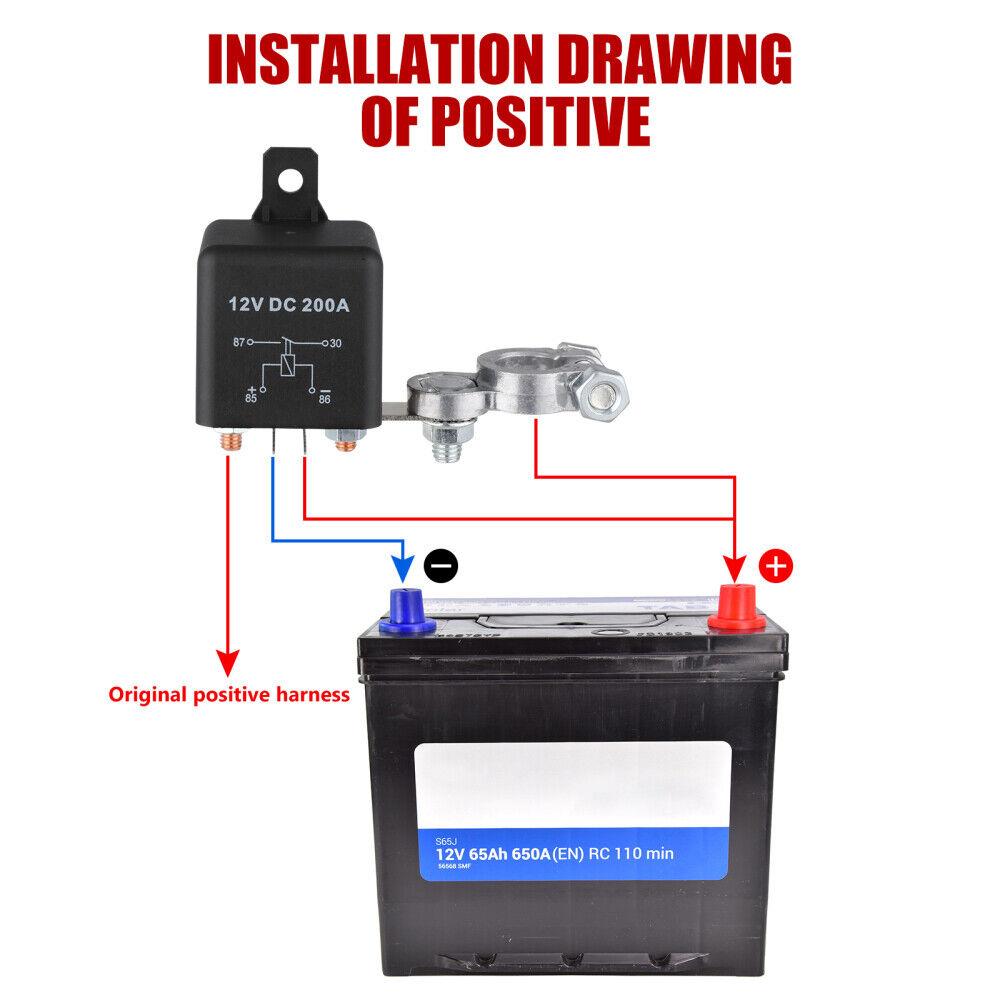
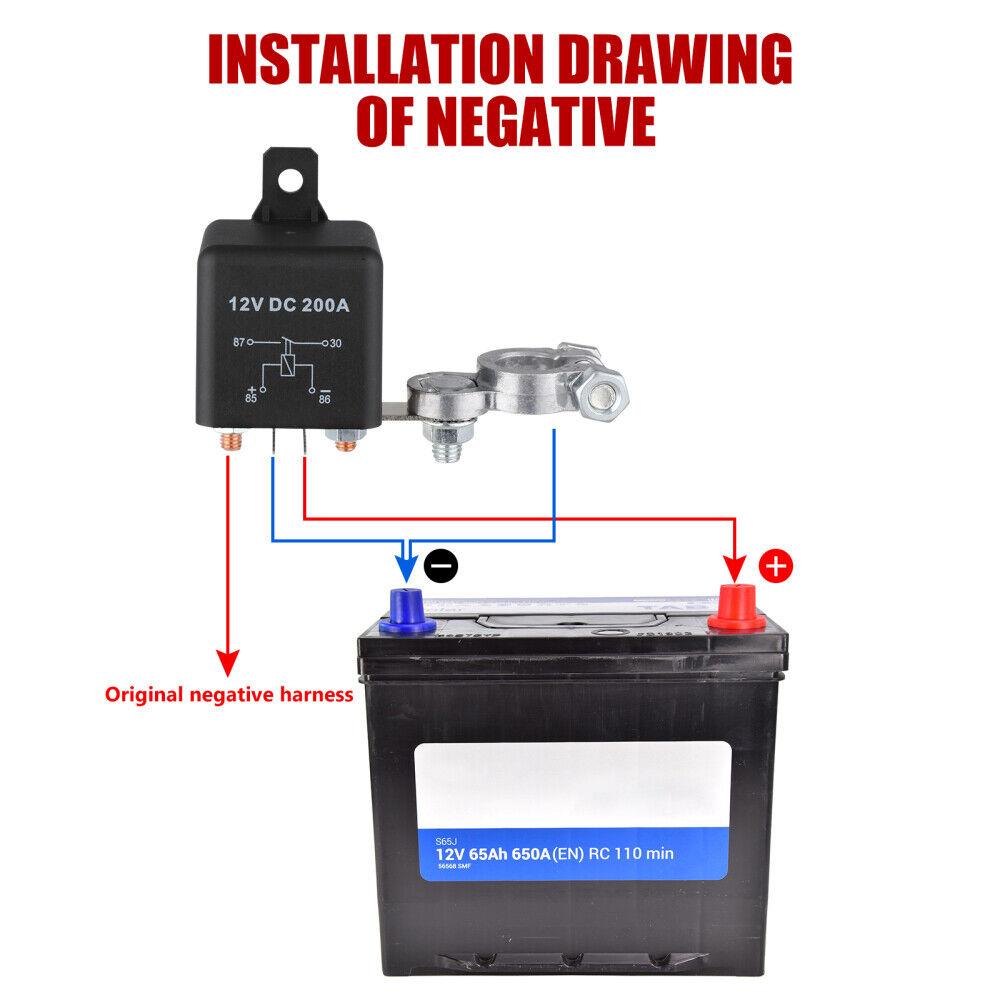
Relay: 30 = To Earth on Battery 87 = To Earth Strap on Chasis (Use existing chasis strap of the battery)
Two Wire Connections: (Red and Black wires supplied) 86- Red Wire = Positive/+Live on Battery 85 - Black Wire = Negative/- on Battery Terminal 85 should not be connected to the chassis earth strap side, does not work.
Intalling:
With Positive and Negative Battery Posts Connected, this leaves the final test. 1. Start the vehicle normally 2. Click the 'OFF', on the remote and restart the vehicle by turning on the ignition key. The Ignition Key turn, will generate the cranking sound leading to starting the engine.
3. By clicking 'ON', on the Remote, turn the ignition key and the car will not crank, turn over or start the engine as voltage has been cut-off or switched off from the main circuits. You have accomplished what you set out to do.
4. By clicking off on the remote may activate the sidelights, this is normal as the circuit becomes live
General tidy up the Boot/Trunk area, return your carpet, Tool /Mat Cover to it's original placement - Job Is considered Successfully done!
Important:At this point, it may be wise to just check to see if the remotes work with the established connection points, are correct for your set-up. If you have a 12V power source or another spare battery lying around, charged-up, this could help.
Make sure the Relay terminal nuts are tight and the extension bar and battery clamp are correctly positioned before deciding to manipulate it within the shelf space.
Testing option: Using Crocodile clips
Use permanent clamped connections when satisfied the connections are good.
See Other Related Information relating to this project: Purchase, Diary
with a push and pull of the battery to one side or another until the battery clamp, (easier to grip onto than just the bar) has been prised up or worked up as one wrestles with the battery, eventually with the outcome of the battery clamp resting on top the battery. The battery terminal can now be connected to the Neg. battery post and secured. The Relay can then be manipulated to the required position to sit neatly under the shelf.
Using Negative Connection
The a Positive Connection
Optional Wiring Diagrams
I Am Using Negative Connection
Automatic locking when driving, remote control does not respond
Some kits will comprise of a useful pillar, or two battery pole connectors with incorporated heavy battery wire clamp, (not inc. in this project) and will vary from supplier to supplier. Shop Around as prices will also vary based on components used.....Further research also suggests they can be obtained now, via British sellers.
Today, I had decided to fit my remote battery isolator, ok, I could use the fuel-cut-off manual switch already fitted to my Z3, or if in a dubious location, have the choice of using both. The only risk here, is having a car that becomes a recyclable commodity, in terms of being a donor car for someone else's hobby... sometimes using the manual switches can prove to be inconvenient, and sound of an alarm can be the main deterrent. Another aspect is; if one has a passenger you don't really want them to know the whereabout of the switch or one needs to be somewhere urgently.
This comes as a complete kit and is a manufactured product from China - it is relatively cheap and already configured to be used with a remote. It comes with two remotes within this kit, one for your daily set of keys, the other for your spare set of keys.
Come with 2pcs 320 Feet New Style Remote Control.You can even control it in your house,One button control on your dash for the whole car power system, Remote Receiver Standby Current is very low (0.003A),Universal for DC 12V Camper Trailer SUV Van Small Truck Agricultural Vehicle Trike Auto Off Road.