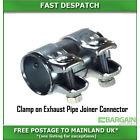
1. The wiring up of the rear heated window (parts arrived 25.02.19, however, still missing parts) 2. Replacement of the centre console, cleaning and fitting (With good weather) (Fitted 25.02.19) 3. Sort out the wiring within the console (done 03.19) 4. Re-fit Radio/GPS (done: 27.03.19) 5. Fit a new seatbelt clip onto the driver's chair (Fitted: 25.02.19) 6. Sort out minor bad earth, interior lighting in boot (New LED Lamp Fitted: 30.08.19) 7. Replace the Serpentine and cooling drivebelts (not too urgent) (Fitted: 30.08.19) 8. Sort out the drop in the front bumper and rectify 9. Prepare and respray the back bumper 10. Sort out some small minute dents in o/s door, (when funds permit - tap out specialist)(8,9) 11. Rear o/s wing has a slight dent, (not too noticeable) 12. Purchase and fit an exhaust cut-off with electrics (parts arrived 04.03.19) (fitted to a fashion .05.19 again, 31.05.19) Finally(26.06.1) 13. Mirror indicators, fitting and wiring up 14. Replacement rear brake discs and brake shoes/pads/sensors (parts have arrived) -Also correcting a possible problem with handbrake - (Bled Rear done: 24.02.19) -Fit Brake Pad Sensor sort out light problem - (Replaced and fitted) (Warning indicator Light sorted 22.06.19)
11.05.19 Well! We are going through the rainy season April - May in the UK, the weather is definitely Bi-Polar; throwing all types of weather at us and it is having hot, cold, rain, sleet, frost, sun, different seasons all in the same day. This can be a little frustrating as one knows there is plenty of work to be done, promises of warmer weather via the 'Met', so far alludes us, and will no doubt require some patience from me... During this wait, I have looked through eBay and purchased a few items, good deals and compliments the old toolbox, (see the tools section). With this weather I will find myself totally broke financially if this spending trend continues...:)!
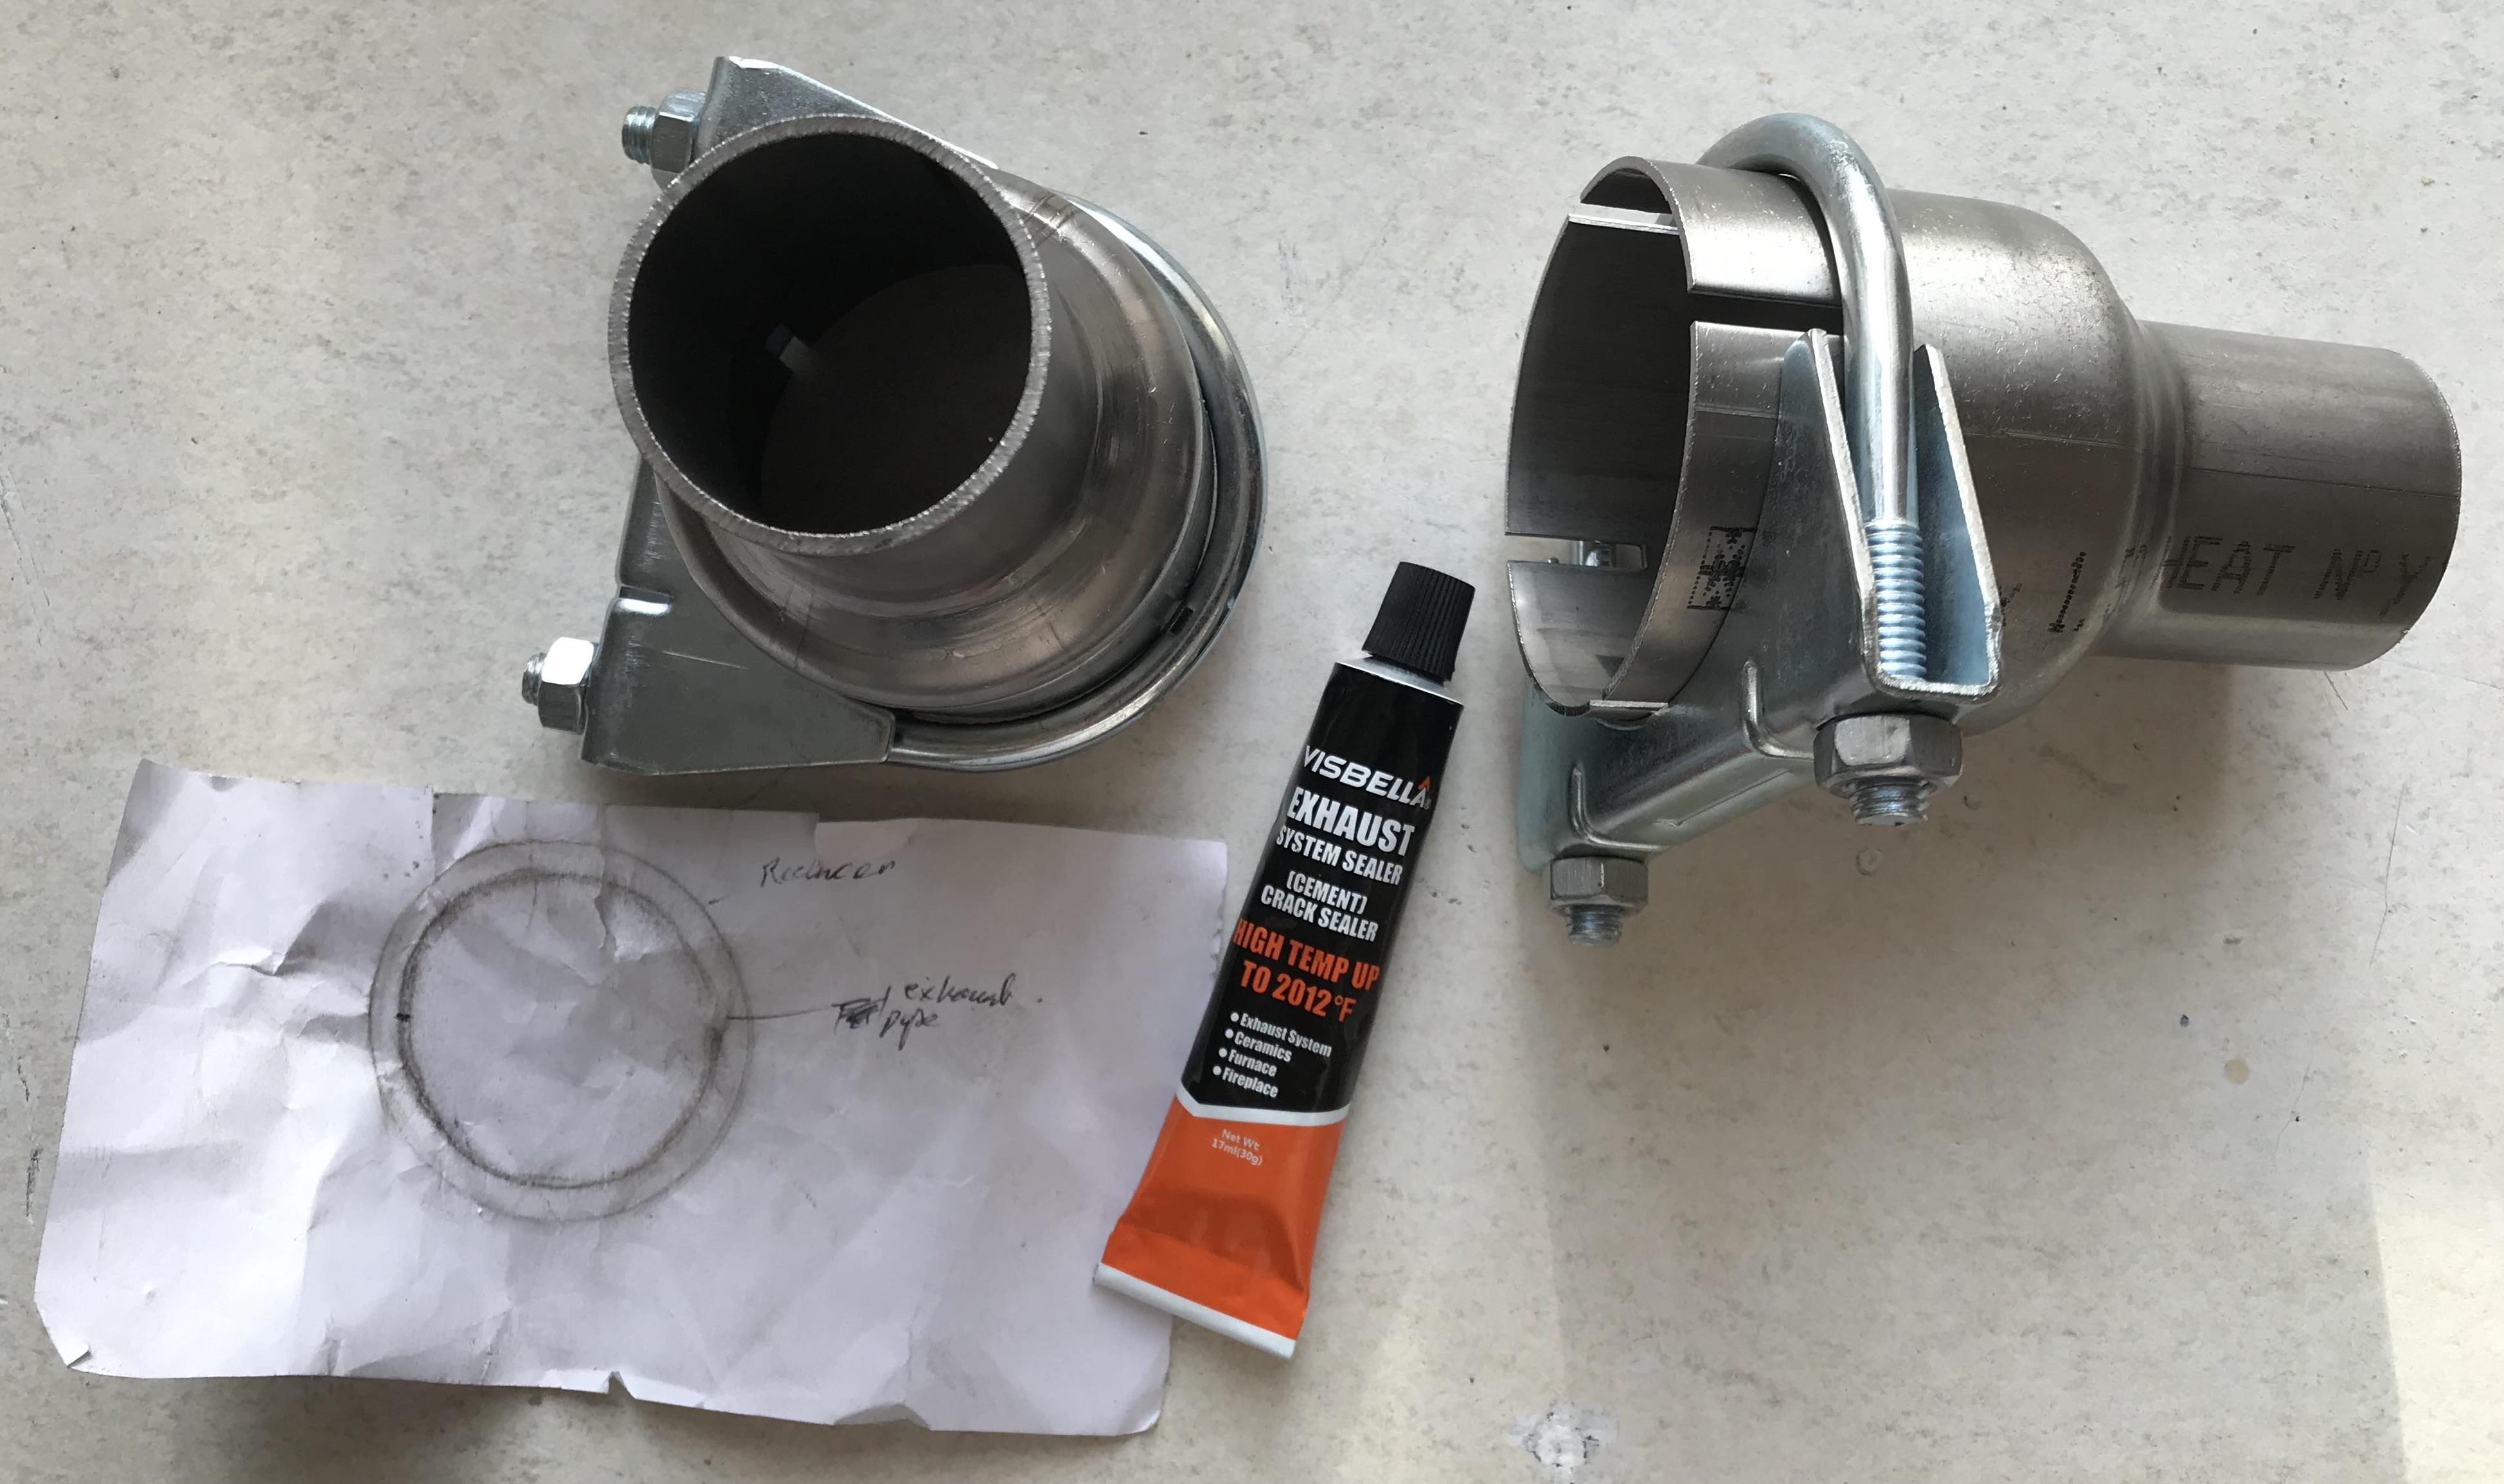
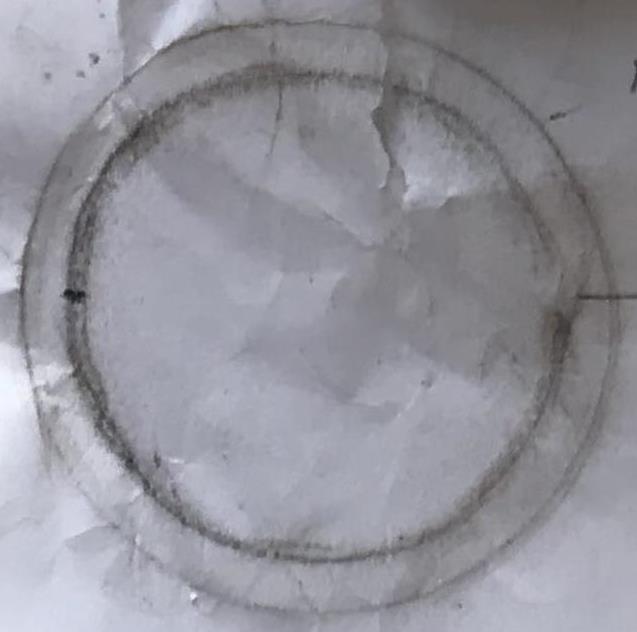
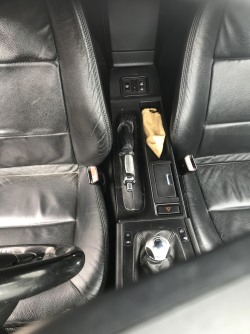
13.05.19 Today the sun is out with a mild breeze, ideal weather to work on the Z3. Today, I had decided to have another look at the exhaust, my son and I, had cut a section measuring around 4" (10cm) on my previous visit and we had found our measurements were slightly out by a lot. It was a scramble to try and get the exhaust fitted back together again to the point of just about hearing minor blowing and to get back home without being pulled over by the police, acceptable sound on the decibel scale. The problem was getting the diameter and circumference of the exhaust pipe, unfortunately this particular exhaust varied it's diameter and circumference all along it's length. The fortunate aspect was the length of pipe initially cut out and patched back in for the quick repair. This piece or length of pipe was what I was going to retrieve. The strip down of the sleeves was fairly straight forward and with the section of pipe; I used a piece of paper to trace the bought reducer diameter edge and the same with the section of pipe, rubbing the end all around the circumference, leaving an imprint of both the apertures on the paper. (this left an imprint of the inner and outer edges, ideal when it came to measuring for the replacement reducer).
The reducer I had bought off eBay was obviously too big by at least 5mm and would require a good dose of exhaust putty and what ever else could be used to fill the space in between, however this is not going to be the way forward. Looking at the eBay advertisement and looking for the required measurement in the adverts, I noticed a company address, the company was based in Redditch, a stones throw from where I reside. As it was getting late by this time, I had decided to check it out the following day, this only left putting everything back on the car, this took twice as long, again the time was spent making the reinstallation repair to fall to an acceptable decibel level and this was achieved.
14.05.19 This morning, (another nice morning), paper in hand with my diameter/circumference imprints, purchased reducer and the box containing my 'Y' section for the cut-off. With GPS mapped in, I headed off to Redditch, (GPS reception can be dubious in this region, plus road detours and those numerous islands), however I stumbled across the entry with the business names on a blue background Board, (can be easily missed). A gated small factory yard with some industrial units and a fair number of purple Arctic Truck Containers. There were a few people about, some in their containers, (so to speak) I did have to ask where this company 'Every Exhaust Part Limited' was and there was a sign of sorts, one could describe it as a little inconspicuous on the immediate right as one goes through the gate entrance. This unit, was an amazing site, machines of all sorts, a true traditional snug workshop, all designed for bending, reducing, enlarging tubes and refabricating metals.
Since I had not seen my particular measurements advertised for my reducer anywhere on eBay, I assumed these particular measurements were rare and fell in the category of 'Cost a Packet'! I couldn't be further from the truth. The owner/manager of 'Every Exhaust Part Limited' was very polite and helpful. I told him my situation and I showed him the paperwork or imprints, as well as the 'Y' Section and the reducer I had bought previously. With a gauge he proceeded to take measurements from my imprints, he took my bought reducer and reduced the one end to the pipes measurements or just under; as he suggested that this would allow my reducer to be inserted into the exhaust pipe, allowing a tight seal, preventing leaks. It was intriguing to see how he operated the machine and how easy he made it look; to get the required results. It was watching precision and skill and it didn't take him long either.
As I would need two reducers, he proceeded to produce another one from a stockpile he had of the same sized donors. He also recommended slits to be punched into the reducers on the one end and to use the conventional exhaust clasps x 2 for retainment; since the pieces were not going to be welded. All this was to help with conserving the available space on the small stretch of exhaust under the car, he also threw in a tube of putty paste for good measure. The bill came to, (wait for it!) £10! A bargain, OK, I did have one reducer already I had previously paid for, however it was not wasted and the incorrect size was corrected for me, this was also a saving. By going to the company direct may have also cut the cost concerning the larger measurement increment deduction, with no doubt. I had got my exact measurements for the right price, especially when comparing the 'universal all size tubes' were selling on eBay for £15+ each, they required cutting to the required length in most cases as an additional process and this; I had escaped the need to do that. More importantly I had the correct sized reducers in my hands ready to fit, no waiting for post... (I will leave the details of the company within the Cut-off Exhaust Workshop, this company I can recommend wholeheartedly, their service and product was and is excellent; for me at least).
This now, just leave fitting the parts and installing the electrics.
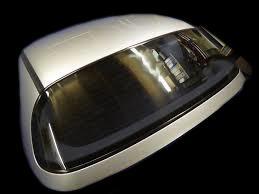
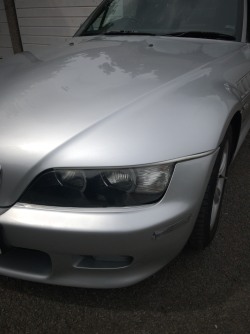
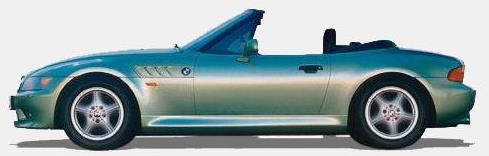
I quite like the contrast of the cream and silver, really >>> down to personal choice and of course, the availability of other colours within the market place...
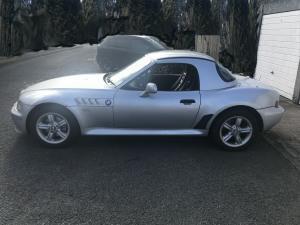
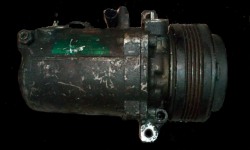
This is the photo of the Donor - the hardtop looks to be lighter or a cream. It looks in good condition, for the price of a hardtop, it should be!
15.02.19 With confirmation via a text message, my hardtop is being delivered on Saturday, (16th) with that in mind and considering the weather is mild, a great opportunity to start on some of the jobs I had been putting off, namely the brake rotors and brake calipers. The reason for putting these jobs off were mainly down to stubborn hex nuts. It is about mid afternoon, the car is out of the garage and up on the jack. Looking at the hex nut, through experience and research there are a number of ways to remove stubborn hex screws/bolts. The following list is an example:
1. Use the correct sized Hex Key 2. Drill the hex bolt out 3. Chisel the hex bolt out, (with hammer and cold chisel) 4. Use an impact driver (Electric, air, or manual) 5. Use a spring centre punch 6. Replace the wheel hub totally, (extreme)
I have seen all these removal methods work depending on the severity of the job. I had already tried the heat treatment, WD40 and the use of the hex key earlier on in the year and without success, so this time, on the choice scale it was going to be the cold chisel, (note: damage can be done to the hub using this method, it is ok; if replacing the rotors with new ones, no problem..). Commencing with option 3, it did take around the 15 to 20 minutes to start in dislodging the hex, this particular hex nut was sunken deeper than others I had seen in the past, however the method did work, the nuts eventually rotated and came out with the occasional squirt of a penetrating oil, left to soak in for a period of around fifteen minutes), it did require patience and perseverance... (not forgetting and as a reminder, one also needs to purchase the replacement hex nuts before commencing with the job, it was fortunate I had prepared for this, as the old hex nuts were scrap)…
When the old brake rotor was off, it is always good practice to inspect the hub, bearing and caliper, rubber bushes and the general state of the metalwork generally. Since I was replacing the calipers and disc, I also proceeded to take off the pads cradle and the caliper units, the caliper was temporarily supported by a bungee clip. I was quite surprised on how the metalwork generally was looking in appearance concerning areas like the wishbone, suspension and all the bits surround them. It was rusty and flakey, the calipers had also seen better days and I was doubtful that they even worked from the look of them. (they must have done so; as I had observed the brake test during the MOT however, they were in my opinion, at the end of their life or needed a good service). Since there were replacements I only needed the wire brush, abrasive paper and a flat bladed screwdriver to get the flakes off; areas like the dust plate, hub and anywhere else needing the 'TLC'. (Preparation is important and time consuming, but worth all the effort for a good finish, this can take up to another good hour plus). The dust plate on this O/S was reasonable, however it was in desperate need of a coat of rust treatment and paint. I was given a solution in two small cans by the windscreen installer on the earlier occasion of a screen fitting and this solution seemed to work very well. (unfortunately the solution can only be obtained within the trade it seems, as an alternative, anything is better than nothing to help protect those vital components). I also treated the other metal work that had also seen better days, they looked presentable when I had finished with them and it didn't take very long for the treatments to dry.
With the new rotor on, new hex nut in place, the metalwork had been treated, I was ready for the disconnection of the old caliper that was supported on a bungee clip. The process did prove tiresome; as the brake pipe nut was seized onto the caliper and required WD40 and did take some time before I could unscrew it from the main body. The thread did eventually give after I took some mole grips to it, the numerous correct sized spanners failed to do the trick and only contributed to rounding off the edges of the connecting nut. (Note and another tip: It is always best to loosen the brake pipe fitting before proceeding with the dismantling in an ideal world; this will allow to get some anchorage for leverage, as it is difficult especially when the caliper is just dangling, the pipe is never long enough to be lowered enough to retain the caliper in a portable vise).
The reconnection of the brake line can be just as awkward, when attaching the pipe to the new caliper, be prepared for this, bearing in mind the added leakage of brake fluid onto the new caliper, at the same time having to rotate the caliper, bearing in mind the pipe is fixed at one end and will only twist and flex making the task very difficult or a further time consuming episode. The problem is getting the thread to connect to the new caliper, it is not easy. (unless a new pipe is fitted onto the caliper first and then attached to the junction. (Use latex/plastic gloves, eye protection and clean up the caliper once the pipe has been fitted; as the brake fluid is corrosive and toxic, this should be done before fitting, the corrosive fluid will contaminate any new brake pad/shoes and will need to be replaced). With new plates/rotors, it is also best to replace with new brake pads, even though the old ones maybe still usable. The new pads will evenly wear onto the new plates and visa-versa.
Now, all connected and a final check, wheel back on and bolted to the correct torque.
This leaves the other wheel to be done and all with the same process to go through again, with finally a possible need to bleed the brakes before venturing onto the public road... this I may need to do; sometimes one can get away with keeping air out of the line, however it is always best; just to make sure as a price cannot be placed on safety, and then the job is done...
16.02.19 Today is the day, delivery of the hardtop, scheduled around 11 to 12:30pm give or take.... and he turns up right on time....
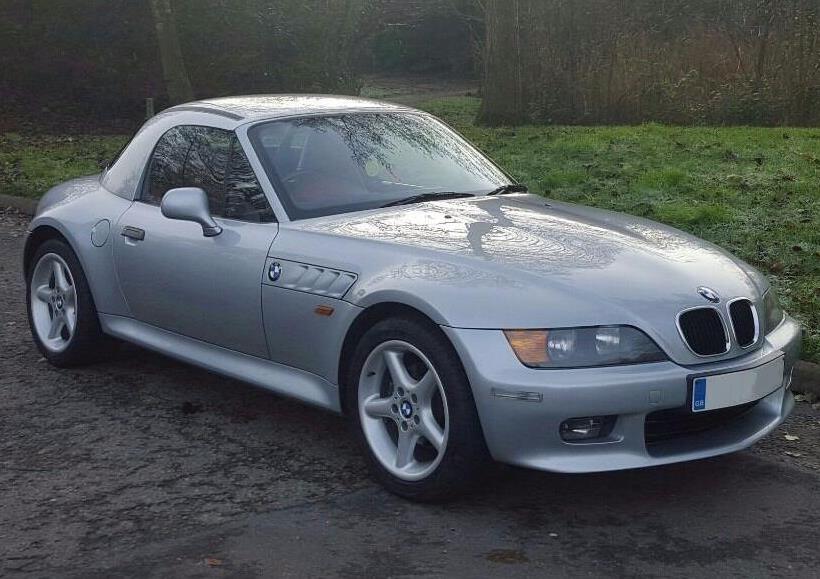
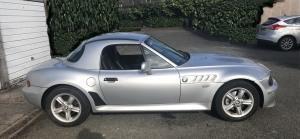
Right on time, the 2.8 Z3 arrived without a hitch at around 12:30pm and the seller was guided to the garages and the 2.2i was driven into the yard and work started, the seller was eager to miss the conventional British cuppa as he had a two and a half hour drive back home. Naveed was sociable and he provided a little history of his life, he bought and sold cars part-time and showed me photographs of a selection of cars he had rectified and polished up for the sales. The 2.8 was another vehicle he was selling on. I gave it a look over, automatic, wood effect console, bodywork was not too good, mileage high 157K. He had also mentioned that he had also sold a number of Z3 hard tops separate to the vehicles and it was proving to be a good market. The hardtop he had delivered today was in very good condition and a perfect colour match, Titan Silver. The advert photos were of another vehicle in silver and with a more of a lighter coloured or contrast hardtop or it was just the advert photo causing an optical effect. However, I was happy to see what I saw, well it could have been red or blue.... and the fitting commenced.
Naveed and I, first took off the brackets of one side of the donor 2.8, (automatic!) and proceeded to fit it onto my Z3. One needs to be careful not to drop the screws and nuts into the tight crevices, (not much space to work in and an aerial magnet is an advisable tool to have at hand). (See Workshop for fitting).
One side done and we commenced with the other side with the electrics, (n/s passenger side). Bracket in, this side can be a little awkward as electrics are in the way. A note of contention, the seller dismantled the demister electrics from the 2.8 and assumed it was not part of the deal and kept it. I have priced it and they are priced from £12 to £28, (£23 from BMW) so I was a little mithed to say the least, but it was not mentioned in the sale ad, so I came to terms psychologically and let it slide. Naveed did try a similar routine with the 'T' Hex tool and the demister switch, however that was part of the deal and advert and I managed to retrieve them with a laugh and a joke.
We continued to install the two bolt threads into the front two corners of the hardtop. A point to mention, this hardtop needs to be lined up squarely and accurately for the locking clamps to clamp and the bolts to tighten up, if out of alinement as we found, the o/s bolt just kept turning and was not making contact. A careful thump with a side clasped hand on top of the corner helped to achieve contact, it takes a little patience but once done, one can be 'happy as Larry', I stood back and saw my dream.... (and that was not the seller!) It was the shape and the appearance of my Z3.
I shook hands with Naveed and thanked him for his help, he had worked well, he then rolled out the 2.8 automatic and departed. The job only took just over an hour, remembering the brackets also needed to be fitted and it was not just the time to attach a hard top. It should only now take around 10 minutes to attach and detach the hardtop at the most?
With gusto, I rolled the Z3 out of the yard and drove it onto the public roads, forgetting I had not bled the brakes from the previous day, that was an eye opener and a tear jurker and on return, it was the first job on the list with a tyre check for under inflation, a top-up. Job done!
Starting to live the dream...
So what are the remaining jobs on this project?
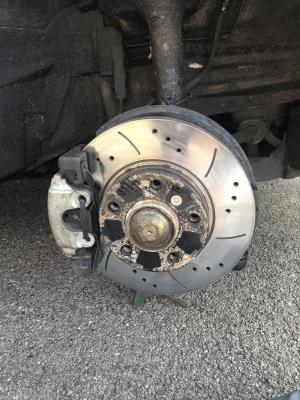
Replaced Front o/s Brake Rotor Hex Screw/bolt with painted caliper, spring and pad carrier
21.02.19 After a few days I got to thinking about the corrosion on the calipers and decided to order a new rear set of rotors and pads, this will also identify any problems with the handbrake and rectify the 'Amber Canadian light' on the dash. I had also ordered the essential wiring adapter for the hardtop a couple of days ago and while I was checking online, I ordered the exhaust cut-off, (This is another way of adding an extra few HP and some street cred with this 'Y'' System, a remote controlled switch to execute an exhaust rumble of a high performance car. This cutoff can be switched on/off, when one goes and does the local shopping errand, keeps good relations with neighbours too. A flick of the switch and one can become a drag racer with the sound to match. With better weather forecast towards the weekend, it could also prove an opportunity to prepare for and complete those other smaller tasks on the list...
23.02.19 The weather forecast was good today and another opportunity to sort out the rear brakes by preparing them with an anti-rust and primer treatment as I had done with the front ones a week before and of course will commence in replacing the old rotors. (The rear rotors were in good condition and I will use them as a backup; if future events warrant it. The rotor hex nuts came straight out today, no hacking this time, this was a bonus. I started on the drivers side at around 12:30pm. All of the brake module/unit was stripped down and with an inspection of the brake shoes and brake pads; I concluded they were reasonably new and without much wear. Normally I would replace them, however there was much life in both sets, so my new pads at least; will go back up on the shelf for another time. (I hadn't got around to getting the replacement handbrake shoes, so there was also a saving there for now). I Did decide to break down the shoes on the driver's side for a more, closer inspection and a clean, the strip down, parts were cleaned and greased where applicable, noting to be careful not to put the grease on the brake pads, (would all be a pointless exercise to have brakes in the first place). The stripping down process was a big mistake, it took over an hour to put the parts back together, tedious and awkward would describe the situation, main problem was with the lower spring, adjuster and the lower small brake caliper at the bottom, they just didn't play nice together. Before that bright idea, I had decided to coat the metalwork with the solution I was given, it kills rust and acts as a primer all in one, in fact this took the majority of the time as the metalwork was such a state; such as the wishbone suspension, shocks, etc. I also greased and WD40 working parts. When I was satisfied with that task and it was completed, I then adjusted the brake shoes to lock on three clicks.The new rotor went on with the new hex nut, repainted cradle, outer caliper and retaining spring. This sounds easy when listing it, however it was strenuous on the back and the knees and the whole process took hours and time was ticking on. (At one point, I thought I was going to yell out for some help, mainly so I could get back up on my feet, the joints were slow to react and just didn't do as they were suppose to, 'as says on the tin' I must have been in one position for a good amount of time, weird that!).
The passenger side was going to be a little more straight forward as I had decided not to strip down the brake shoes into their independent components and waste the remaining time I had left, it was starting to get a little dark as the sun had gone in. Since the brake parts were not going to be replaced this time around, I continued with cleaning and coating the metalwork, after a good rub down and the movable parts were greased, I then put all the parts back together again. Again, the hex screw did came out easily on the passenger side, as did the old rotor, (lucky on both jobs) and a new rotor was also attached to the hub, again without a hitch. At this point the adjustments took place and the handbrake locked at three clicks. The cradle, brake pads, pins, (painted, re-greased where applicable) and the bolts were tightened. The wheel was re-fitted and the handbrake and foot brake re-tested.
The handbrake clicked up to five notches with some force, a little more than anticipated and this may need a little more adjustment, it may just be down to adjusting the handbrake nuts inside the car and possibly it could do with a system re-bleed again. I am happy with the initial results and the brakes will be bedded in within the next few days before I attempt to do the re-adjustments with the braking system. The brakes are currently safe and are efficient. Note: The amber dash light still remains on, however, I believe it is the brake pad sensor, as the original one was missing the metal earthing clip, hopefully a replacement should sort that out and is on order as well as four new bleed nipples. The red dash handbrake light illuminates on and off also, with handbrake operation as it should. Another job nearly done for now and ticked off the list of things to be done.
25.02.19 Another long afternoon re-repairing the driver's chair seatbelt clip. I did do it the day before, however the clip did come detached as I was struggling with the re-installing of the chair, man-handling the chair back into the vehicle. So! The chair was unbolted again today and stripped down for the second time. Today it was less rushed as there was more daylight time and after an intensive workout, I was eventually pleased with my efforts. The strip down is fairly straight forward as long as one takes time to work out how the chair comes apart and the seat skin lifts off. (in my case there was no removal of staples as such, as it all works on a clip-in system, in my opinion a good uncomplicated solution). The same for putting the seat skin back on. Another point is the installation of the chair into the cockpit, this can be a very awkward exercise and is very time consuming, to line up correctly for the bolt and nuts to be inserted and tightened. I believe the problem is that the chair rails may become a little warped with the manhandling in and out of the vehicle, hence the problems with re-alignments. It is also important NOT to operate the motors during this time, as the rails will move to different lengths causing further alignment problems. (See Workshop for an in depth 'How-to' repair the safety belt clip - Guides for two chair models). However all these problems were eventually overcome and another job was done!
On to the next job, one of the biggest problems was with the replacement centre console, getting out the old one and putting in the newer one, or at least the one in better condition. Other problems followed, (bye the way, this is the norm for me, with home auto D.I.Y.) was with the re-wiring as there is not much room to play with; inside the underbelly of the console and dash and one can be very prone to getting hands stuck, cut or bruised. Most of the wiring is now 'hopefully' connected to the right points, this just leaves a few more of items to be re-wired, namely the USB port switches, (these needed to be replaced as removing them from the older console was difficult as they had locked securely and were reluctant to move home) volt meter and not forgetting the radio and GPS system. Can't seem to get a live feed for some reason and will need another half-day to identify and fix this problem, no doubt.....
It is now later in the day and I have decided after a rethink of the situation to re-do the radio/GPS wiring when the new supplies arrive and this will require starting again, in terms of using a new blank page, so-to-speak, this is easier than to sort out and identify where the problems are. At least this way one can get into ones mind where everything is. I will definitely use junction boxes for speakers, lives and earths this time around, no doubt there will be future developments on the system and this method will save time and effort, at least I labelled the speakers! I live and learn, well! At least try to..... this revamp will be for another day.
27.02.19 Another sunny warmish day for February and this always helps when it comes to getting motivated, as well as receiving a delivery of car parts. Today's delivery of the brake pad sensor, lighter extension and there was of course the brake nipples that needed replacing. This also meant a full re-bleed of the braking system from back to front. A fairly straight forward programme, however was more orderly this time around, with the refreshing of the new brake fluid throughout the system. Nipples replaced, brake system bled and rear brake pad sensor replaced and the dash light remains on. I am hoping after a number of miles, the light will go out. I have checked with my 110 analysis meter plugged into the OBDII socket and there were no indications to prove there was a problem one or two other codes had been dealt with and have now been cancelled. However the brake pad light still remains on..... another weird one, or one of the new sensors is faulty?
(done - Fitted 23.02.19)
27.03.19 It has been a month since my last entry, time has gone fast, the brake pad sensors have been replaced yet again and the problem of the dash light remains ongoing, even though the pads, rotors, the bleeding have all been addressed, I have even tried to do a reset using an open door, an ignition key to no avail. This only leads me to believe there is a fault in the pad sensor module line under the car or a possible bad earth somewhere? I have not dismissed the ABS sensors.
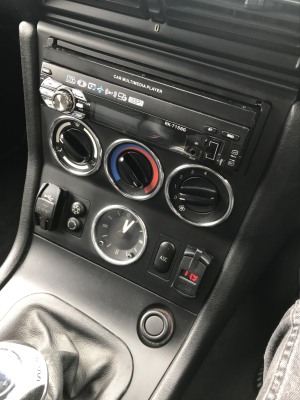
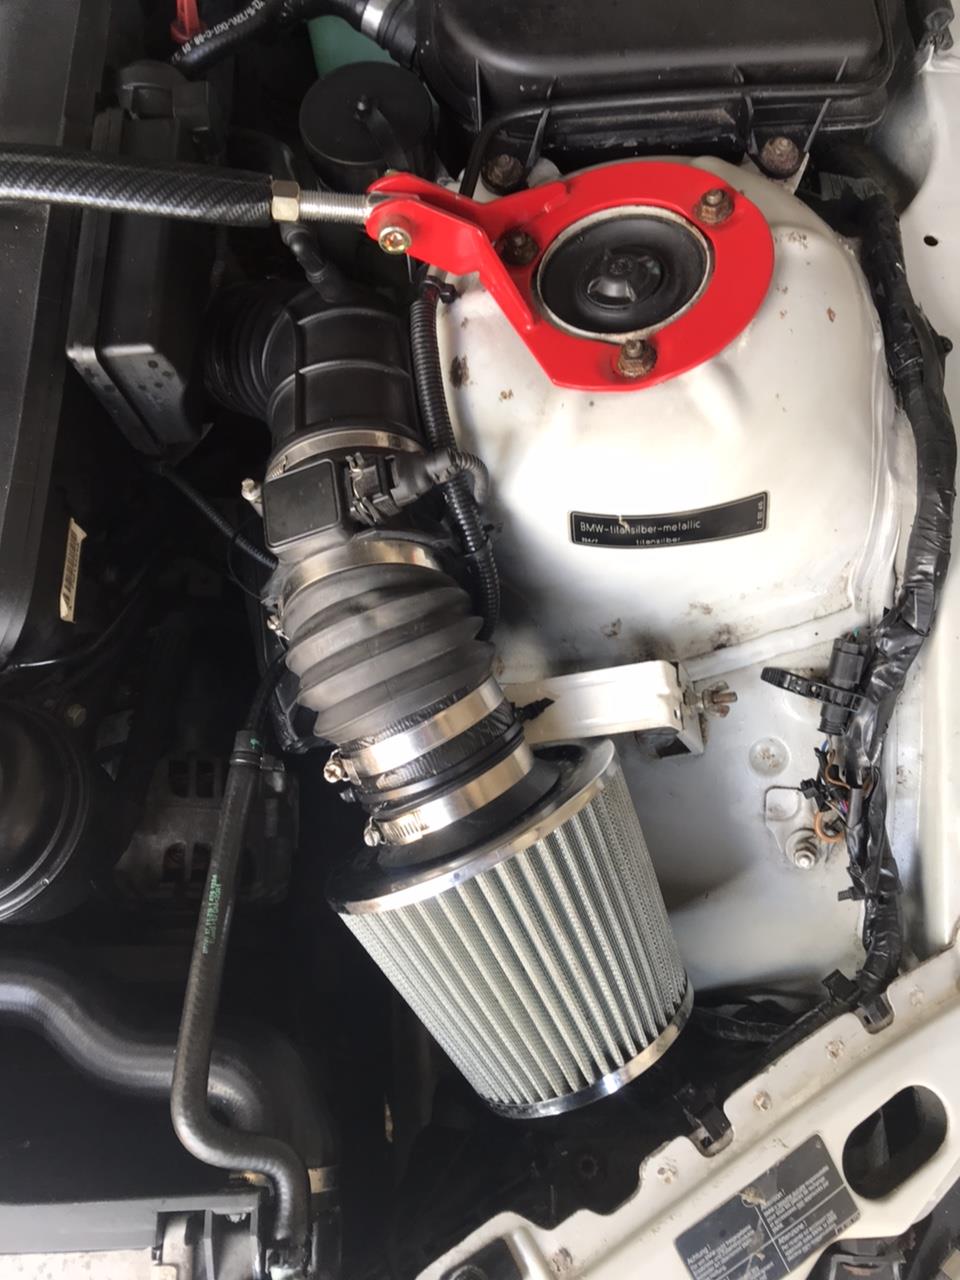
Not letting that spoil the day, the radio/GPS now has been rewired and reinstalled into the replacement console, some may disagree with my method of using chocolate block as in 'block' connections for the speakers, Earths and Lives, however by using this method the wiring is easily accessible and can be adjusted or rectified easily, it works for me....(Update: I am looking into another style of wire connector, review pending) the heater blower dials, knobs and rear module were also replaced, (the back blower module probably didn't need replacing, however I had the spare and it seemed to have a more positive 'click' than the previous one See entry: 28.10.18). The front footwell speakers are now working, (The original connections must have been bad as they failed to spring into life and only the rear ones were working fully) The system sounds quite good now and even better with the bass switched on, not bad for factory spec, it may sound better with an upgrade in speakers, but not today. (however earlier; I did add a couple of extra tweeters as previously mentioned in an earlier entry, this may have contributed to the sound quality see diary entry: 16.07.18). I also re-arranged the USB extras, that is the couple of switches that fit nicely into the front of the console, (see diary entry: 3.08.18) however the old ones were unfortunately destroyed, as they just would not leave their previous positions and two replacements were ordered with orange/red display, they were delivered and one turned out to have a purple display and was not used, I was not amused to say the least. (so much for the quality control with some of these so called businesses). Fortunately, I managed to find a spare switch and decided to refit that one, after rechecking it's functionality, they are now both working well. The volt meter USB is now in the front console rather than the rear, where the demister switch has now been situated for the hardtop. (so there is no struggling to view the voltage display as previously endured, with needing or having to take one's eyes off the road for a specific and potentially dangerous length of time). The WebCam has now been wired up straight into the electrics, with fuse also, bypassing the cigarette lighter plug-in, in other words the screen-cam automatically turns on and records when the car ignition is activated and the recordings can be viewed via my mobile phone if and when required. I also fitted another auxiliary lighter/accessory unit, again with fuse, just incase there is a need for one, this I tucked away under the centre console at the front of the vehicle, easily accessible if needed. (so no shortage of accessory input points and really makes up for day I purchased my Z3). There are still some other jobs to do initially; as to install the small wiring or 'tube kit' for the hardtop, fit the remote exhaust cut off and it's wiring. I am now starting to see the light at the end of a long tunnel 9 months on from my initial purchase....feels good!
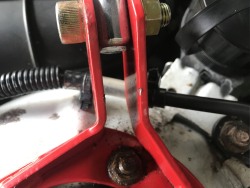
29.03.19 I decided to go and see my son and we had decided to try and trace the problem with the brake pad light on the dash and if we had time, to fit the cut-off exhaust. 'Best-made-plans and all that! I was looking forward to a good run of around sixty odd miles there and the same back, however on the way to my destination, I heard a clonk and looking towards my rear view mirror I saw a chunky bolt just miss the car behind me. I assumed it was debris from the trucks in front and in the slow lanes to the side of me, until I put my foot onto my brake pedal. They did work, but not as they should. After stopping at the next service station I did check all around and underneath my Z3 and couldn't see anything that could account for the problem. I decided to continue with my trip however with caution. Needless to say, I arrived at my destination just after 9am. We commenced with jacking up the car to check the brake pad sensors on the front off-side wheel. Low and behold I noticed the lower brake pad carrier bolt was missing. Checking our boxes of nuts, bolts and screws we could not find a replacement and this just left a trip to the local BMW dealers, Halfords and others... The bolts I got from BMW (x2) and amounted to just under £5, not bad considering their size. The top bolt was replaced, (the old one will remain a spare) and the lower one was aligned as with the slider bolt and bolted up to the required torq. My conclusion was, a fitting error and misalignment of the lower bolt and the slider bolt, giving an impression of being secure, but obviously now, they were not, hence the one eventually falling out. Not good for a reputation and one for the page of caution in the future. The situation could have been much worse across the board.
We continued to check the problem with the dash light and also came to the conclusion that it was most likely linked to the ABS sensors. This means replacing the ABS Sensors, again another time...
During our time sourcing the bolts, we took the opportunity to also source some sleeves for the exhaust cut-off fitting. After searching for exhaust sleeves or clamp, we found the costs retail; to be extortionate and geared up, to just make the retailers a large profit it seemed. Prices varied from £8 to £20, with a standard or limited diameter of 60mm. So, much running around and not much done today. I had already ordered a clamp/sleeve off eBay for £7.45, so we decided to commence this job another time. The journey back was good and the front brakes performed as they should, just love the sound of my exhaust even without the exhaust cut-off.
When the eBay sleeve arrived the following day; it was the correct length and width and I had decided to order another one. (See Workshop)
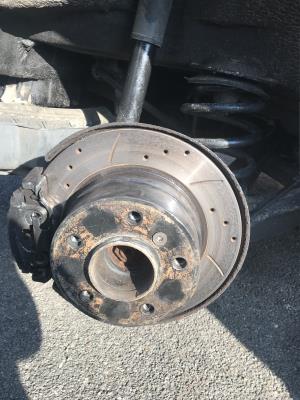
Update 29.03.19 Replaced Rear Drum Rotor a photo a month after fitting. Replaced Hex Screw/bolt. painted hub, carrier, spring & pad carrier
Arrived 30.03.19 eBay £7.45 Supplier: bargain_autoparts D 63mm x L 75mm
We did consider welding fabrication and were told it was difficult welding stainless steel onto standard steel exhausts. It is not the first time and it will probably not be the last, where are those people with the skills, no doubt it to do with the political establishment or it is just down to the mindset, some people just don't want the business or the challenge now-a-days it seems... However, I do prefer the sleeves to welding, as the unit can be dismantled and used again on another DIY project and it can save money too! (Did I say it saved money?)
12.04.19 Another early morning rise to journey the 60 odd miles for the fitting of my exhaust cut-off, pleasant sort of journey however with a slight traffic build-up, the sat-nav. lost it's signal for some reason, however I managed to get to my destination with the odd detour here and there. I had all the parts I needed for this operation or so I thought. My son and I got straight down to placing the vehicle on the portable ramps, axel stands and a chock. We decided to use a combination of tools, as we were doing this outside, electric retracting saw and grinder with a diamond rotor to cutting the exhaust pipe.
The pipe was estimated to have a 3-4mm rim and was in my estimates a thick gauge, definitely manufactured to last, the system was a through 'double' exhaust rather than just the single pipe, so we decided to cut the outer pipe on the N/S, allowing us space for the positioning of cut-off motor. We cut out about a four inch length of pipe (a little awkward, considering the Z3 was on portable ramps, i.e. depth and space generally) to start with and it was fortunate that we did only cut a small length as the size of the pipe was deceptive, especially when it came to placing the cut pipe, (for comparison) into the cut-off 'y' piece. It could be said it was equivalent to a straw and a large hammer handle as size goes, we totally got it wrong. This left us in quandary as the car couldn't be driven in this particular state of gut wrenching dragster bellowing sound... (however, I quite liked the idea of it, sense came back and the realisation that something was needed even if it was only temporary!)
The next two hours we raced around to most of the autocentres within the region to try and get a couple of exhaust reducers and we came away with two reduced sleeves instead; we abandoned the efforts to fit the cut-off for now and to concentrate of trying to repair the exhaust, until I could get the correct reducers for the cut-off. So another, what seemed to be a wasted journey it seemed. On the positive note, the pipe had been cut and repaired with a slight blowing sound, not too noticeable and when the correct parts arrive after we get around to ordering, the job should be a little more straight forward, (famous last words, I know...) So the job for another day. We decided to have another look at the wiring of the radio as the memory was not holding the time, date and radio station. To cut a long story short, we failed with that too, up to a fashion! Finding we had got two unidentified wires left over and not labelled, floating around and not doing what they were suppose to do. This would mean stripping out the radio again, to see where they were coming from and our fingers were getting frost bitten by this time. My son decided to drop a hint and put on another layer of clothing on for good measure, I did take the hint.
The cost of the journey and the parts required to patch my exhaust totally emptied my wallet and after further inspection, I thought ok, I had my debit card, however I had not used it for a while and forgotten the ATM numbered pin. It was only on travelling back home, I did start to sweat a little; as the fuel gauge needle indicated very low to nothing and the amber warning light had flickered on. I was miles away from home and on the motorway. (you know when you get that feeling in the stomach, thoughts race through your mind of a hassle of a car recovery, trying to obtain a fuel container from nowhere, the dreaded long walks, no sleep, no food, oozing gratitude with guilt towards those that may have put themselves out, or frustration to those that had not! Being helpless and with no form of reward to those offering help, uncomfortable situation....? ) With a song and a prayer, I did eventually manage to get home with great sense of relief; with what I thought to be a miracle; with possibly around two minutes of fuel vapour left, this was without exaggeration. As to say, the following day, even though I was pleased with the car's performance and enjevity towards it's fuel intake, I just left the car in the garage. Out of sight out of mind, for now at least until the warmer weather is a little more constant...
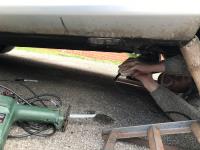
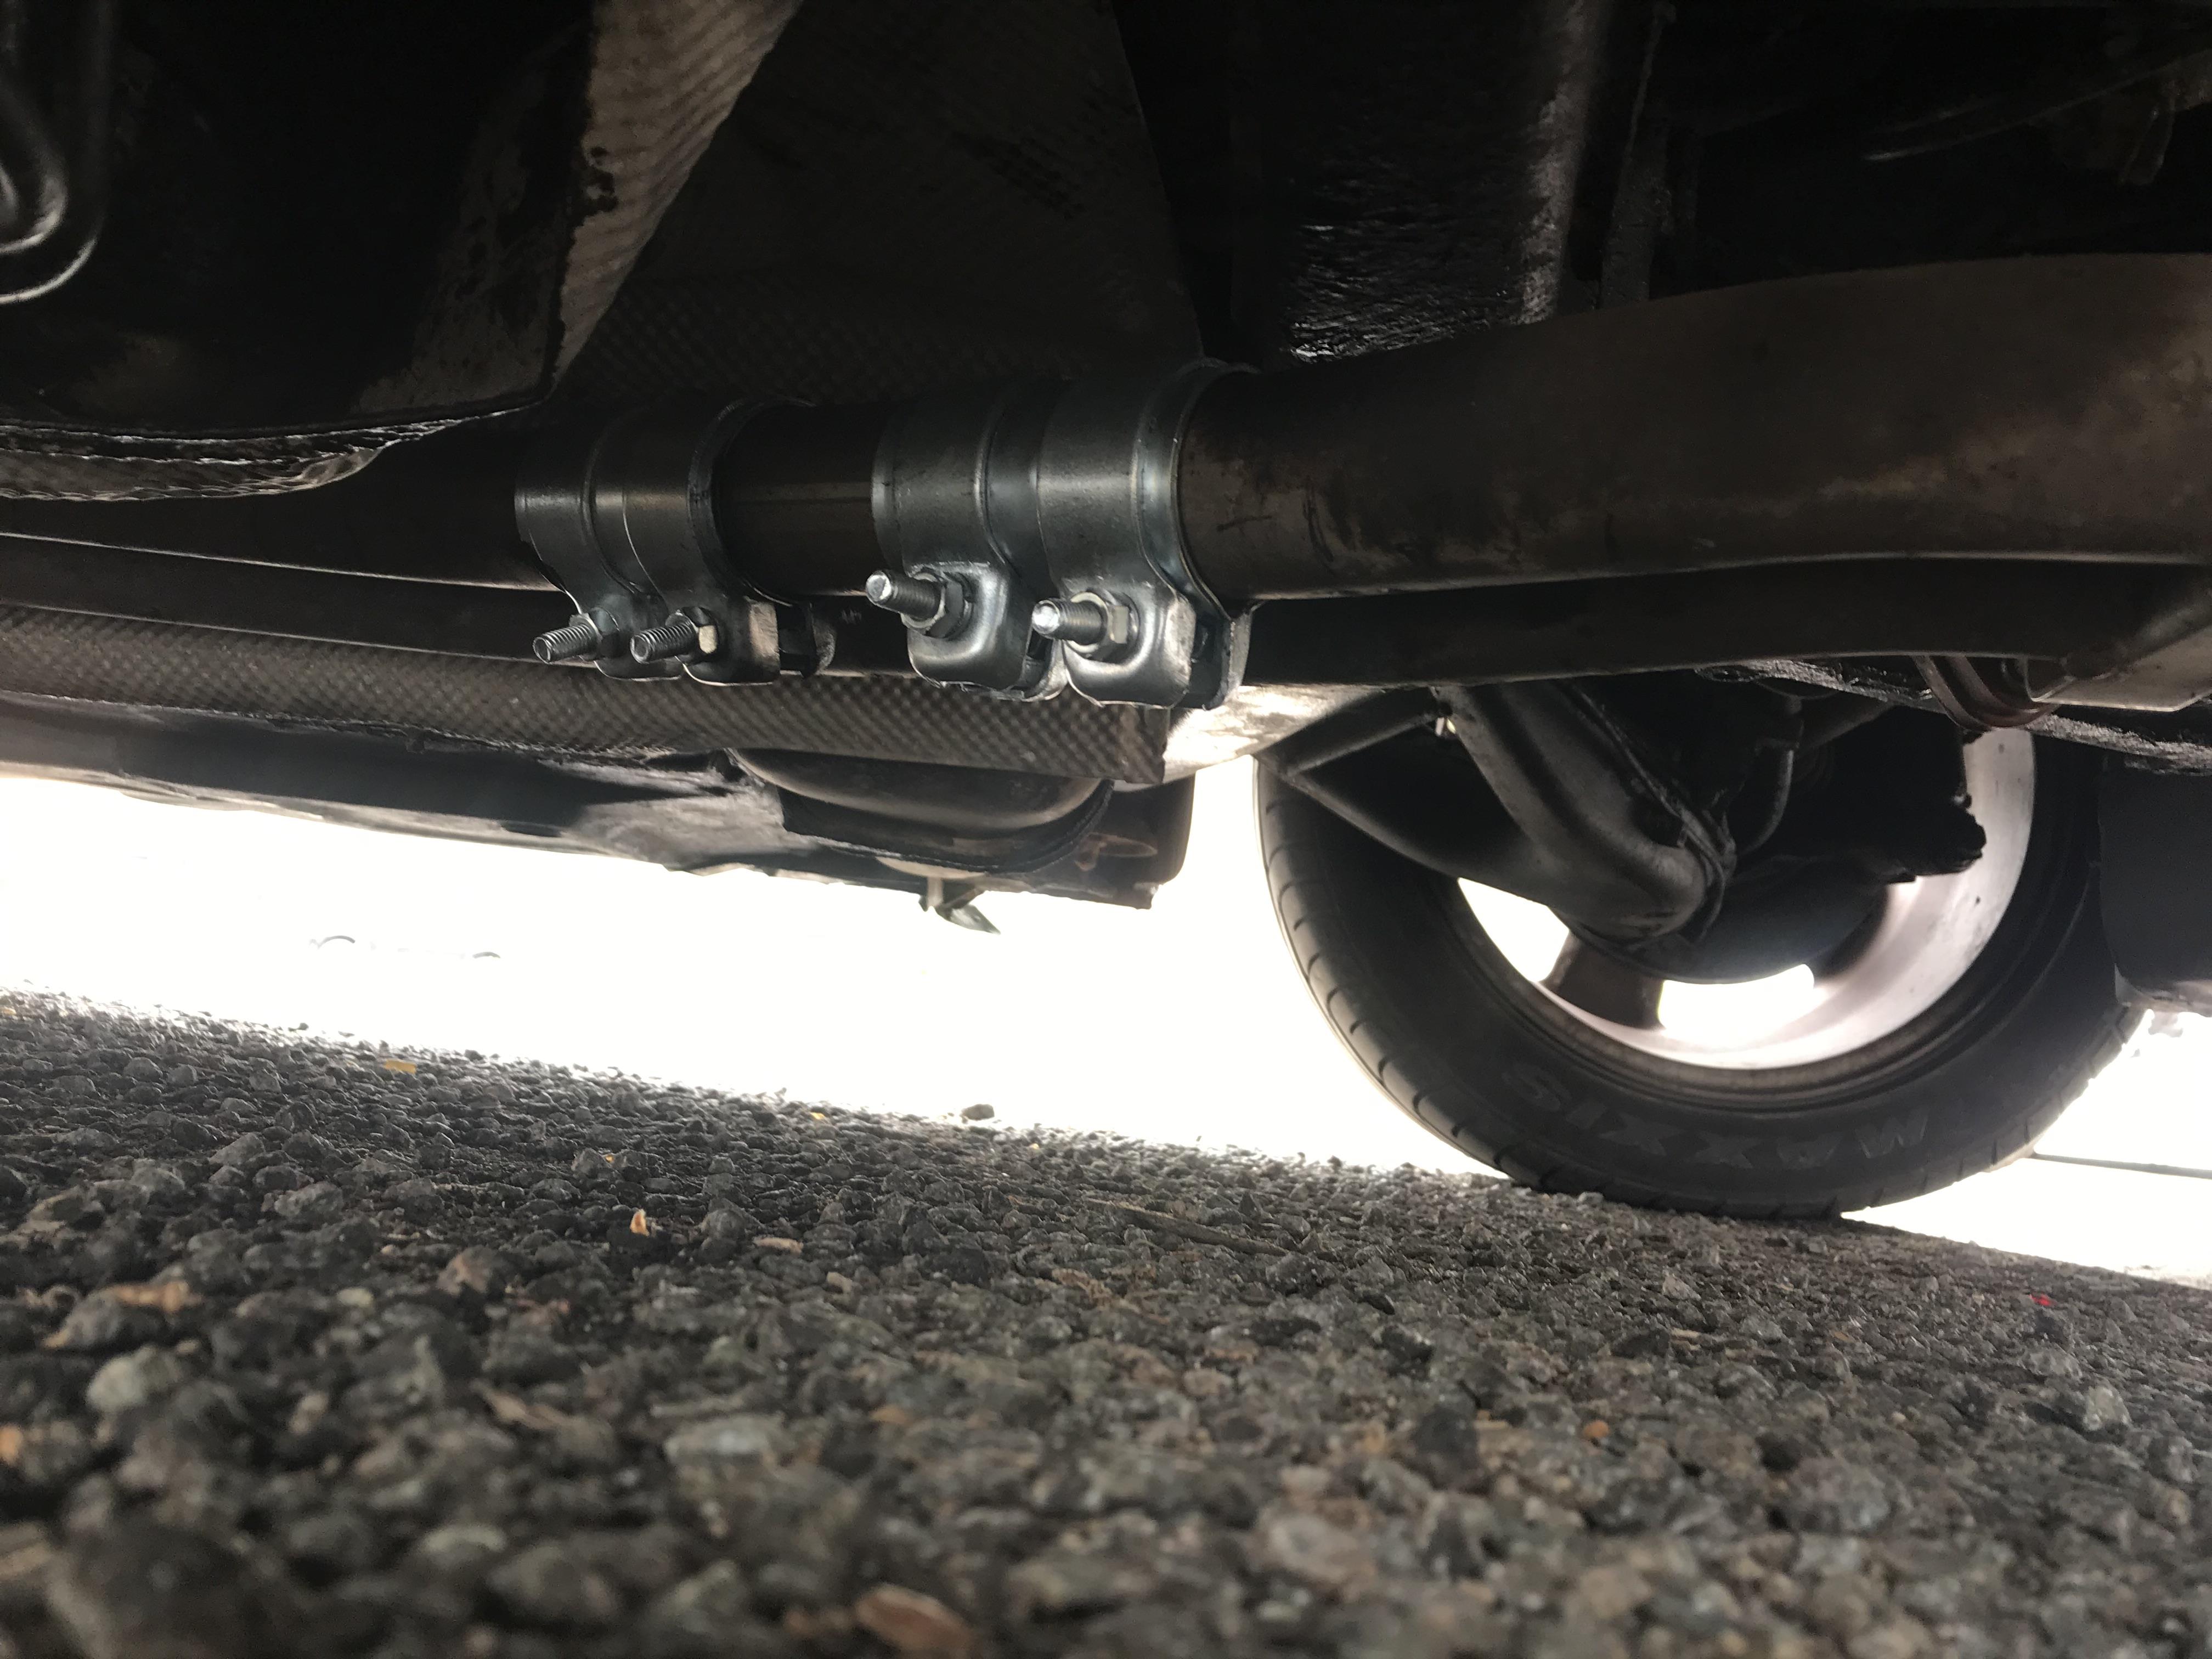
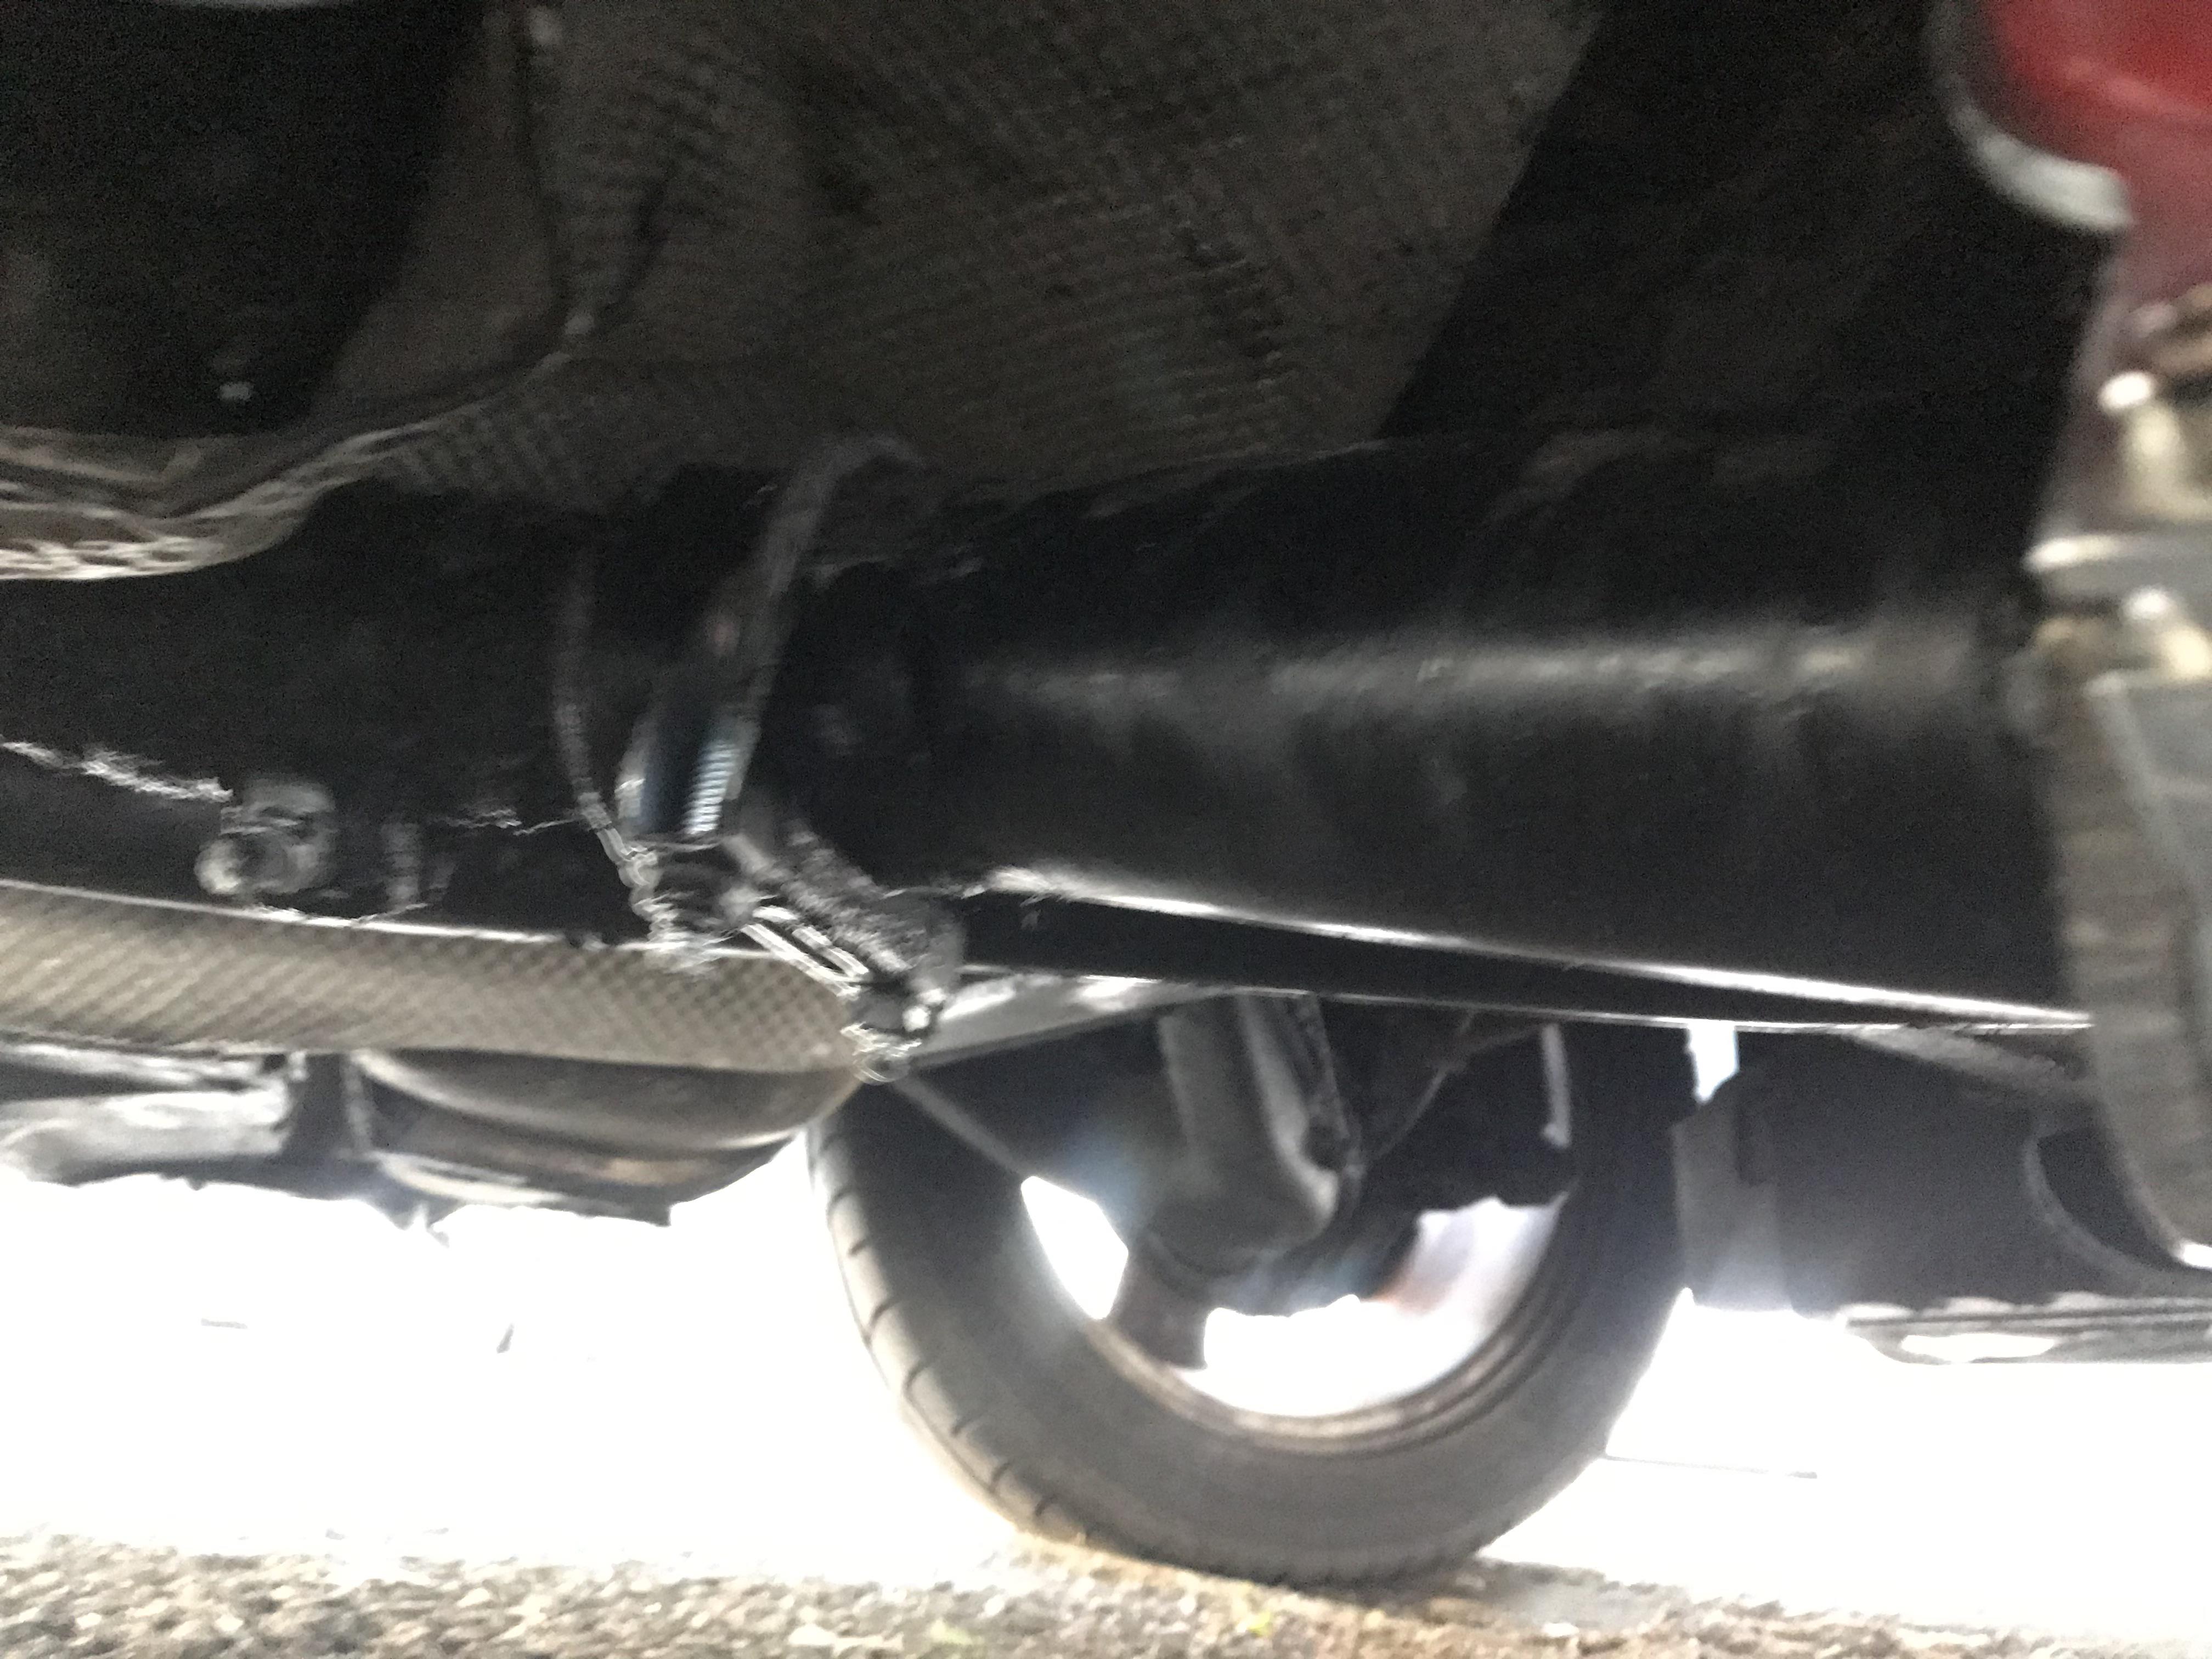
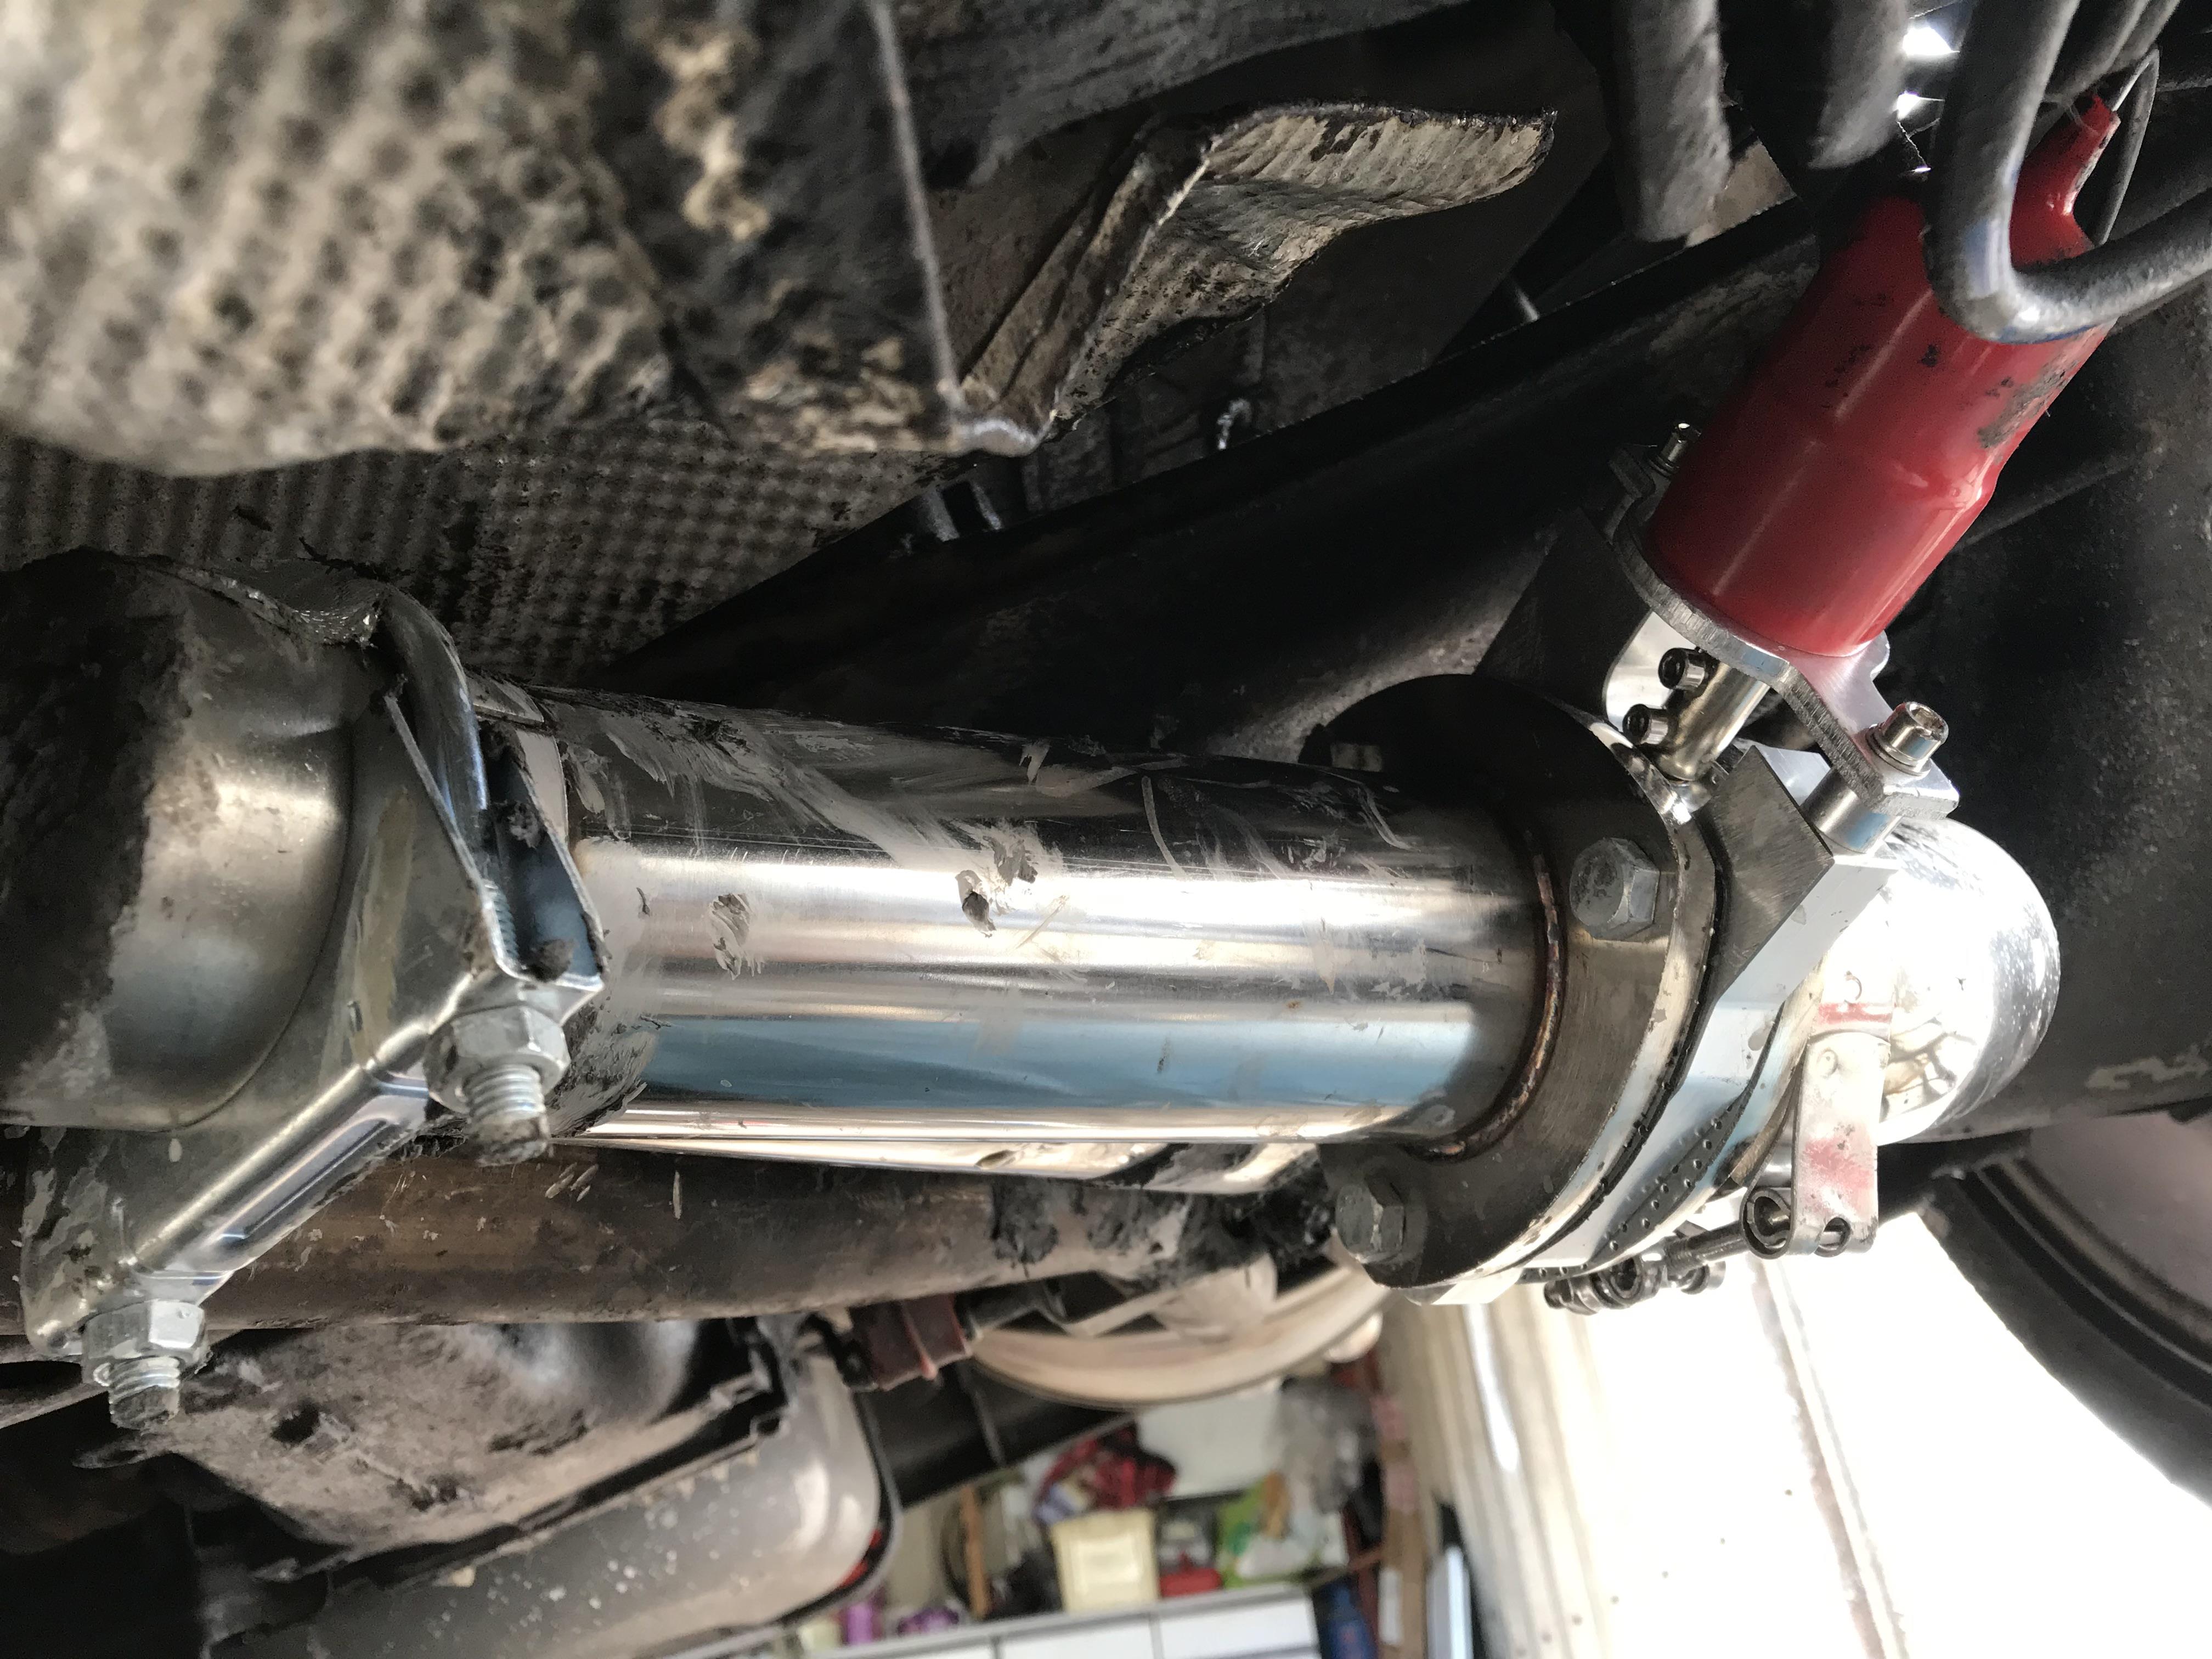
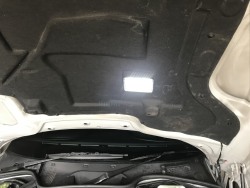
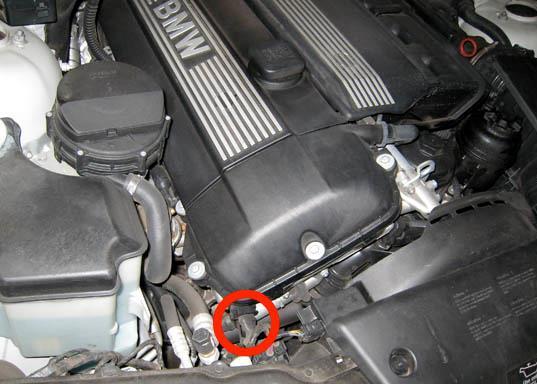
Under the Z3, the cutting out of the section of exhaust pipe ready for the Exhaust cut-off 'Y' section....
Note: it can be difficult to gauge the width of the fitted exhaust pipe, even when using a tape measure, mainly down to the lack of space under the car and the variation of the pipe throughout the system generally. The pipe we cut was of a smaller diameter than was expected.
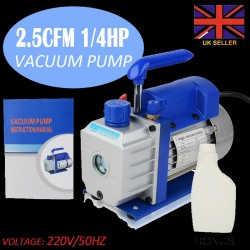
20.04.19 Today, I decided that since the weather was good for this time of year, (a one off day) I would have a go at fitting a 'Fuel Cut-off-Switch'. I hadn't fitted one of these to the fuel system before however had fitted one to the battery when I had my 1966 MGBGT, so it was going to be a small challenge concerning the method I would adopt, the materials and fitting. As one is incorporating a security feature, the positioning of such an item like a switch needs to be discretionary; as it would be a pointless exercise to say the least to publicise every detail, however the methods and by using examples concerning the materials used, can be explained without giving away the security aspects. (see Workshop for the guidelines). The process describes the switch and the wiring to the car wiring loom. The exercise was surprisingly straight forward and for once successful first time. The only problem is remembering to switch the system on and off after leaving or returning to your vehicle and remembering at the time that a switch has been fitted. Some people tell me that the forgetfulness is something to do with age, I can't see that,.... can't remember who told me that now! ;) (Workshop 23.04.19)
25.04.19 Ordered a reducer today : I am hoping this reducer should do the trick, the following morning 26.04.19 it arrived by pony express, I will be checking out the size on the 'Y'cut-off and if all is well order another one as both sides will require a reducer. I will also be taking a few more photographs of the work that has been done so-far within the interior and under the bonnet, mainly for the workshop illustrations; see if you can spot the new piccis.
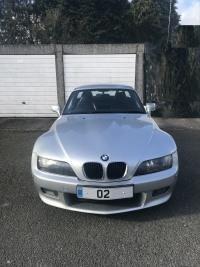
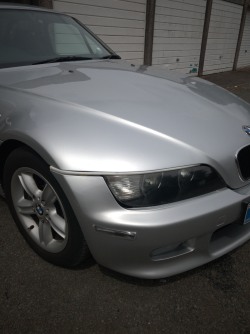
26.04.19 BMW Z3 2.2i 2002
Temporary Repaired exhaust pipe
A few days later, jumping back to another problem, I did have another attempt with the wiring of the radio system, this was the third time of attempting to get the job done right! (I hold my head down in shame, hence no date entry!) I have in the past fitted radios without any problems and it was just one of those times that things had just decided to have gone pair shaped … however, today I was on a role, with the radio back out and wires stripped down I started again, first the radio wiring, cigarette style socket, webcam and USB sockets, all just fell into place, the wiring was straight forward too, all connections are now all working and believe me, job satisfaction for today was good, I may had just, redeemed myself.
Radio and USB switches are now working fine and the radio turns off independently by it's switch and from the Ignition. The wiring has been secured within the connectors; by twisting the wires and soldering them before screwing them down within the block.
The clock in the radio system is now remembering the date, time and also the radio stations are being retained in memory. Sometimes when one has purchased after market accessories such as, in this case the radio, at times they are accompanied by instructions that will throw those installing it, especially when it is in 'pigeon English' then one needs to fall back on experience and guess work. Sometimes we get it wrong, with perseverance and a few suggestive words and not giving up, we eventually reach to our goal. Woo! (see the 'correct' Wiring InstructionsWorkshop) Also looks good in the replacement centre console...
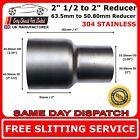
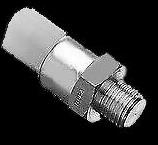
Large end fits 63mm, I will need to strip down the exhaust sleeves to see if the other end fits....watch this space!
1. Reducer Diameter 63.5mm inner
2. Exhaust Diameter 37mm inner
UPDATE: 13.05.19 It looks like the reducer is still too big in diameter and circumference on the narrow end due to the thickness in the lip...
This picture is a little misleading with an optical illusion, believe it or not, this smaller pipe diameter is smaller than the diameter of the inner circle of the drawing when the pipe is turned on top of the outline with at least 1mm to spare, weird or what? It can be explained, the pipe is closer to the camera and therefore the item appears to be bigger than the image in the background, based on the depth of field.
Due to a few commitments, I will have to wait a few days before I can fit the exhaust cut-off.
10.5cm
63.5mm
37mm
clamp 67mm
19.05.19 Another 60 odd mile journey to sort out this cut-off exhaust once and for all, (in my dreams) the reducers are done, got the paste and 'crap' just continues to happen, the reduced diameter was reduced but still not enough, even though the measurements had been checked and triple checked. I believe the measurement from the diagram I gave to my 'get out of jail' company was calculated for the outer ring of the inner imprint rather than the inner ring measurement, making it about 2-3mm too wide; this I had assumed they would have calculated for, …(and no, one should not assume, but we do, don't we, I should have clarified....). With the exhaust pipe in bits and cut, we had no choice but to do what we could and we ended up doing a recovery botch job. Something I don't like doing at all. However, we do what we must at the time. As space was tight under the car, I decided to have a go at the electrics and had finished trailing the wires for the cut-off motor, a fairly easy task as I decided to fit the separate switch at another time; since I had already the remote with the plug in attachment for the cigarette lighter as the live source.
By the time I had got under the car; the exhaust had been cut on a curve, we also know that a straight pipe will not connect onto or into a curve of a pipe without some fabrication and introducing a welder of sorts however, this was our situation. This left us with a big problem as we did not have a welder, how to fabricate to block up a angled curve or hole? The only thing I could think of at the time was to use a high temperature narrow exhaust bandage, coated in exhaust putty. Unfortunately we didn't have any bandage or any more putty on that matter. The whole job took from around 12pm to 6pm. To cut a long story short we tried using a grinder to narrow the width of the narrowed end of the reducer, introduced slits to help collapse the dimeter as we knocked them into the exhaust pipe and this worked to a fashion, also using the clamps purchased with the reducers and those clasps from the sleeves. The sleeves were too long and would not fit, as there were no straight pipes left in our localised work area, as these were all cut, leaving no play and were totally out of the 'ball park,' so-to-speak.
One cannot get annoyed as good intensions and personal time had gone into this project, however this exhaust cut-off was becoming a money-pit; as well as time consuming, I even dream't about it. One consolation the gut wrenching bellow and back cracks did turn heads most of the way home, this was just the blowing, even though the cut-off was not in operation, it sounded good! It was better still when it was operating and the leaks had been blocked temporarily. As it was, it did become annoying for the couple of hours on the road without having the means of turning the blowing off. (Is this me getting old, I hope not...). On this basis with the job completed and in full operation, hopefully this will be remedied and will be a great addition to the Z3 and a good talking point. Meanwhile this will need to be repaired, being the fourth attempt at some future time. If I had known or had the foresight before this 'esca pay' , I would have sourced a fabricator, it couldn't have been more expensive as this project has become, however fabricators with the required welding skills seem far and few between in my, 'West Midlands Region' as I had carried out a research of local fabricators, Yes! I thought that too! (We can blame the politicians for the decline in our industrial manufacturing and I can be sure of that! The bunch of politicians today are an ideal target in out current political climate! - I feel better for that, unloaded the blame of many decades of political incompetence, to a lesser degree, mine too! I digress....)
20.05.19 I have received a couple of email from some readers of my diary asking if the Cut-off exhaust had been attached or fitted. (I thank those that are taking an interest and visiting my site, your positive support and suggestions are always appreciated). The answer to this question is yes, to a fashion. It is securely attached and blowing in two locations, mainly on the narrow ends of the reducers where they are wedged into the exhaust at both ends. The one end is slightly on a curve towards the rear back box, the other end is not so severe, however there is a small amount of blowing and this maybe down to the type of clasps being used or where the narrow ends are not inserting or seating correctly, remembering that the narrow end of the reducers are too big to insert into the existing sized exhaust fully. Both these locations can possibly be fixed with some high temperature tape, narrow exhaust bandaging, coated in firewall putty, wrapped tightly and that sets hard, hopefully sealing the leaks, I don't profess to be an expert on these matters and to whether this will work, I usually try to rely on common sense, luck or positive suggestions from those that are more experienced, (even when, with some experience and at my particular age). This repair will commence in the next couple of weeks, once the materials and parts have been sourced .
(I will try and add photos in the next few days) 29.05.19 OK! Just received a couple of orders to try and recover or repair the botch job on my exhaust, I am hoping this will work. I ordered the following items:
zakautoparts £4.39
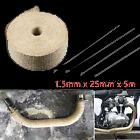
keepsgood £4.52
17 xiaolan72 £5.68
These item should do the trick and just waiting on one item before commencing the repair, normally at this point one would source a fabricator, however, finding one and finding one at a reasonable price are two different things when finances are constrained..., so a shoestring it is or one is suggesting; however it has been totally from the truth with this project so far as it has been mounting up... (The joys of motoring and renovation). (see purchases for full details of products)
31.05.19 Today has been a mixed day concerning weather, the morning being overcast and on the verge of possible rain. The question was to go up to the garage to sort out this exhaust once and for all or not.... I placed all the exhaust materials ready and noticed my battery leads on my charger looked a little worse for wear and started to service it by stripping it down, this took me a good part of the late morning, I later concluded that this was procrastinating. After arguing with myself; it was around 2:50pm, there was no good excuse in putting this job off any longer as the weather had improved, the sun was out and there was a cool breeze. With battery in hand, (since it had been on charge over night after going flat) and with my bag of bits, the route to the garage it was...
A couple of neighbours approached me at different times on route, suggesting that my alarm had gone off a couple of days before within the early hours of the morning, they remained polite, suggesting the sound had been muffled by the car being in the garage however; I had got the message and with apologies, I then continued. (This probably accounted for my battery being flat). For me the day had just started.
With the car on the jacks and ramps under the passenger side wheels front and back I commenced with my diagnosis of the previous workmanship and it was dire, even from my own workbook standards. The cut-off 'y' section and the reducer at it's narrow end going into the pipe towards the tailpipe end was exposing a large hole, looking at both ends of the 'y' cut-off pipe , I decided to work on the easy end first, this allowed me time to think through the course of action to resolve my problem with the gaping hole on the other end.
The chrome directional end of the Cut-off, (the noisy end) had been a little misshaped with a few chips out, where it had bounced off the road bumps, it was still useable as the damage was minor and only evident around the edges of the tip.
With wire brush in hand, I continued to clean off the old hardened putty from the previous job, this batch of putty looked to be of poor quality, as it was thin and flakey. Then came the brackets, these were around each of the two narrow ends of the reducers and close to the defective areas. The biggest problem was to get behind the brackets with the tape, ribbon and putty, as these brackets were wrapped around the pipe and getting them off and reinstalling them would prove to be near impossible, (these brackets, with hindsight were not ideal) especially when trying to get the nut to make contact with the bolt thread when one comes to reinstall them or close them up.
There were a number of choices of how one would proceed with this job, after cleaning the work areas of debris and the following sequence was chosen:
1. Wrap the silver tape around the exhaust starting from whatever available exhaust pipe was exposed, continuing over the small end of the reducer, overlapping as one went and over the join areas, (or holes) with plenty of overlaps at each end. Then the hard part, the brackets needed to be manipulated over the tape without tearing the tape giving a continual length going the full length of the work area, (this was awkward and time consuming based on the type of clamps used). I would suggest at least three layers of tape especially over the join areas. Note: the clasp or clamp may need to be widened to allow the thickness of the tape and ribbon - ( the wider the bracket, the more awkward or difficult it would be to pulling this particular clasp or clamp back together, enough to allow the bolt and nut to make contact with each other exposing enough of the tread tighten up).
2. When the tape was smoothed out by hand, any dips in the tape, (usually covering any holes or gaps) one would need to fill with putty, this didn't need much as one was trying to obtain a uniform and flat surface all around the work area of the pipe.
3. The 1 - 2 cm braided ribbon bandage was measured and cut to, (in my case with the Z3) 30 and 60 cm lengths, (for ease of use and manipulation) and then tightly wrapped around the pipe, the ribbon came with metal ties and a couple were used to retain it around the large end of the reducer pipe. The clamp will also help in retaining the braided ribbon, or at least prevent it from becoming too loose, (if it chooses to 'play nicely for you, as the metal ties were difficult to tighten fully as they slipped, being metal').
4. The final process was to coat on top of the layers, emphasising the two areas of the reducer joins with the layers of tape and ribbon, finishing off with the remaining putty; in and around the mental clasps letting the one side of the cut-off 'y' section to dry naturally, whilst one continued or commenced with the other more difficult side.
The same sequence was adopted, for both ends of the 'Y' cut-off, with emphasis on the large chasm at the latter end, this needed an adequate amount of silver tape wrapped around, smoothing it out as one went, a number of layers and then a good dollop of putty, spread to fill any indentations, or chasm in this case, (don't be shy to getting ones hands dirty around the more difficult areas of the exhaust pipe, (especially when working with it still attached to the vehicle) all possible gaps will need to be filled and spread out evenly before wrapping the braided ribbon bandage around with plenty of overlap as one goes.
There were problems with the 'marrying up' of the clasp or clamps, (note the clasps or clamp used in my case, for the narrow ends of the reducer were off an exhaust pipe sleeve previously used to do the first repair job and these sleeves were expensive to purchase at the time. A standard and correct sized pipe clasp should do the trick and maybe, be more suitable or easier to use; especially when trying the get access behind the exhaust pipe near the car's floor. It would make life easier as and when it comes to reinstalling the bolts nuts and washers also. I obviously used the sleeve clasps, since I already purchased them and also to save on further costs, noting it did not make the job any easier.
Once the repairs were completed and the pipe was all bolted up and finally pasted up uniformly with putty, the time had come to start the Z3 and allow the engine to tick over for a couple of minutes, mainly to allow the putty to become hardened via the heat through the exhaust. (Note: don't rev the engine, if there are leaks during this process, or the tape has torn some how, the putty will disperse and jet off to the next county, leaving one back at the dragster fair. Also note, there will be condensation or water dripping from anywhere it can. This is normal as hot air meets colder air forming condensation and this will give one an opportunity to tighten down the nuts if and where applicable, to prevent some of the leaking, not all. Note: The condensation will dilute the putty, especially if there is no exhaust tape or braided ribbon to prevent the full blast of the exhaust. Leaking from gaps or untreated areas, any contact with the liquid or water, will obviously prevent the putty from hardening and sealing the exhaust pipe, hence the tape and ribbon.
With checks all around, the job seemed to be a reasonable success, after observing and feeling around the joins for leaks, there wasn't any...woooo! I did notice this was not at all a pretty job and decided to blacken most of the chrome and the adjacent sections of the exhaust system, just leaving the motor unit and the chrome tail spout of the cut-off as chrome. The job looked more acceptable to the eye in appearance once completed, for me at least. With remote in hand, the cut-off was tested and there was definitely two different sound or tones to the exhaust. I can now at least put this particular part of the job to bed - Job Done!
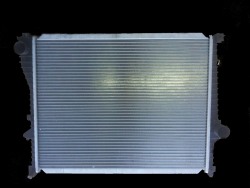
My son telephoned me and we verbally went through the procedural process to keep him in the picture, since he showed some interest in the job. During the same time frame he was also working on the e39, refitting a radiator and he then out-of-the-blue decided to inform or suggested he had found a fabricator, with a pause, I just chose to ignore and moved on to another topic, that is what family do, frustrating isn't it....
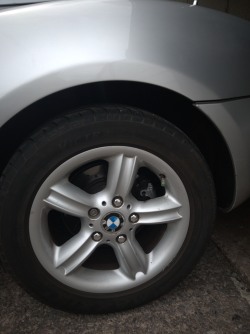
15. Wheel centre reskims and paint x4
Raw Repair - Note: Twin Exhaust System, one side is used for the Cut-Off Unit.
Y' Section Painted Black
1 2
Conventional Exhaust Clamp (more favourable)
Sleeve Exhaust Clamp (not ideal)
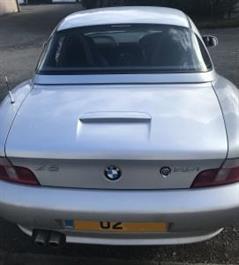
BMW Z3 2.2i 2002
1
05.06.19 I really thought that today was going to be a case of sorting out this exhaust again, it was blowing hard and it was giving me a sinking feeling and the question of "what had I done to deserve this?" and "what could be the problem now?" I decided to just have a token look to see what was happening, many images were racing through my mind. I put the problem down to the exhaust cut-off possibly the putty was no good, the cut-off being too low, (especially after hitting a couple speed bumps on the road a few days before) that was not good! In any case, a curse to most motorists with lowered springs, front bumpers and in my case low exhaust cut-off.
Without jacking the car up on the trolley jack, I breathed in and crawled under the nearside of the Z3 to investigate. The exhaust was not blowing to my pleasant surprise, this was good and some minor relief, however I did notice the remote flap on the motor was sticking open by at least a quarter of a turn, enough for the exhaust to bellow out sounding noisy. When the remote was operated to close, the flap was not closing fully. This was due to the chrome tail piece being loose, (most likely dislodged when it hit the road causing the flap to foul up onto the tailpipe end piece). With a number of turns of the ratchet on the clasp retainer bolt, the tailpiece was made static and with a few squirts of WD40 onto the flap fulcrum within the motor housing, it did begin to operate as it was meant to. This was of great relief on a psychological level, as well as a physically level, (holding ones breath whilst tinkering under the car is an enormous feat. One just did not want to be going through the motions of starting all over again. My conclusion was that the contact with the speed bumps had dislodged the chrome tailpiece, with further adjustments and rotation of the bracket and with realignment of the tailpiece, everything was good again. The question at this point was for, how long? Being positive, I placed that thought at the back of my mind, out of sight, out of mind for now, just leaving me at least some short amount of time to enjoy the moment! I just needed to be more aware and show caution the next time I approached the local speed bumps.
Would I fit another exhaust cut-off at another point in time on a vehicle? Give the right vehicle, most likely! Given more exhaust length and a little more depth for the motor housing to play with. This being the first cut-off I had fitted, it had been an eye opener and a challenge, bearing in mind that I had avoided the welding fabrication aspect of this job, I can safely say with hand on heart, the job has been a success, this time, (maily due to necessity in putting everything right again and this is important after so many false starts and finishes). Any next time, I would get a 'Y' cut-off the correct diameter to the exhaust pipe, this will save time, money and patience. It does sound 'GREAT though'! It just leaves me to install an independent switch, having it wired up permanently to a live supply, rather than having the 'live' through a cigarette lighter adaptor, taking up a utility I could use for something else, a job for another day. (See Workshop)
18.06.19 A number of days ago, I did attempt putting a five pin switch in the dash for the exhaust cut-off, everything was straight forward up until operating it. Not sure what happened or should I say nothing happened. I can only assume the remote unit or the motor had blown, even though it had a low rated fuse that had been used. All the wiring to the switch and the fuses were double checked and the wiring and fuses were as they should be, appearing to be good, a weird one. I did end up in ordering another remote unit from the supplier, failing that, I will have to place another order for a new motor that operates the remote flap. The only thing I can think of; is it is down to using the combination of remote unit and a separate switch working or not working together nicely, (will not work based on the circuitry of the remote unit, one can only assume, as my electrical skills are reasonable... but basic). One may end up not using the switch and reverting back to the cigarette lighter plug-in, as it previously worked before. At least I do have a spare socket under the front centre console, this could be used and stay hidden away. I did think a switch was a good idea at the time, but we all know what happened to 'Thought' Thought planted a feather and Thought he grew a chicken!' I believe some things are just not to be....well, until the next attempt! The remote unit will be arriving from China in a number of weeks, I normally prefer to buy British, however I haven't seen the unit I require over here, so it will be near to a month. 20.06.19 Meanwhile, today the weather was overcast and reasonably warm, an ideal day for repairing my drivers chair, as the rails were not aligned properly. This caused a problem in securing the bolts, the front ones were bolted in, however the back ones were semi-bolted in and strained, in addition to that, the seat were also sqeaking, quite annoying after a period of driving. I found this job difficult, mainly based on the lack of knowledge and decent DIY YouTube videos to follow, to correct these rails and inserts. It meant extracting the chair out of the car, stripping down the guides and inserts and much guess work. It was mainly through perseverance and trial and error before all the holes aligned correctly. It made me think of all the YouTube videos I have watched and how easy they make it look, wondering how many attempts they had to go at and video retakes, before getting the job done and to make it look competent or easy? I digress, after the chair had been manhandled back into the car, eventually the chair lined up and all the bolts and nuts slotted into the holes without too much of a problem. The electrics were reconnected and the seat operated as it was intended to do. At this point in time and three hours later, it was a case of another job done, and yes! The success did surprise me too!
21.06.19 Today is my Z3 1st Anniversary of my purchase and what was better? … Another nice day, the sky seemed very blue with white fluffy Cumulus clouds and the odd black cloud, I decided to risk it to give the car a good external clean. I have not really concentrated on the bodywork that much and thought it was overdue. I had previously used a ceramic polish and noticed this had left some streaks on the flat surfaces such as the boot/trunk and bonnet/hood. After a soapy wax wash and clear warm water, the car was dried off using my new leather and a further silver 'magic' polish was administered, this was used to get the streaks out; as well as generally polishing the car. It did take a bunch of elbow grease too. The Z3 as many will know is a small car in comparison to many, however it did take a good three hours working on these stubborn areas to the point of these blemishes eventually being removed via the polish and then another hour was spent on the over all shine, manually. It looked good, minus the odd wear and tear on the bodywork however it was a 2002, it was satisfying.
1
1
2
40֯ angle
Clasp and chrome tailpiece was later rotated to prevent further contact with road speed humps (I 'may' also paint this black, not sure yet)
Results!
Result!
Result!
I also decided it was a good time to address the leather seats, these looked a little dry and I had tried a number of products but they seemed to just clean the leather and not really address the maintenance or conditioning of the leather. The only product I had not used was a bees wax polish, so again I administered the wax into the cracks and crevices. The verdicts out at the moment to the effectiveness of this application. (so watch this space for a later update). Much work has gone into the Z3 restoration since it's purchase exactly 12 months to this day and fortunately, the major work has been fulfilled, believe it or not; there are still a number of jobs to be done, (some already listed in prior list entries) many readers will understand it is always ongoing and when finances allow. The work can be a little frustrating at times, especially when the jobs don't go as smoothly as one hopes, however it can also be rewarding when it does go right. Here is to the next 12 months of jobs going right!
22.06.19 Another blue sky sunny, warm and an inspirational day. I started to think about my cut-off exhaust and in the back of my mind I was questioning the reasons for the switch or the motor not working. So I made my way up to the garage thinking on this matter and as doing so, I decided I would bypass the remote 'brains box' and hook up the switch with inline fuse directly, after around 15 minutes of working with the wiring, the switch came to life and it worked! When operated, the cut-off on the exhaust activated and the flap opened and closed as it should. With that, I decided to check it all out and I drove the car up to my local petrol station to top-up with a little fuel and return back home. The switch worked well with no further problems. My only thought was what to do with my remote unit ordered from China, (to replace, what I thought was a broken remote unit?) While the engine was ticking over, hold on to that thought, low and behold! I noticed the amber brake pad warning light had gone off! As many will know, this has been a problem I had been having and trying to solve or sort out for a long time, since day one of having the car. With a couple of engine restarts, I concluded the warning light was definitely going out as it should, so some how, this problem had solved itself! It was like I was mesmerised with the invention of a light bulb, on, off, on, off... I do like to analyse the workings of things in general, however this one was another one of those weird ones. My only thoughts at the time was based on the possibility of adding an earth to the chassis for the exhaust cut-off, it had improved the earth status on the vehicle generally and some how; this had helped to reset the functionality of CPU and the brake pad sensors. Two annoying problems were solved in an instant, I was not complaining. ….And people say a car doesn't have a soul! I beg to differ! An anniversary gift that kept giving... 'Katie' (the name of my Z3) must have loved the, polishing?
Wiring to Exhaust Cut off 5 Pin Switch :
FITS 18mm wide X 37mm long slot
NOTES FOR FITTING ELECTRICS; 1ST TERMINAL ---- MOTOR = positive or negative pin from cut-off motor 2ND TERMINAL ---- NEGATIVE (earth) 3RD TERMINAL ---- POSITIVE (MIDDLE) Cig Lighter pos+ or battery 4TH TERMINAL ---- NEGATIVE (earth) 5TH TERMINAL ---- MOTOR = negative or positive pin from cut-off motor
1 = Wire to neg - or pos - exhaust flap motor
5 = Wire to Pos + or neg - exhaust flap motor
Both earth wires, (black) can be twisted together and then grounded onto an earth point on the car chassis or onto the negative - post on the battery)
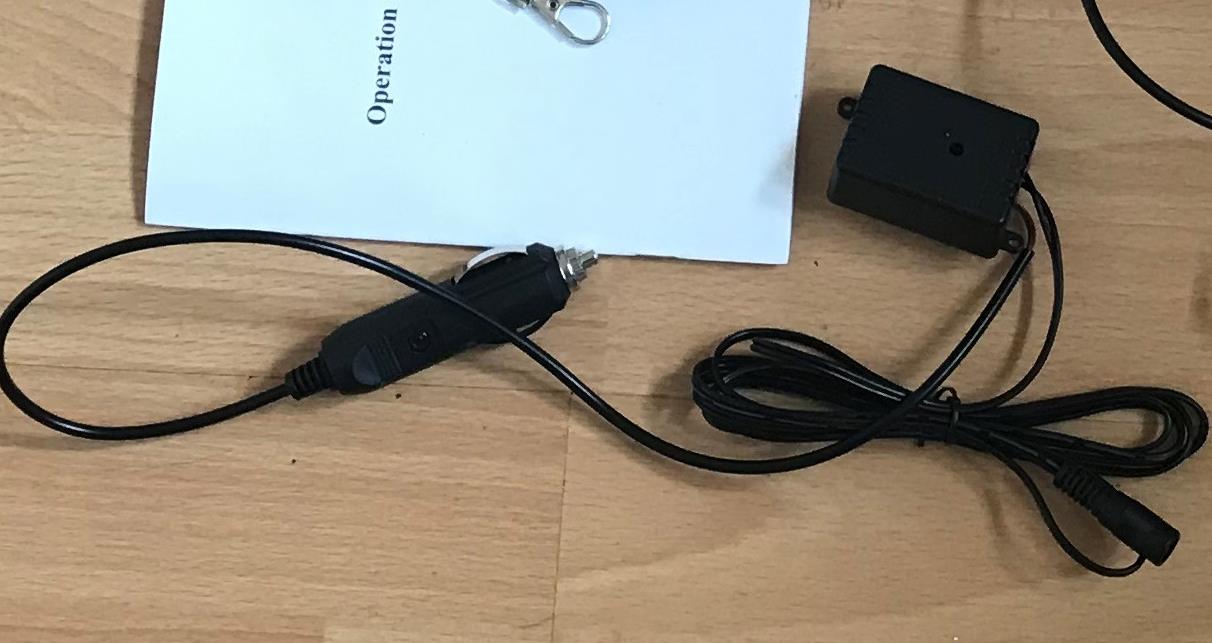
Note: Don't use the remote 'brainsbox or lighter adapter' that comes with the exhaust cut-off, the wire that has the male or female connector from the 'remote brainbox can be cut and the two wires can be connected directly to the switch pin 1 and 5. (doesn't matter which of the two wires goes to pin 1 or 5, either way they both need to be connected to either of those terminals). Don't forget to have an inline fuse on terminal 3 - middle pin that connects to the LIVE supply, (if using a switch) (battery + Note: cigarette lighter, (if not using the switch should already have a 20-25 amp fuse).
x
x
cut
Use the female connector - cut one end close to black box (discard black box and lighter adapter) the cut wire end, goes to the switch the other end can be plugged into the male connector that leads to the motor valve.
23.06.19 Today is rather a cloudy day, temperature 22.2C, I noticed the bonnet/hood BMW badge had seen better days and decided to swap it over from the spare purchased boot/trunk lid I had stored away in a shed. With a small screwdriver the badges were both detached from their settings and the better looking badge was attached to the vehicle Z3 bonnet/hood. Looks much better now and not so worn. I know this was a small job, however every job leads to the end goal on the restoration.
26.06.19 A great sunny day, part of the European heat wave from the Sahara. This was a good time to check the exhaust cut-off and refill with the exhaust putty into the areas that needed it. During the afternoon I also repainted the rear brake calipers with the high temperature paint to match the front. I am still between two minds with the colouring of black v silver...?
01.07.19 A 'pottering about day' today, on delivery of a new Duel WebCam, this was installed within 20 minutes; not bad considering everything usually takes half a day to a day+ to complete. (see purchases) As a small review, so far, the new webcam is now working and attached to my front windscreen of the Z3, replacing my previously installed webcam. So far, I am pleased with the clarity of the images and general functionality. I was not sure what was wrong with the old WebCam, other than it just didn't work the way I hoped it would, it may have been a poor connection of sorts, however I was needing to rectify the problem of functionality. The old webcam didn't give a display, unless through a mobile phone with Wi-Fi or Bluetooth. I concluded it was all just too much hassle and another item requiring a pedestal to clutter my dashboard and vents and only acting as a visual deterrent. The instructions were also in pigeon English, perhaps some other time. The new duel WebCam provides real-time displays back and front that I can visually see as and when I am driving and the unit automatically starts-up as soon the ignition is turned on, after a short pause. (a button is also available for switching the unit on and off, independently if and when required). Other options are also available of full or divided recording screens. The cigarette lighter adapter needed to be stripped down and decarded, leaving a small circuit board with two remaining wires off the board, the live, re-connected under the dash with an inline fuse to an ignition live, the other to negative earth. By internally wiring, allowed the cigarette lighter availability for other electrical gadgets if and when required). The new WebCam also works as a GPS system and will record the journey or locations, (via Google) recording map coordinates, speed, works very much like a basic tachograph. Other useful functions, it will re-activate, if sensing anything close in result of touching the vehicle, recording the front, back and sides of the vehicle through the wide angle camera monitoring. It stores the files with a further option of implementing a security lock down feature button, this 'locks' the recordings on the unit and micro SD card, in the event of an accident or security event. This unit Complements any existing security deterrents fitted to my Z3. The duel WebCam looks good, small and compact and not over the top. Job Done!
Result!
This was the wiring I used on the five pin switch.
WebCam
Remote Cut-Off Unit
My cut-off remote unit also arrived today by post, I had ordered this when I had thought I had electrically blown out my exhaust cut-off remote unit. However, with the new bypassed connection to the switch and finding out the switch and motor was in working order, there was no need for this new purchase and it was now to be stored until I can utilise it in some way, or use it as a backup in the event of my current system failing. This was an a expenditure I could have done without...being philosophical one can say: 'that's life!' In another life, I could be fighting for life on the Prairie... so this is justified and drops out of significants.
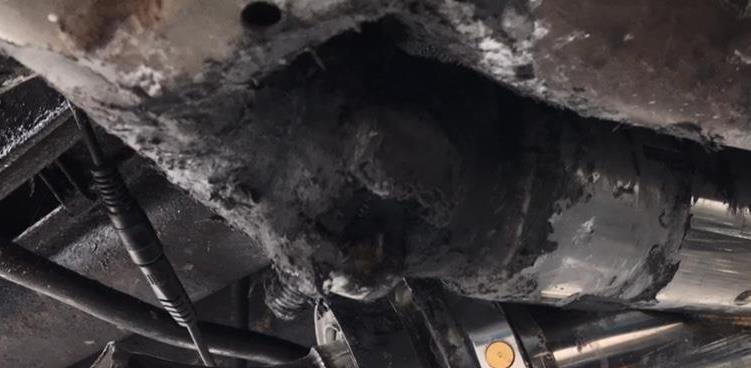
The error was mine, on misjudging youth and experience. Too much metal was cut out off at the angle, leaving a gap to be filled with something - this is where a welder would have been very useful at the time. Unfortunately, there wasn't one available. However it was on a shopping list of the future....
07.07.19 Today another warm 23.4C on the temperature scale, this afternoon I decided to give the car another wash and set, however a little too warm for my liking, I completed the polishing when it was a little cooler. Some may ask why the wash and set, so soon after the previous one, my answer is to build on the layers. Each time I polish, the job becomes easier as each layer is established. It will require a few more layers before I am satisfied with the result. Also an opportunity to tweak on previous jobs. There are still more jobs to do when the weather gets a little more bearable.
click
17.07.19 From the 07th to today, I closed my eyes for a minute and it is now 17th, it is horrific how time flies by. Today another hot muggy day and I decided to have a once over, overview or take stock and take a few more piccis to cover the things that haven't really covered in any detail, so it is a case of gallery, background the music and view:
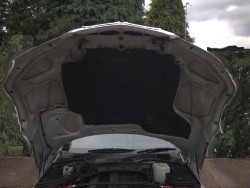
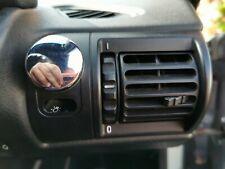
The reason I am showing these two images is to highlight the bar indicator lights above the headlights. These were purchased to help camouflage the drop in the front bumper. This is a job that I have been trying to get around to sorting out and not being able to start... However, I do like the functionality of these light strips and have today purchased two more; as they have now been upgraded to a 'sequential indicator, in other words the amber light moves in the direction of what ever turn is made and once the turn has been made, the light reverts back to a daylight running light mode. Sounds good! I had also been planning on adding daylight lights on the Z3, the problem was where to put them. This may solve the problem with location, I am looking forward to the delivery, not sure what I will doing with the ones already on there, perhaps there is some way to reuse them, at the rear? (see purchases for further details).
Taking Stock... Gallery
installed in the Z3
The resprayed Rear Caliper I may redo these calipers at some stage
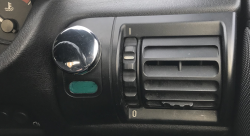
Handbrake and Gear knob Furniture Look's Good!
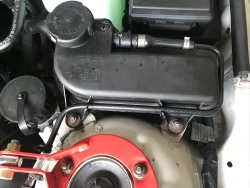
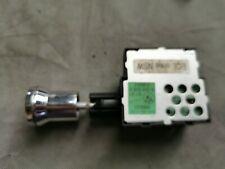
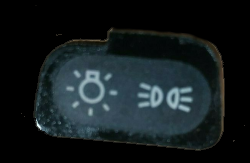
Rear Switch Console - Demister Switch to be Wired Up
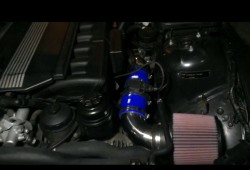
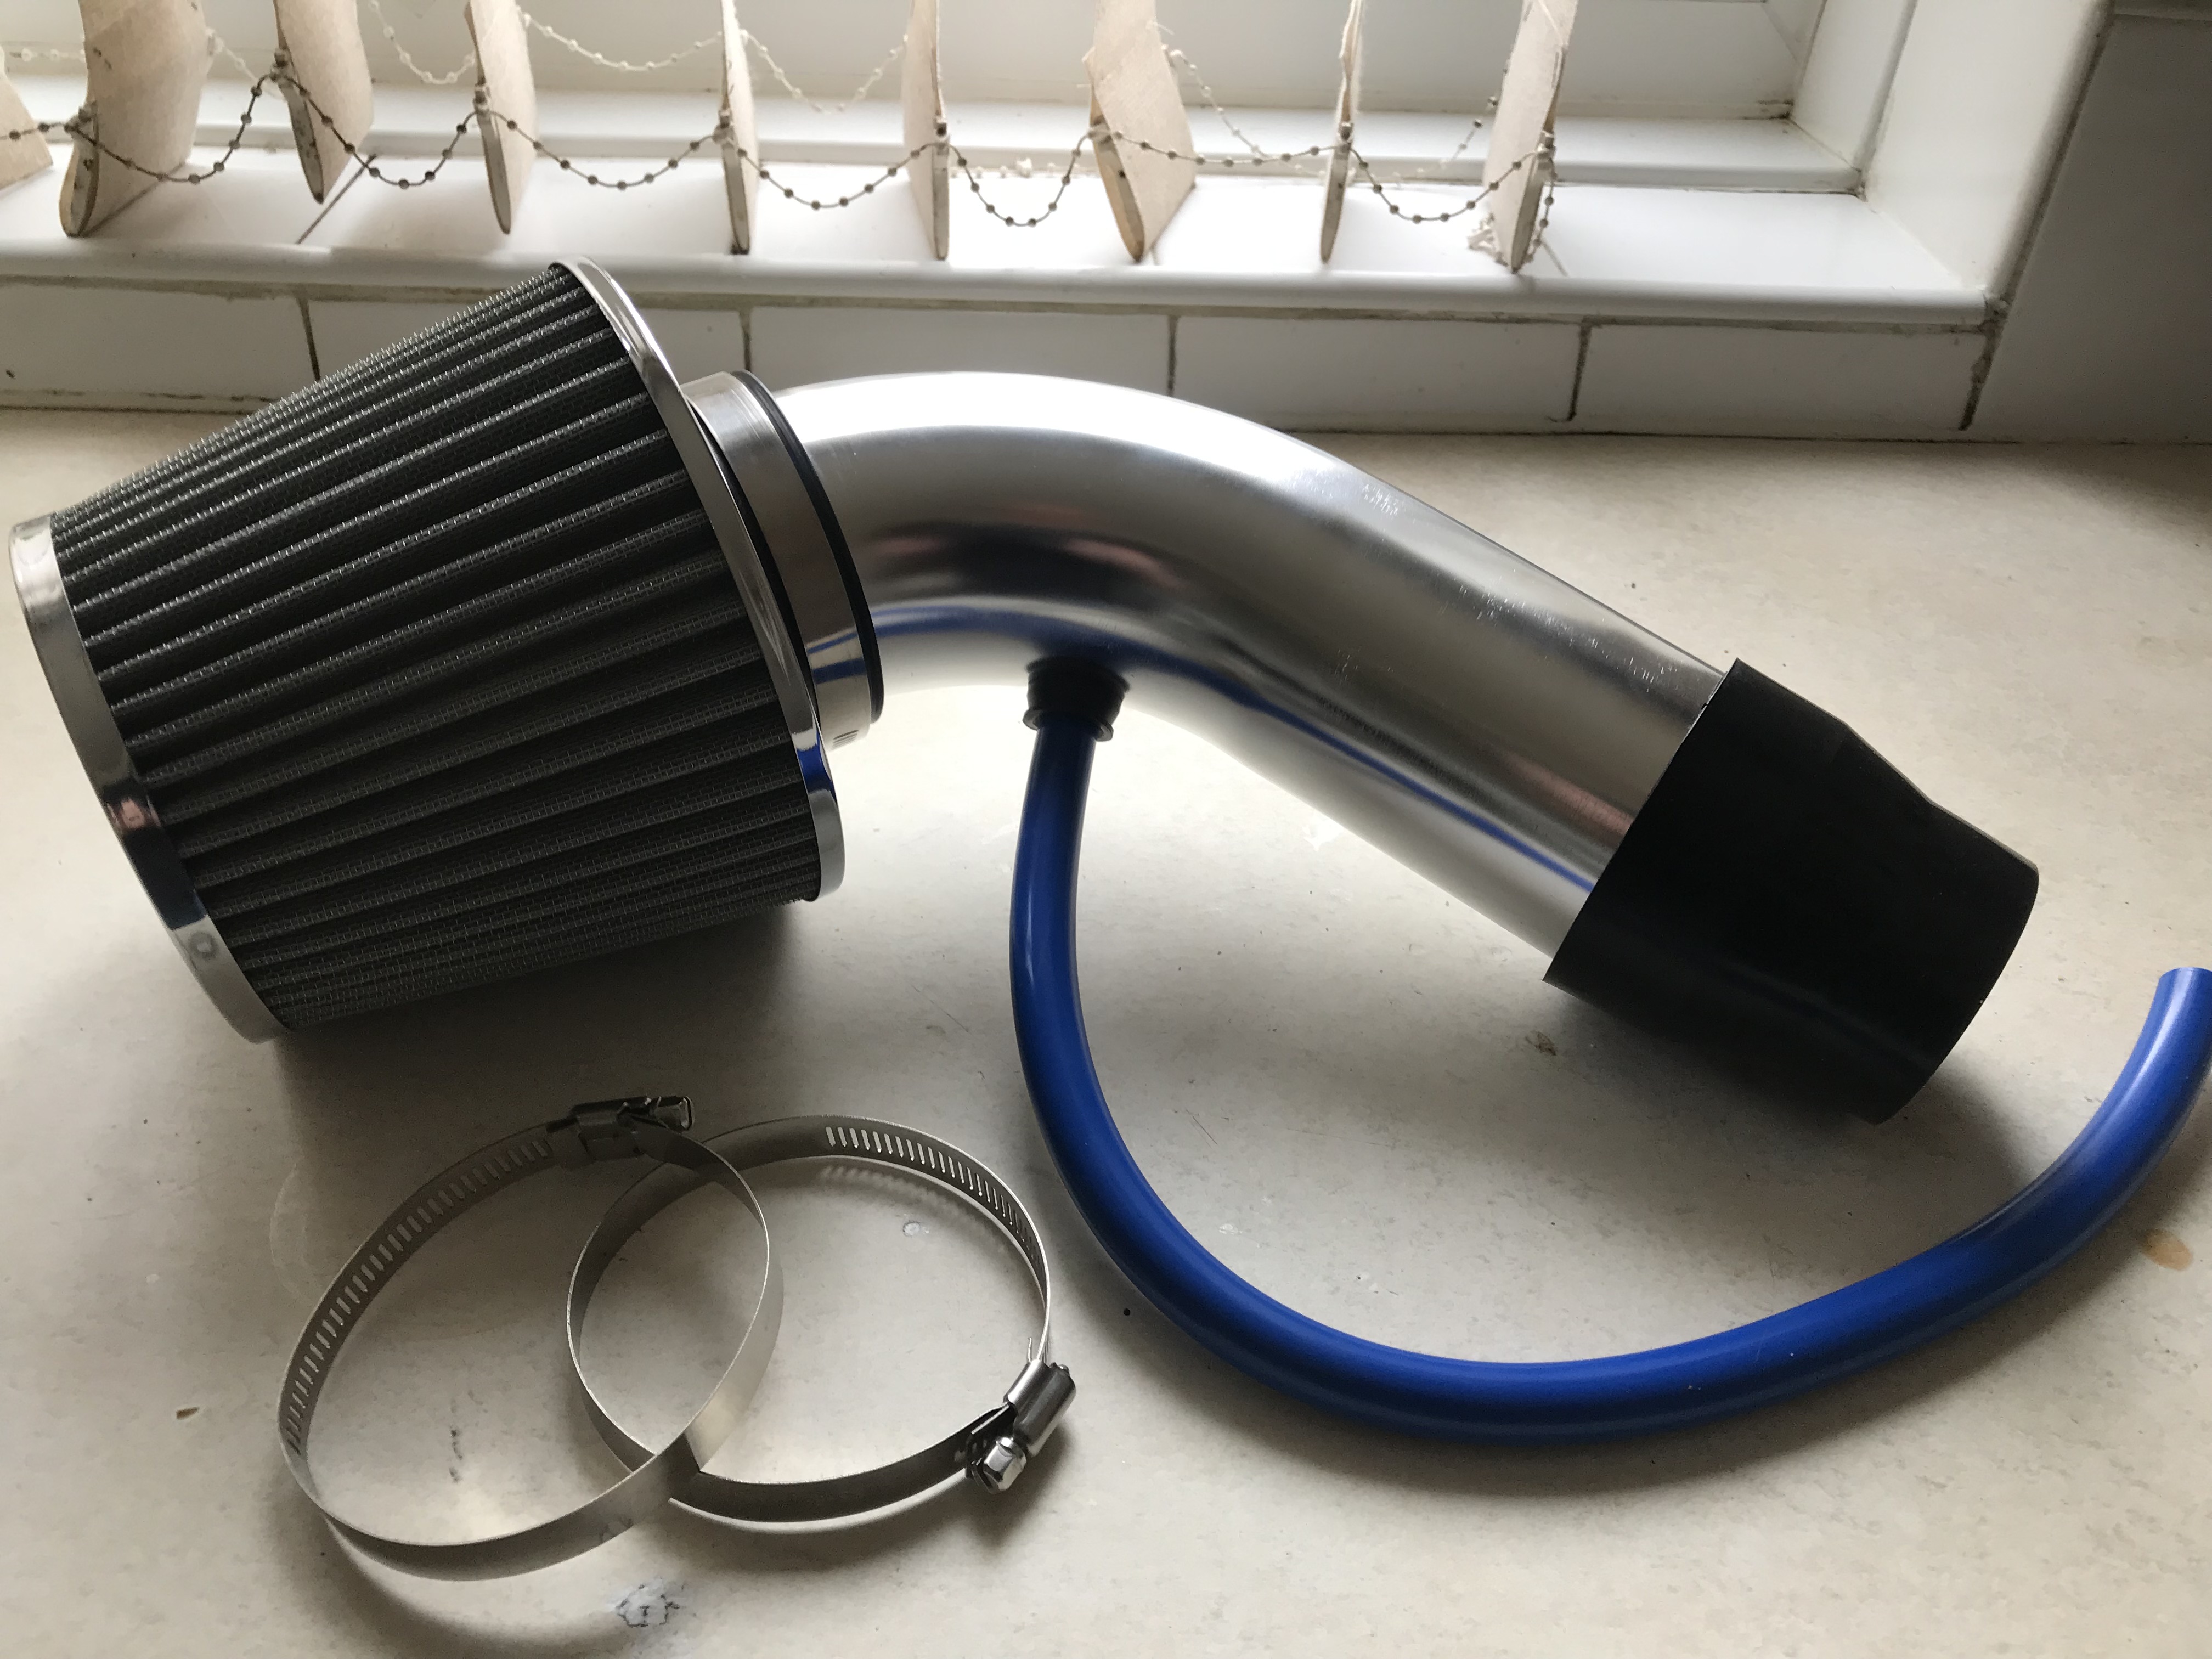
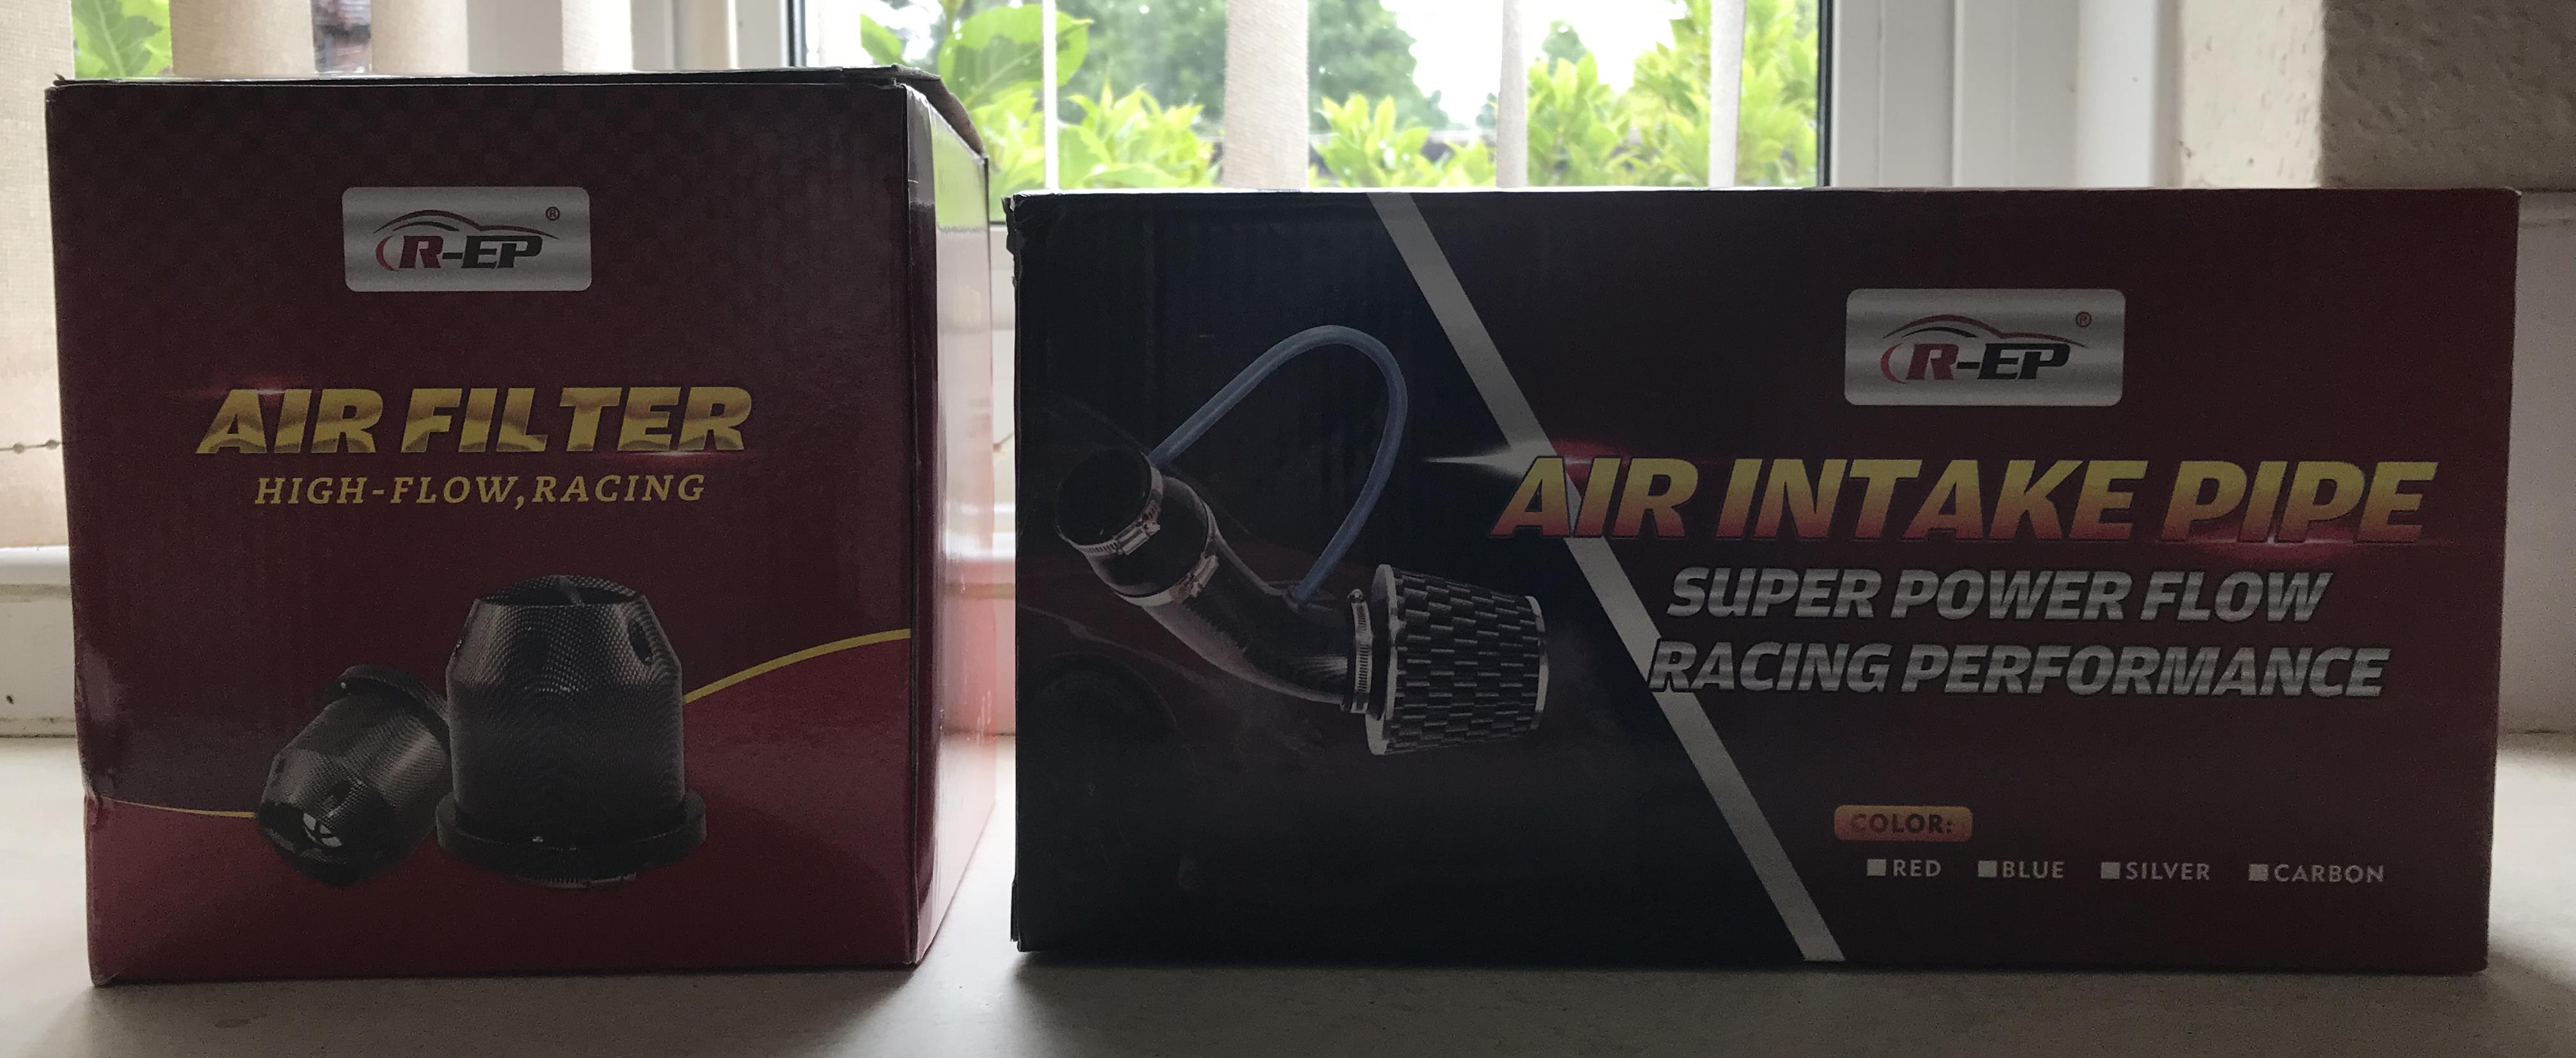
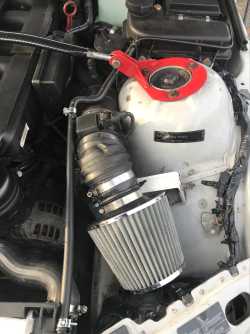
Possibly my next projects? - Straight Cold Air Cooler Filter, These can be cheap and most likely will be the next purchase
- Spray Washers for Headlights requires new twin pump, rather than the single already on my Z3. I already have the 2 jets and piping off the old bonnet/hood so may as well use them.
These are Just a few ideas playing around in my mind - watch this space to see if the ideas become reality or not .....
done!
done!
Going back to 2018, the Start of the Renovation - See 2020 diary entries pending....
I like the chrome and black and matches the manual brake, accel & clutch pedals.
I do need to wait until I take off the hard top, before sorting out the wiring. Another problem is trying to find a safe place to store the hard top. A good wiring diagram in laymans terms would also be helpful in rewring my switch, as it is the older type. The one ideal switch am looking for, is like looking for rocking horse droppings, rare and is expensive.
23.07.19 This afternoon I decided to have a go at fitting the new sequential lights that arrived today on to the front of my headlights and bumper, today is one of the hottest days at 24c and sweat was an understatement and the heat just drained energy. As to say, the job was not concluded as there was a break in one of the extended wires, making the o/s lamp faulty. I decided to utilise the cut-off fuel switch, so this switch now allows the operation of the fuel pump and the running day lights at the same time. The follow up tomorrow means sourcing some more wire to complete the task. Forecast tomorrow is hotter than today with thunderstorms....
24.07.19 As one promised a night of thunderstorms and another hot day following. Again; late afternoon up to the garage, to sort out the wiring of the sequential lights. I decided to replace the live wire to the o/s LED strip and that did the trick, the lamps all work and not looking too bad! On to the next job...
I had noticed I had some exhaust bandage left over from my job on the exhaust cut-off and not one for wasting anything and while I was on a good luck run, I would use it to cover the unsightly angle section of the exhaust and paint over it, car was raised up onto the jacks, ten minutes and and another job was done....
The good luck run took me onto another small job and that was to investigate a problem with the sound coming from my o/s footwell speaker. With soldering iron in hand, I re-soldered the speaker terminals and I then decided to put in a couple of small multi-speakers into the dash, allowing me better sound and volume. Again the one side sounded good, but this time there was a phase in the n/s speaker. I knew what was wrong; as I had noticed when coming to fit the o/s speakers, two wires were wired up in what I thought was a peculiar way, however they were a back to back speaker wired up in a way I hadn't seen before and was correct apparently. So the o/s just needed to adjusted accordingly, this will be most likely completed tomorrow.
25.07.19 Today is suppose to be the hottest day on record, it is 9:36am on a Thursday and the temperature has reached 27c. To place on record, Boris Johnson is on his second day at no.10 as PM, not sure if there is a connection with the heat, but hey, give the man a chance, can't be any worse than the pm that went out?
Two purchase orders have been placed today, one for the Cold Air Filter, (see purchases). The cold air filter is not really a necessity, mainly engine compartment bling, I have some thin steel sheet to fabricate a firewall and should it should look good when completed, another job for the beginning of August. The other purchase was for two interior lamps, one for the boot/trunk and the other one was for under the bonnet/hood. The bonnet light does not exist 'currently', (pardon the pun) and the boot light is not working, most likely this is down to a bad earth somewhere; even after trying to trace it. By rewiring to the part of the circuit that works, this problem with lighting should be hopefully rectified. With the addition to a new circuit under the bonnet, a useful utility to have if there is a problem and maintenance is required during a dark evening. It should be much brighter than the conventional lighting system.
Ok! We are in the afternoon, the heat is astounding at 26.0c inside, and must be in the 40s outside, seems as hot as it was this morning. So, 20 minutes exposed and I had, had enough. The radio speaker wires have now been soldered on correctly, onto the terminals, the phasing may have been down to the solder, it seems to be ok now. Some mats have been vacuumed and some hand tools placed in my boot, that is it for me today...
30.07.19 Arrival of my Cold Air Filter in the pm, unfortunately the weather has turned from 'red roasting hot', to rain and has been all day. When I get a break in the weather this item will be fitted - watch this space...
31.07.19 A cloudy, no rain day so far, ideal for fitting my cold air filter, (photos to follow). It is never plain sailing with these jobs, as one normally expects with such a simple job however, 'Sod's Law', so where do I start...… 1. Not enough space for the chrome pipe, 2. broken the radiator top nipple, during the disconnecting of the factory air box, and overflow pipe, due it to being brittle; so the job has taken twice as long, as one has come to expect, unfortunately. No bracket in kit, so had to make one, can't use chrome pipe and I will not cut it, as the length would be pointless, so I needed to fabricate some rubber tubing. To add further difficulty, the gaiter that came with the filter was the wrong size for the MAF sensor, so the gaiter needed to hook or by crook be adapted, one way or another until it fitted. I checked on varied sites to see what other DIYer's had done when fitting their filters on Z3's, not very helpful really; as the they had plenty of space to play with. After further investigation, I did find something odd and that was a box shaped container attached under the tubing coming away from the engine to the MAF. I hadn't seen one of these, almost like something that collects condensation, or something like that, whatever it was, it was factory spec. I decided to leave this on since it was a sealed unit; I would have needed to resource more factory spec tubing if it was taken off , no doubt at a cost, this was not going to happen on this 'simple job', enough had already been spent. The radiator nipple has now been glued back on with a strong glue and will be left over night to harden, then hopefully, the rubber overflow pipe will be refitted; preventing any further leaks. I did start the car up, just to see if there were differences in the sound. It was not disappointing as the accelerator went down, the tell tale signs of the roar through the filter. Just another cosmetic add-on that compliments the exhaust cut-off deep throaty idle.....sounds great!
Quick change in subject, after a tidy up of the garage, I came across the 300 decibel horn and 60W speaker I once had on the e39. This may be another install job for the Z3 for another day... I will leave a description in purchases'. I really thought I had thrown or had given away this horn by accident a year or two ago, so a pleasant surprise for a change.
07.08.19 Over the past couple of days in-between other, just as important unassociated tasks, I decided to look at the radiator's broken nipple that connects a pipe to the overflow or expansion tank, a frustrating problem. (as mentioned on 30.08.19 note: 1) It is either a new radiator at £119, or a new brass nipple(s) at around £6 or an attempt of using epoxy resin at £1.49. I decided on ordering a couple of brass nipples of two sizes and/or possibly use some tubes of resin and hardener.
The two brass nipples and resin were ordered and two items have been delivered so far, one brass nipple, this one proved a little too big when it arrived a couple of days ago, (awaiting the other one to be delivered mid August; as it is arriving from Hong Kong - I know ok! It was cheap). The other was the epoxy that arrived today. I had previously tried a standard glue and it worked to a fashion, allowing small beads of water to drip, (this was not really ideal for any long journey). I was not really satisfied with that temporary fix or the layout of the piping coming from the expansion tank with the new filter installed. With a re-arrangement and sourcing some more appropriate piping from the garage, the pipe connections were re-arranged to a more appropriate position. This just left the epoxy and this was spread onto the broken nipple and the radiator point it attached to, (one must add; the tubes of epoxy and harder were mainly filled with air, (and it seems you get what you pay for) only allowing for a very limited content, this was also a little annoying, remembering it did account for the cheap price I paid for it). With what little there was, the nipple connection and inner metal pipe was epoxied to the radiator. This I did early, this morning. As time ticked on, I have now allowed a good 12 hours; ideally 48 would be the ideal for the epoxy to become solid and harden fully before re-connecting the rubber pipe, hopefully, this will do the trick. There is always room for another attempt; if and when the other brass nipple arrives and this time be the correct size. I am hoping that this epoxy job will servise:
As one can see it is very tight for the Air Filter, there was definitely no room for the chrome tubing, however the filter does point down over an air vent and the filter is sturdy with flexibility. In other words it doesn't bounce around too much. Looking at this image it does look a little limp, it is not, unfortunately it is something to do with the angle the photo was taken....believe me! ;)
This may look like a hot air filter and with all of the will in the world there would be a problem in constructing a firewall box to make it a cold air filter due to the confinement not clear in the image. However the filter is over a vent and performs well. I may look at it again some other time to see if improvement can be made.
Note: The pipe, left of filter as discussed for the next entry
08.08.19 ...and here is another sunny, hot day with the follow up to sorting out the break in the radiator expansion pipe nipple. It seemed to have held this time, however just to make sure; I decided to finish off the tubes of epoxy and hardener and gave the break site the remaining topping, (see ' Repaired Join' image above). The pipe was re-attached and secured, the engine was left to tick over for twenty minutes to check for leaking and the repair seemed to be a good one. I haven't seen what the results would be after a long journey; this will be the defining factor to whether the job was a success or not.. so far, so good....
09.08.19 This afternoon I took a 25 minute drive locally to test out the repair, the temperature gauge did slightly move to the half way mark on the dial and remained there. Before it was just a little before the half way mark. This could be down to the new cold air filter and the rerouting of the expansion tank piping. Over all, I believe the repair was a reasonable success. The return journey proved to be the same.
16.08.19 Today a very sad day for me, and I must commemorate the memory of my cat, as she was taken to my local PDSA today where she passed away peacefully at 12:00pm - her name was Daisy or affectionately known as The Mogg! I had adopted her in her latter years from my deceased neighbour - Well! The moggie really adopted me and I had known her most of her life as she visited regularly. I will miss her deeply, her personality, character and especially her companionship. My heart was broken.... I am a big softie really, but don't tell anyone!
18.08.19 To take my mind off my recent personal event, I decided to redirect my thoughts to address some of the reoccurring issues with the Z3, namely: A. Shut off switch failed to perform correctly, or there was a problem with the fuel pump and this happened when trying to drive out of the garage to commence the work. B. Running lights had stopped working C. Cigarette Lighter also stopped working a couple of weeks ago, and; D. The radiator expansion tank water had gone down to a very low point, this indicated a leak somewhere I had hoped it had been resolved. Inspecting each job I decided to address them as and when I came across them.
B. the running lights proved to take the longest duration to correct, (a good few hours) as they needed to be rerouted and sides changed and stuck down with doubled tape. This was down to noticing the sequential was indicating incorrectly within it's duel function as day running light and direction indicators. The strips also proved to be back to front and required the wiring to also be rerouted to display the correct side of the strip. During this correction the live feed also decided to fail on me, so most of the time went into the diagnostics into tracing the problem. At the same time, I introduced further wiring to a separate switch, so it could be turned off independently to the ignition system when needed; as I found this to be a useful additional function when stationery and the ignition left on for the radio. The switch is now setup and only needs an appropriate hole drilled into the dash for the switch to be accommodated. Previously, the live was going from the fuse box, sharing the fuel pump fuse connection contacts. This was not really appropriate and may have been the cause for the switch-off switch failure, therefore the circuit live was rerouted to the ignition live under the dash and an inline fuse was inserted into the circuit. The light strips themselves were stuck down better this time too, tested and they seem to work again.
The next problem was to recheck the radiator D. The connection hoses to the radiator were re-checked to make sure the jubilee clips were correctly tightened and secure to the radiator. One was tightened up by the broken and previously repaired nipple and the radiator topped up to it's appropriate water level. Only time will tell and of course a local journey will be required for the water to be brought up to temperature and pressurised, to see if the problem has been resolved.
C. The cigarette lighter connection was checked and was found to be disconnected due to one of the connection spades not being compressed enough to grip the pillar terminal on the lighter. An easy fix.
A. Finally, the Shut off switch, again required diagnostics, the switch received a couple of new spade connectors and was made more secure, I also replaced the dummy fuse into the fuse box and replaced the fuse under the dash for the fuel pump. After a test; it was back up and working again.
These corrections were frustrating as these jobs were all good at the time of fitting, or as I had thought... but that is the way it goes sometimes, if not most times with car DIY. So the job left is to house the switch for the running lights, pending good weather.
23.08.19 Today, another sunny warm day, I decided to have a drive locally, unfortunately when I got to the Z3, I could see water on the floor of the garage and with further inspection, could see the radiator tell-tale signs of a leakage and the expansion tank required a good top-up. This meant one thing! I needed another radiator. On looking via eBay, Gumtree and via the part breakers online, the prices varied from £43 to £390, some prices were even more ridiculous towards the £660+ and ones I totally ignored. All for the same radiator for a Z3, (mainly for the 1.8 or 1.9 models). From what I gathered the 2.2 is the Sports Version of the Roadster, hence the price tag... even the breaker yards were asking £175 and that was for a used system and unknown history of it's wear and tear. Surprisingly other models 2.3, 2.5, 2.8, 3.0 and 3.2 varied in price and were cheaper in prices than the 2.2i. I could only put it down to the available space, radiator dimentions with their trims, the hose layout? I did eventually find a radiator supplier: bargain-radiator, via eBay selling one for £119.31 with a 2year warrantee, that warrantee was the clincher and I ordered one, even though my finances currently are at choking point. One needs transport, so what can one do? (see Purchases for details). Hopefully this will arrive in the next week, after the bank holiday....
Front of Vehicle
Radiator >>>
Repaired Join
Most awkward position, but the repair seems to work and the leak has stopped.
Transparent insert to check on free-flow and contaminants - this may change as the see through pipe is soft...
<<< Rerouted pipe, routed under the filter rather than over the top of the 'Cold Air Filter'- note: the condenser tank under the thin pipe. The only place one can secure the expansion tank pipe is with a zip-tie from the filter bracket...
<<< Expansion Tank pipe route.
<<< There was nothing wrong with this old expansion pipe route, however with the new Filter, it provided it's own set of problems and not forgetting a break in the original plastic piping that was wrapping around from the expansion tank, under the brace and where the transparent pipe is now situated... With the new filter, the pipe would have been going over it; making it look a little more untidy... (See first image dated 31.07.19 above for comparison).
New Pipe Route
New Radiator is now on order
The leak on the old radiator is from the broken nipple, even with resin and dollops of glue, air is getting into the system and causing the overflow, hence the lowering of the water level. Makes one think and ask the question 'why do manufacturers use weak plastic that can go brittle over time, for a high stress area, such as the location of a nipple on the radiator? Explanation: Cheap! To sell more complete radiators, at the full price, perhaps? No control of cheap Imports? Nothing changes it seems, concerning the greed of some manufacturers, it seems to only gets worse.... I digress...
New Serpentine Belt is now on order
It is only common sense if replacing the radiator; one also replaces the Serpentine belt. Since the radiator will be taken out of the vehicle there will be more room and an ideal opportunity to check the belts and pullies. I am aware of some wear on the serpentine or alternator belt and this will be the best time to change it. This will give me more peace of mind for at least another 50,000 miles before another thorough inspection. In addition, as long as finances are not stretched, the A/C will be checked and the belt will also be replaced (pending).
Update: Both items received today 28.08.19
30.08.19 It is about 2:pm in the afternoon and the weather is humid with the odd cool breeze. This is an ideal window to strip down the radiator, fix the serpentine belt and check the water pipes, pullies etc and replace the radiator. The Z3 was more straight forward than I had expected, the only slight confusion was with getting the fan off. I tried undoing the bolt on the fan, clockwise thread, (reverse thread) via the water pump; but it wasn't having any of it. Maybe it was the design of the fan unit, rather than just being the fan, it also had a clutch. As for the A/C unit, this may have been replaced after the front end bump, the vehicle experienced with the last owner. I ended up removing the fan off the clutch unit, rather than taking out the water pump, this was only four 10mm bolts and an easier option. (I didn't fancy taking out the water pump unit, especially when there wasn't anything wrong with it and I didn't really want to change that.) So the clutch it was, this was so I could get to the belt adjuster bolts to take off the belts. I ended up replacing the Serpentine belt and leaving the A/C belt, as it looked to be in reasonably good condition. ( I am sure the mechanic I had bought the Z3 off had done some general maintenance work on the vehicle, most likely to get it through it's MOT, before deciding in selling it to me last year. Looking at the old radiator, again looked near enough new, with the exception of the broken nipple of course. The Serpentine belt was replaced, the AC was checked and the belt placed back onto the AC after inspection. I also noted the AC was not working and this was going to be another job, for another day.
One needs to remember to take old parts from the old radiator, to place on the new, as the new one comes with the bare minimum, or nothing and therefore requires these parts for the reattachment process for the install. This includes the rubber grommets for the radiator clips at the top front of the radiator, the fan switch screwed in on the offside of the radiator, there is also a length of rubber strip for the gap between the radiator and the chassis or vehicle structure. I was also able to reuse the original water hoses/pipes as they too, were in reasonable condition.
A note to remember if just taking out the radiator and not replacing the belts: By draining the radiator, (this can be done partially) by disconnecting the hoses partially from the radiator, raising the pipe preventing further water drainage, electric connectors from the temperature switch, loosening the fan shroud and unclipping the radiator, should now allow the old radiator to be lifted straight out, followed by the shroud. All with the fan still connected. Obviously; if one needs to do other work on the vehicle, one will need to remove the fan to gain access to the front of the engine.
The installation of the radiator is the same, but in reverse order. When installing the shroud, make sure it is flush to the radiator. This just leaves the topping up of the radiator and bleeding the system:
1. Top up the radiator with water, antifreeze. 2. Make sure the fan blower inside the vehicle is switched on full, check the gauge and vent for hot air, (heater) - Start Vehicle 3. Leave the radiator cap off at this point and also the bleed screw should be out of the bleed hole, completely. 4. When the water is at temperature the level drops in the expansion tank, re-top up with water, (one will notice bubbles coming out of the bleed hole this is normal). 5. Allow engine to get up to temperature, regularly check the temperature gauge inside the vehicle and feel for the hot air on the vents inside the vehicle. (if one cannot feel the hot air, this may be down to air still in the system, continue with the process). 6. When one is satisfied there are no leaks, from hoses, radiator and expansion tank, other than from the open radiator cap and open bleed screw, the gauge should read a little below half-way, 'normal' and one can feel the heat from the blower, reconnect the radiator cap. After another ten minutes and there are no more bubbles, reinstall the bleed screw. 7. Check the inside temperature gauge and this should now read half-way or ''normal'. Let the engine tick over for at least 10 minutes checking for leaks and temperature, when satisfied, shut off the engine. 8. ONLY when the engine is cold, one can remove the radiator cap to check the water level, top up if necessary. One can then go back to the normal maintenance schedule - Job Done!
The next job to be carried out was to install a replacement boot LED lamp. This came with self-tapping screws and a backplate, (I only used two of the four screws. The wiring, (3 wires, red, yellow and black) two wires were just connected to the existing lamp wiring. I had previously wired up a separate earth. With the ground earth (black) and the live (red) connected, (the yellow wire was not used as this was for auto entry operation) the lamp was installed onto the backplate, fixed to the boot wall and was secure - The lamp had an on/off switch and auto, I preferred the physical manual operation of the switch of on/off, to the auto, on when lifting the boot lid, mainly to protect the drain on the battery - especially if this function fails for some reason, quite a common occurrence on BMWs. Another job done! The lamp for the bonnet/hood will be installed another day.
Jobs completed today: 1. Installed Serpentine belt 2. New replacement Radiator 3. Cooling System Bleed 4. Boot Lamp installed
After.....
Old Radiator overnight Leak
- New Radiator - New Serpentine Belt
- Broken Nipple Connection
New Boot Lamp...
31.08.19 Today, a quick trip locally, just to test the radiator pressure, on my return and with a radiator check, I found a leak in the expansion tank pipe to the radiator from the join on the black to the clear pipe by the engine brace. This was quickly rectified with pushing the black pipe further into the clear pipe and adding an extra zip-tie, this was enough to stop the leak. Hopefully this will solve the problem, failing that a long, thicker length of the pipe; maybe needed as a replacement of the old thinner pipe. The temperature gauge setting inside the car was back to the normal reading, about half way. (WARNING: Be careful with the water pipes under the bonnet/hood, as water maybe very hot and there is a risk of scolding if the pipe becomes disconnected).
Note: the Clear pipe directly under the brace, allows one to see bubbles in the system.
02.09.19 A bright morning, nice breeze, a few hours of a window to install an LED Lamp under the bonnet/hood, it means adding a new wiring circuit and fuse to the live in the fuse box. There is a good earth or ground point attached to the bonnet/hood and this will also be utilised. The bonnet/hood has a thin sound insulation blanket attached on the inside, held in by a number of press in screw threads or clips, three or four of these will need to be removed to get access behind the blanket to allow the wiring to be attached to the light unit. I had decided to use a basic zip-tie to hold on the retaining bracket for the lamp. This is more than adequate to retain the lamp in position as the weight of the lamp is very light.....(pardon the pun). The connectors are spade/grip connectors and insulated with tape. The wiring is duel speaker style wire, again lightweight. The wiring will be taped in black to match the rest of the wiring under the bonnet/hood. A ten amp fuse in its own protected socket is attached to the accessories fuse in the fuse box. With the job completed and everything visually back to what it was, the LED is tested and works well. Again, it is not linked to the auto-on when the bonnet/hood is opened, like the Boot lamp, it is manual on/off, mainly to save the battery, if there is a malfunction. So another Job Done!
Before finishing off with my efforts today, I did have a quick look at the front A/C fan and this was not working. More curiosity than anything, I plugged in the OBDII under the hood/bonnet to see if I had any codes. One of the code descriptions suggested the A/C Fan Temperature switch was reading 'Low'. I interpreted that to being partly faulty, one temperature out of a two temperature switch. A Temperature Switch was placed on order. (see Purchases)
Ordered: 02.09.19
With the Temperature Switch replaced, I am hoping this will solve the A/C fan problem.... (pending)
05.09.19 A quick entry today, I have now received the Temperature switch and have fitted it to the radiator. The A/C is still not working and this is most likely down to the refrigerant being low and therefore not activating the A/C. Another possibility is the auxiliary fan not working. So the next step is to get the refrigerant and of course the gauges to address this, to deal with the first possible option. (when finances allow).
10.09.19 Some of you will know, by now I am never satisfied in just watching the world go by without addressing something on my beloved Z3 and after many hours viewing the YouTube channels, it has urged me on to get results one way or another. By planning and juggling my finances, I have managed to order refrigerant and gauges needed to at least do the next job within my diagnosis. This is the next step in solving my problem with my A/C or a case of eliminating each possible problem at least, within my diagnosis. Process so far:
1. New radiator - done! (This started the whole process after the nipple was broken off when fitting the Air Filter) 2. New Temperature Switch - done! (The previous switch looked to have seen better days) 3. New Refrigerant (with gauges-bot sets) - done! - (received, basic gauge unit, awaiting advanced system) 4. New Auxiliary Fan - pending (suspect -old one not working) 5. New A/C Clutch or unit - pending (suspect - not working) UPDATE now ordered a used A/C unit (see next entry 26.09.19) ...
It is known for A/C or the clutch to stop operating when the refrigerant becomes too low and this will also effect the auxiliary fan. If the fan has gone or burnt out, this can be tested independently, as with the Temperature switch. Bearing in mind, when I first collected the Z3 it did have a serious dent in the front of the bonnet/hood, one can also assume possible damage to the A/C high/low fans and possibly the air cooler/condenser radiator in front of the main radiator. There is also the A/C fuses and relays. (if one can find them, my fuse box does'nt really indicate them, weird must be Canadian, (nothing against Canadians, however they do have different vehicle requirements to most other countries, it seems) most likely under the dash somewhere. I will have to check, but not today).
20.09.19After further investigation and extensive search of the A/C fuses under the dash of the driver's side, they could not be found visually at least. I decided to check and identify the relays by probing the connections to the A/C as well as the front auxiliary fan, on both occasions two of two relays clicked within the main fuse box; within the engine compartment and one can assume there is a live supply.
With the delivery of the A/C refrigerant gauges, I connected the twin set to the system. (I was unfamiliar with the feeding of the refrigerant at the time and was familiarising myself with the set-up). These A/C twin gauges were not reading anything and one could only assume there was no refrigerant in the A/C system. (It may have also been a case of turning on the yellow pipe connector, up at the gauge end, that may have made a difference..doh! ). When it came to re-connecting the system using the yellow pipe, this could not connect to the refrigerant can. After spending time and arriving at a number of incorrect assumptions like, the thread was wrong on the can? I eventually arrived at a more logical conclusion, there must be an additional connector required, and this was the case, it seemed, a further purchase was required and is now on order. The following day my basic small lead gauge had been delivered and had the appropriate fitting for the refrigerant can, this meant I could now continue with the process of recharging the A/C system, only to find the gauge was only reading charged! With a quick halt! (to save wasting the refrigerant as in the UK it can be pricey). The reading was just going into the yellow from the green, suggesting 'ALERT' or system 'over charged'? This did put a different view on the situation. So! It was not low on refrigerant... unless, the A/C system was holding moisture, or even oil, possibly? Other options left, the compressor itself or A/C clutch unit, as well as the auxiliary fan, or what I also later researched the A/C 'dryer' system was still a possibility of being faulty? The A/C condenser is assumed OK, as there seems to be pressure within the system and has been for some time, evidently. There is of course the illusive A.C fuses too, power not getting to the A/C compressor! With more research, there is another point overlooked and that is to process of refrigerant evacuation or the use of a vacuum pump for the system to eradicate the moisture or atmosphere within the A/C pipes and system generally. A purchase of a vacuum system was now becoming a required necessity... pending?
I was not sure how long this particular A/C compressor or clutch unit had been on the vehicle in it's current not working state, for all I knew it could even be related to the involvement within the initial accident, over 12 months ago or even before that, before the purchase of the vehicle? One could understand no refrigerant however, this was not the case. The over charge could on the other-hand, be enough time for the system to be saturated with environmental moisture perhaps?
The problem as far as I could see, could now be back to the electrics, both relays clicked when power was put to it at the compressor unit and the temperature switch. The clutch did not respond at all. This leaves me to believe the A/C clutch may have failed. The other point could be the A/C clutch plate could be dirty and corroded or the gap may also need checking? To eliminate this possibility, I used a crowbar, A/C system on at the ignition and tried to manually engage the A/C clutch by tapping the face of the clutch plate. It was totally dead, not even a click or any reaction.
So, still quite a list of suspects, further research and more possible expense, no doubt! The winter months are now approaching, so I have time to move slowly and eliminate one specific symptom at a time. To investigate and/or replace/purchase the following renewed list of suspects: (trying to keep the cost to the minimum - ha! In one's dreams).
1. Vacuum Pump Evacuation System (will need to purchase at some time) - (Update: Ordered 25.10.19) 2. Compressor A/C Clutch, (if deciding on a separate unit) N/A 3. Compressor Unit, (part no. 6452 8 386 650 - As a complete previously used Unit) (Update: Ordered and received 01.10.19) 4. Auxiliary Fan, (this will need to be replaced as it has been diagnosed as dead) - (Update: Ordered 25.10.19) 5. Condenser Unit, (in front of the radiator where the auxiliary fan attaches - last resort) - (Will check the above first, so, pending on the results).
26.09.19 A mixed weather day today, so decided to stay in and proceed with some more research. During the morning, I got thinking about the A/C unit and decided to check out some sources, the prices were all over the place, one can be sure some of these prices have been pulled out of the air, however I persevered. I ended up back on eBay and found a rough looking unit and at a reasonable price of £34. This was better than around the £400 to £600 figures I had been seeing. The body of the unit was disgusting, straight off a vehicle floating in oil one could only assume and by the look of it. Beggars can't be choosers as 'they' say, whoever 'they' may be....
I know A/C clutch units by themselves are around £69 new, common sense suggest to me, to purchase this whole unit for £34, dismantle the A/C clutch, clean it thoroughly and place it on my current unit, after taking the old A/C clutch off. This may save me having to re-charge the refrigerant in the unit on the vehicle, saving me time and more money, perhaps? If that doesn't work, then at least I can put the replacement unit back together after a deep clean and use that one. Either way, it has a number of chances. This will just leave me with a possible three items on my list for now, if all else fails. As I have stated before in my earlier entries, this could have been a donor car in the past, especially seeing the amount of parts that have failed. But I must be positive and move forward.
Now on order.... from drex_auto_parts based in London
A/C Unit Cleaned up
Arrived: 01.10.19
07.10.19 As the weather has been bad and limited worktime on the car, I have had plenty of time to think of what to do with this unit. Strip it down or just place this unit straight on. I am tempted to do the latter. This will mean purchasing the Vacuum Pump to extract the refrigerant....decisions, decisions..... Another purchase will be the Auxiliary fan that attaches to the condenser unit in front of the main radiator unit.... decision pending.
23.10.19 Some may wonder why there has been a delay in my diary entries, it's mainly down to finance, it does catch-up with us, from time to time and it is that time!...As many will know, there is the constant flows of bills and unexpected situations that do arise, without any consideration for one's schedule. The A/C can't be installed until I have obtained a Vacuum pump and it very much looks like I am going to have to purchase one. Hopefully this will be in the next couple of days. I am hoping to make the purchase of the pump and at the same time, an a/c auxiliary fan for the front of the condenser radiator unit to start to move things on. The weather is starting to show it's teeth, as we are getting closer to November, only a few day to go. Check the following details of purchases ordered this month:
click
With these purchases; pump and fan, (they were ordered before prices rise further) and possibly a new condenser and/ or dryer unit may also be required. The latter item will be determined, when the A/C unit and fan is on, the system drained and recharged.... I am hoping the A/C will work. However I am not holding my breath.
Personally, I don't mind the delay, as it is nearing winter and the A/C is redundant anyway, in the predicted colder months of November this year and may continue up to and even beyond March of next year. I am predicting the jobs will be done, eventually and looking forward to the summer months of 2020. My current problem is not having the inclination, spoilt, by the breaks in-between jobs. One can stagnate like this, after a number of lazy delays... I am sure this will change as we go on with the project.
Double click to edit
01.11.19 A quick update, my vacuum pump has been delayed, the company I ordered it off sent me a humidifier of all things, so it has now been sent back with all the paraphernalia that goes with sending an item back. They are not sending the ordered item out, so one 'assumes' they don't have any in stock. I was Informed after a to and fro email, also, that a refund has been now been made, so another order will need to be drummed up some time in the near future. Again, there is no real rush. However this sort of thing is slowly becoming common place.
13.11.19 This month is proving to be a slow month, I had decided to sort out my expansion tank hosing; as I was not too happy with the set up, especially since the fitting of the Air Cooler and the new route the hosing/piping had taken. The joins in the hose to the expansion tank had deteriorated over the couple of months and become a little on the dubious side since the new radiator had been installed. The hot waterflow has caused some of the pipe to bloat, (this was down to the type of piping I had used). The piping had shown to have split in one particular point. The only reason water had not leaked out, was down to having used 'gaffer tape'. After ordering a new hose and connectors from eBay, I ended up reordering a couple of times , mainly because I received a variety of mismatch sizes for some strange reason, only known to the sellers it seems. My measurements were correct and checked after each delivery and it only proved the supplier was half a sleep, or they couldn't care less. I ended up going to a local outlet and strangely enough got what I had asked for. Ok! It cost me around fiver pounds for the length I needed and included two hose clips, a bonus! Today, was a reasonably warm day for the time of year, so a good opportunity to get this job done before it got much colder. The fitting of the hose went smoothly, I also ran the engine to check for leaks, again no problem. This small job after completion, gives me more confidence in wanting to take longer journeys. Especially over the Christmas period.
18.11.19 A little on the cool side and required a thicker coat today, just tinkering around, I found my headlight switch playing silly antics, to what one would describe as a poorly designed switch or novelty. By pushing in and out and turning the silver knob fully right or clockwise; one can switch off the headlights/sidelights or control the dimmer illumination. One will wrestle to try and carry out this function, especially not being familiar with this particular switch at least, or break it trying, ( if not through frustration). By all accounts after a read-up on various forums, it is a common problem and a replacement can cost between £50 to £75 for the switch and vent console, usually sold together, so do advise you don't get too frustrated with it. There is a method of turning the lights on/off and one needs to familiarise with it's on/off functionality. One needs to adjust the dimmer to full before pulling on/off the knob. I am not sure if this method just relates to my switch or all of them fitted to Z3s.
eBay: £12 + £5 p&p - ridiculous!
Unfortunately a common fault with the Z3s and an expensive game to get repaired... Obviously these prices are ridiculous for those on a low budget or are less experienced in life, considering there are a fair few numbers of Z3's going to the breaker yards nowadays. I chose the route of attempting the repair myself, as always. Keeping my switch and stripping it down and cleaning the connectors and learning it's functionality is important for less repairs in the future. (yes, naïve too..;). The element of the switch can become hot during connection, as it is based on a rotary spring on a live contact, the spring heats up. (not the best of design, in my opinion) so be warned of potential burning of fingers. Placing the switch back together, it seemed to function ok, bearing in mind the adjustments or rotation of the knob; for the dimmer is all really down to familiarity of the way it functions.
The vent or plastic console switch retainer, just pulls out of the dash, there are no forms of anchoring or retainers, it just grips in. The switch will need to be removed carefully, first taking the cap off the knob, this hides a retaining nut. (the knob is usually 'Silver' or 'Black' and one may need a small pocket screwdriver to open this cap, be careful not to damage the plastic cap...), then by unscrewing the retaining nut inside the actual knob enclosure, the knob can be removed, this will give further access to dismantling the stem through unscrewing the stem from the housing. (note: the stem does not just pull out). Only by rotating the stem/stalk anticlockwise, will unscrew the stalk from the console fixture. With the stem/stalk removed, it can be placed to one side allowing access to the inside rear of the fixture. The bulb section at the back, also has a retaining fixture, this fixture or housing does come off and out with a firm pull, based on it's primitive retainer, (the bulb itself, is a push/pull unit in itself and fits into this fixture, this will also need to be pulled out). Another point to note: the initial bulb housing fixture may need to be glued back prior to reinstalling, this really depends on the condition of the retaining infrastructure, (my particular one was not the greatest of fittings and did require gluing - (I used plastic modellers glue, it worked).
A piece of clear or contoured coloured acetate will be needed to also be glued into place, (I used some clear plastic off an old clear security ID cover that could be cut to size with scissors, (this ID cover was something that pins to ones clothing and was in a draw just gathering dust, so what's could be better and free, other the a factory decal?) The thickness of the acetate was also just about right. Now it was time for devising an alternative to the factory spec decal. If one can find one locally and free, that would be great in an ideal world however, looking through the forums via the internet, the factory spec decal proved rare, expensive and not that secure it seems and comes off or damages easily. (like the one in the stock picture, first and third image above). There is an option if one can't find an original decal, for those like me not willing to pay silly money to greedy scrap operators or foreign opportunists, I digress, this is the alternative: A suitable appropriate resourced coloured transparent material should be placed inside at the back of the switch console. (you will need the acetate fixed at the back to look seamless when looking from the front, this is to give it a little more of a professional look, ( A tip: a green felt- tip 'Sharpie' can be used to colour the one side of the acetate preferably at the back. (as long as you don't mind the odd streak here or there). I did try a Sharpie on the clear acetate, however after a number of attempts of trying to get the colour even, the pen dried out, I ended up cleaning the acetate back to clear. Another option and possibly a better one, is to use green paint spray if one has a spare can lying around that is the right colour). Another would be to use some alternative coloured transparent material to be placed over or behind the clear acetate, that to me would prove time consuming and when tested, can prove to be semi-transparent to non transparent. (it is what it is and what is available at the time).
By using any transparency in green, (normally the colour green, signifies the; normal driving beam'; on most car dashboards however, any colour of your own choice or even the factory grey as in the above decal can be used, as long one can see light coming through it to indicate it is on). One needs to style or manipulate the acetate or plastic, this should be shaped, glued into the decal aperture allowing it to seat nicely, until the glue sets; this should serve the purpose of covering the bulb area to stop any glare from the bulb and to also eliminate that, damaged or trash car look. I also needed to replace the bulb, (since mine had blown) it is best done before replacing and gluing the fixture back in place. This small project on the whole, proved to be awkward and time consuming exercise, however worth the result in the medium-term. Seeing the results; I could at least see a light variation or illumination at night driving and that is really all one really needs. Cost for this project was just pennies and time, rather than pounds and not forgetting plenty of patience. The result? It looked like it has always been there. I did also note: the bulb does stay on, even when the lights are off and it only goes off when the ignition is turned off. I belive this is a common feature to most BMWs, well it has been with the one's I have owned in the past. Another job done!
It was only down to identifying I had a problem with the switch that I realised there was a bulb illumination under the headlight knob switch, as my bulb had blown and the headlight decal was missing I just never clocked it, weird that! Looking on the internet for a replacement was, one can only describe as mind-blowing to what prices were being asked for on these parts. The decal alone was:
A new Coloured Decal to replace the Missing One, It could have been a little darker green with a little more transparency, however it is all down to resources and finance. Another thought as I look at the image, one could have also drawn on a shape of a bulb in black or white ink, ideally behind the acetate, it is a good idea with hindsight! - Better Than Nothing! ;)
Believe me, this was after the first wipe down....
20.12.19Not much is really happening this month other than running backwards and forwards to hospital. (90 years old and my mother has broken her hip). The car at least is out of the garage for now and is being used regularly. The A/C system, Auxiliary Fan, Vacuum and recharge has been put on hold until the warmer weather, most likely will be done next year now...(2020). Time does fly, doesn't it....and another year passes us by.
27.12.19 Today, I was quickly checking my OBD-II and to my surprise I found another fault other than the brake pad sensor light. (I must add, the brake sensor does not appear on anything including the OBD-ll computer). It was the PO365 Camshaft Position B Bank 1 - Circuit Malfunction. I Quickly checked the YT and internet for the further details and diagnosis, it seems that I will have buy a new sensor to replace the faulty one.
P0365 BMW, Meaning 'The Camshaft Position Sensor' is an electronic device used in an engine to record the rate at which the camshaft is spinning. This information is used by the Engine Control Module to control ignition and fuel injection. The camshaft position sensor senses the retraction of camshaft (intake) to identify a particular cylinder. The camshaft position sensor signal is not detected by the Engine Control Module(ECM) during the first few seconds of engine cranking...
Pt: 26-04337-83550 eBay £5.99 the cheapest on eBay, I am hoping this will do the trick and solve the problem. The prices vary considerably up to £48 for a replacement sensor. Be careful as one must consider 'you gets what you pay for'. We shall see!
stock imsge
Possible Causes: - Faulty Camshaft Position Sensor - Camshaft Position Sensor harness is open or shorted - Camshaft Position Sensor circuit poor electrical connection - Faulty starter motor - Starting system circuit - Dead (Weak) battery
P0365 BMW Possible Symptoms Engine Light ON (or Service Engine Soon Warning Light) Lack/Loss of Power Engine Stall
Check Workshop Section for Further details and fitting: WkShp
My Diary Of An BMW Z3
Z3 2002 Engine 2.2 5 Speed Manual
Nigel G Wilcox
click
Paragon
07.01.19 Today, I decided to clear out the garage of the wooden pallets that were used to deliver the bonnet/hood and to cut the remaining wood down with the rotary saw to make fire wood for my neighbour. A job I have been meaning to do since the delivery, there is a lot of it. It was also causing problems with garage space for the car. I did say it would take up until Christmas; didn't think it would include a quarter of January 2019 as well. Now to dispose of it, HO!! HO! HO! done! The old damaged bonnet has been stripped down of all its fittings including the BMW logo/emblem and that leaves getting the scrap merchants to pick it up. I have tried advertising it for sale but no takers and I have now moved it out, propped it up, outside and against another garage door. Unfortunately, with the reversing into the garage with limited space, it can be awkward as the bonnet was in the habit of jumping out from the back of the garage and catching on my N/S rear bumper, it just got in the way too many times to mention; it was starting to cause some paint damage, this will definitely need to be touched up with paint, using a rattle can or two in the near future. A little frustrating so, the old bonnet needed to go....I did think of using it as a sledge, great for the down hills I would imagine; but someone suggested I grew up, never saw that coming or them before, come to think of it!...... I reluctantly took the hint at least for today, as there was no snow...anyway!
24.01.19 The days have rolled on by and with the cold spells, very little work can be done, a few days ago the old discarded bonnet/hood mysteriously disappeared, one presumes the scrap merchants had picked it up and loaded it onto their wagon. It has been a long wait for them to turn up, I did think my neighbours might have made a complaint, fortunately, they didn't as far as I'm aware. The garage had been cleaned out and has proved to be an improvement, far less damage to the car now on the reversing in. Changing the subject slightly on the topic, after searching the internet, I did find an electric portable spray compressor and gun, reasonably cheap, £18 off eBay, yes it is cheap, however viewing YouTube and what it can do for the money concerning the touch up on cars, it even boasted truck of the arctic size, did look reasonable, ( I will leave the details on the Purchases or Tools section). This will possibly save having to purchase a professional generator and air compressor, costing hundreds of pounds. I will give it ago in the better weather. There is still the mechanical aspects of the Z3 maintenance I am in need of catching up on.
04.01.19 It is a myth that lightening never strike twice. I discovered a number of weeks ago that my heater fan blower knob; only operated the fan on the top setting of 4 (0-4) and I investigated the problem to being the resistor situated under the front cowling bonnet end, outside, where the main fan mechanism lives within the firewall. On ordering a new resistor and receiving it today, I decided today was a good day to fit it. Very straight forward refitting, taking about an hour. On completion I decided to take a quick trip around the block to allow the heating system to warm up and try out the heater settings. During my journey, I managed to get stuck behind a truck for ten minutes, only on it's departing; it decided to kick out some debris, (what seems to be grit from a tyre), placing a large crack in the lower part of my window screen. What a pain this was. On to my insurers and National Window Screens £85 Access and can only be replaced on the 7th February, a day before my MOT. I wonder why we pay insurance, checking the policy it is covered! So why are we still having to pay an access? ....ridiculous!
08.02.19 Another day of chores and a first MOT for my Z3, very lucky to get the car booked in. The brake rotors were mentioned and luckily, the garage proprietor knew me after a number of years of going to him for my MOTs. He; knowingly, understood that I would correct any problem the vehicle had and he gave the beamer a pass. So, another 12 months before the next one....
11.02.19 A surprising event took place today and an opportunity to secure a hardtop or detachable solid roof for my Z3. Not many were advertised as they are now becoming quite rare, however the one I noticed was a close match to my Z3 colouring of Titan Silver. A slightly lighter colouring, it could be described as a cream and it can be seen on numerous different coloured Z3s, mainly used for a paint contrast. The current owner is selling his Z3 and decided to sell the top separately, however he did say in the advert that he preferred the sale of the car and top to be a job lot. At the end of the day, it is really down to what profit can be made and he did suggest he would be delivering it himself from Bradford, with it being on his Z3 and the hardtop can then be dismantled and installed onto my vehicle. (One hopes he still has his soft top attached for his drive home...). The personal visit is down to not having confidence or faith in couriers, (funny that!), he could also utilise the saving of cost of a courier and place more into his personal profit than going through a middle man with them risking a loss of goods also. He also suggested that he would show me how to dismantle the roof and fittings and would then give me instruction and a hand to install it onto my Z3. For that I will need to wait. After my previous experience with high end items or parts, my motto is believe it when you see it and be prepared for disappointment and hassle, anything positive is a bonus!
So why do I want a Hardtop when I have just paid out for a new soft top? The simple answer is for security! With less threat of having the soft top vandalised when parked up at the local shop, contents also stolen or damage done whilst visiting at a friends house, it is that simple. I found myself parking the Z3 in reverse against a wall, just to make it less inviting to those that just want to destroy property for whatever reason and there are many nut jobs out there..... Is it worth the price range of £600 without, to £1200 with fixing kit? Yes/No? One is between a rock and a hard place to come up with a definitive answer, as there can be many reason for, 'for or against'. For me, there can be a little less stress, perhaps psychologically, however there is that deep and empty hole in one's pocket?
The other benefits are to do with person comfort, sound insulation, rear heated screen on bad weather days and of course the heat insulation when one needs to be warm in the winter or early mornings. At least the roof is detachable and the soft top comes into play in the summer with or without having the top up. (Air in your hair, so-to-speak). All down to having the choice of combinations.
Happy New Year!
Note the difference (off) (on)
Indicator Bar N/S
Indicator Light O/S
Base speaker? It looks a little bare here
- Bonnet & Boot Lights, again cheap enough and a useful add-on.
click
Top View
Normally, when I leave my Z3 in the garage it is disconnected from the battery preventing battery energy drainage, due to alarm etc. and discharge that most cars seem to suffer from. This method is effective and the vehicle starts up near enough immediately without problems when the battery is reconnected. (occasional recharge is require to replace or rejuvenate the electrolytes, once or twice a year to maintain the battery).
The problem of the code, may have arisen when the exhaust cut-off was installed, the sensor may be picking up on a false reading?
Looking through eBay for the correct part, based on the cheapest list price, I decided to get a replacement, just to see if that would solve the problem, well, why not? The circuits will be checked, as well as the connections for corrosion. This may even be an easy fix! (yes, so naïve but positive)….
Powered by S-AM3l1A
BMW Z3 2.2i 2002 (with hard top)
BMW Z3
2.2 Straight Six 5 Speed Manual Convertible Titan Silver 2171ccm 170HP 125KW Petrol