1. The wiring up of the rear heated window (parts arrived 25.02.19, however, (still missing parts - update: have wiring - job pending) New Switch 11.8.20 received - Just requires Two Terminal connection when hard Roof is refitted winter-time... 2. Replacement of the centre console, cleaning and fitting (With good weather) (Fitted 25.02.19) 3. Sort out the wiring within the console (done 03.19) 4. Re-fit Radio/GPS (done: 27.03.19) 5. Fit a new seatbelt clip onto the driver's chair (Fitted: 25.02.19) 6. Sort out minor bad earth, interior lighting in boot (New LED Lamp Fitted: 30.08.19) 7. Replace the Serpentine and cooling drivebelts (not too urgent) (Fitted: 30.08.19) 8. Sort out the drop in the front bumper and rectify (a job still pending, based on inclination) 9. Prepare and respray the back bumper (a job still pending, based on inclination) 10. Sort out some small minute dents in o/s door, (when funds permit - tap out specialist)(8,9), again not urgent) 11. Rear o/s wing has a slight dent, (not too noticeable) 12. Purchase and fit an exhaust cut-off with electrics (parts arrived 04.03.19) (fitted to a fashion .05.19 again, 31.05.19) Finally(26.06.1) 13. Mirror indicators, fitting and wiring up (Have units, however decided to not fit, may do if/when run out of jobs) 1 14. Replacement rear brake discs and brake shoes/pads/sensors (parts have arrived) -Also correcting a possible problem with handbrake - (Bled Rear done: 24.02.19) -Fit Brake Pad Sensor sort out light problem - (Replaced and fitted) (Warning indicator Light sorted 22.06.19) , again: 04.01.20 bad earth somewhere! - Sorted, created a new earth anchor point under the dash 15. Wheel centre reskims and paint x4 - (Non-Urgent) Replacements - More time to do the old set (07.10.20) 16. A/C Unit Replacement/Re-Seal x2 - (Have Unit - Fitting/repair) 12.08.20 seals 04/09/20 17. A/C Auxiliary fan replacement fitting - (Have Unit - Fitting pending) Awaiting better weather 18. A/C Air evacuation and Re-gas - (Have the appropriate gauges/air pump and gas - job pending)
As one can see and compare the previous lists, much work has been carried out to bring the Z3 up to a reasonable spec. Remember this car was designated as a 'spares' car, in my opinion, the previous owners eventually would have most likely have sent it to a scrapyard, once it was stripped of it's useful components. I couldn't have that now! An iconic design, reliable. OK! I have found the project frustrating at times, a money pit, however, mechanically it has not let me down, it has given me a purpose in my life as a single guy; as I age into oblivion... So, the project is also giving. In roughly, the two and a half years of driving the Z3; it has about 60K on the clock, not much considering it's age or mine at that matter. Someone has asked me if the car has a name! Of course it has! 'Kate', one could not give it any another name really, as the registration consists of the appropriate letters and the GPS voice is of the same name. The GPS even shouts at me when I go over the speed limit, now who does that remind you of? I was tempted to shut that part of the GPS down, based on that there was nothing illegal in shutting off an electronic box, some may think, it is a shame one cannot do the same for the 'passengers' ...! However it's is all down to familiarity, wrong in all senses of my psychological state, however good that, the bellowing voice could save my life one day. Call it sad or what you like, it suits me...it is a little like having a pet or even a wife. In this case, one can shout back without any repercussions, not that I would do that to a pet, great! Releasing stress without having to bang my head against the steering wheel, because of a side seat non-driver....it may sound sexist, and one could be married, however been there done that! My current life, wonderful!
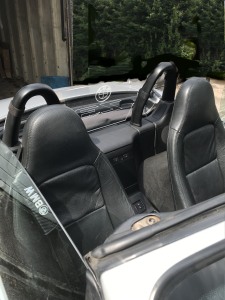
So! Back to the maintenance of the Z3 for 2020, let us hope it is a good year!
Nigel G Wilcox
Diary
BMW Z3 Maintenance Project On A Shoestring
The Diary of the BMW Z3
Starting to live the dream...
So what are the remaining jobs on this project?
(done - Fitted 23.02.19)
1
1
Results!
2020____________________________________
Happy New Year!
Signing Off Today....
Double click to edit
A Happy New Year!
01.01.20 31 Days and the UK is out of the EU! Now who would have thought that? We can only see this as a positive move, independence and democracy. Let us see if our Politicians are up to it! So let's move on:
05.01.20 - Today, I poked around on my Z3 to try and find out why my sequential strip driving lights/indicators were not working properly and also the electrics on my exhaust cut-off had stopped working. The light strip was working, (driver's side) the indicators on both sides worked, so I presumed a possible fuse or bad earth, somewhere. Checked under the bonnet/hood, seemed ok, checked fuses, ok. I then tried under the dash on the drivers, (uk) side. Again, checked the connections and still nothing. What did surprise me was after adjusting a couple of earth connectors as one does within diagnostics....(especially when one is experiencing the 'twilight zone and not aware of a solution any time soon'), something that happens quite regularly, I had noticed the Brake sensor light had gone off, it was just a casual glance over! (as many readers know, I had been trying profusely to identify why this light kept coming on and staying on; trying many ways to solve this problem and today it had just gone off! Now ask me what I did! I couldn't tell you! As I don't really know! As I have already stated, I had worked through this problem checking the circuitry, earth straps before and nothing, no changes at all. With this new development one can now say, there is a most likely a chance there is a problem with the earth to the chassis and possibly requires a strap via the battery earth and it will have to be addressed, joining the list of jobs to do. Not today, as the temperature outside is bitter cold. Now that the brake sensor light is working corretly, I just didn't have the inclination to go through screwing it all up for myself, especially before the annual MOT....due in early February 2020.
One possible cause of correction with the brake sensor: I did disconnect the battery on both the Pos.+ and Neg. - terminals, a few days before as an ongoing solution and diagnosis of the problem, again, as one does. I then placed a large spanner, (wrench) between the two disconnected lead terminals and left it over night. This is meant to discharge any residual current remaining within the circuit from the battery and resets the 'brain', (computer) of the car. With the disconnecting of the earth straps under the dash a few days later, it may have been just the trigger needed for the reset of the brake light within the clock cluster, this however, is just only a guess!
As for the cut-off exhaust electrics, this maybe down to damp, due to driving through a flood about a week before, or the connector under the car has become disconnected via the force of the water, or the motor that controls the butterfly valve on the exhaust has blown, or there is that bad earth scenario that incorporates the Exhaust cut-off switch also. This scenario could be the reason for the switch not working and will also need to be addressed too, in the near future, when there is a suitable day.
In the meantime; I have decided to replace the running sequential light strips with two new replacements; this time I am favouring bright white light rather than the blue, I have gone off the blue colour and as the later units do come with resistors, (an upgrade within their manufacturing, it seems this maybe down to this problem of the unit failing?) The ones I have on, didn't come with these resistors, so this could solve the problem or at least prevent another burn out when they are installed, as I think this is the more plausible fault. This will be ordered towards the end of the month, they are cheap enough and are not urgent in this point in time.
Quickly going back to the brake light! I am really pleased about the brake light sensor not being at fault anymore, it is one of those small annoying things when out on a drive, noticing an amber warning light on the dash, it has continued to sour the enjoyment of driving for me, as one is always trying to diagnose the problem. This I can now put to rest for the time-being. With the MOT coming up and garages out to strip you of your remaining finances and blood, the warning lights are just another excuse for a garage to rip you off. One less fault and excuse of empty pockets...
07.02.20 Today, MOT day, a quick call to the garage and low and behold an appointment fitting within the hour. To cut along story short, a PASS! So again mechanically road legal again. The prices of MOT's are rising each year, I was told £50 was a good price for an MOT? Previous years it around the £30 to £40, this I would consider a better price or less if I was totally honest. Remember the £5 - £10 MOT? Better still. The passenger side, (UK) Headlight bulb had blown.... always seems to happen at the MOT station on test, weird that! ....Considering I had checked all the lights, like I always do, the day or night before an MOT....
03.03.20 It is now March already, not much has happened, like many of us, the weather has been a total handicap when it comes to work on the car. However, the parts and tools have been sorted, purchased for the jobs and are in and ready for a good day, not sure when that will be, so watch this space.....
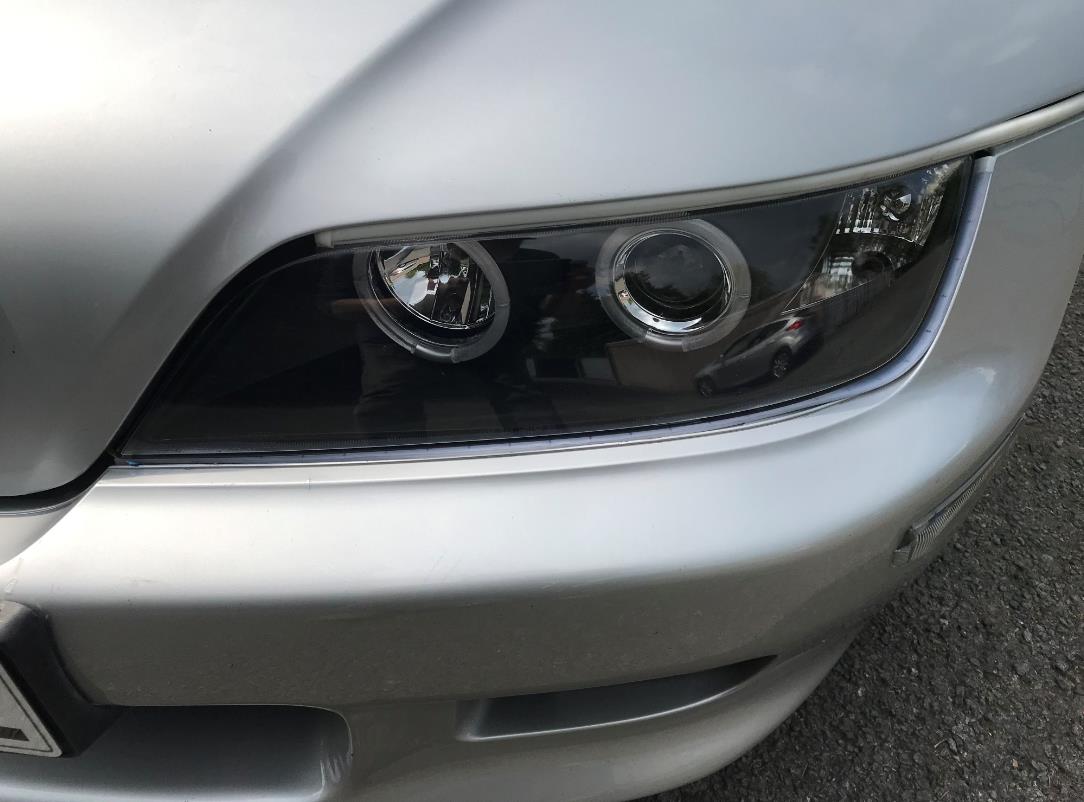
18.03.20 Another 'spanner in the works' it seems with the 'Corona Virus' spreading across the world and what to make of it.... ? I decided life must go on and to have a good look at the front bumper, this was on the 16th; and to check if the bumper brackets were broken in some way, this would account for the growing gap between the up and lower bodyline. I have now, some spare front brackets off a 1986-onward, from a scrap recycle yard. This meant taking the headlights out, to inspects the existing brackets, another job that has been pending or put-off since I had bought the car. At the same time, these headlights needed to have some work doing to them, mainly to realign the light beams. This simple job turned into, not surprisingly an unwanted epic, with brittle plastic and rusted bolts. I have now replaced each of the units with new replacement units, a needs must. (I had in the garage a couple of units with the Angel eyes), (see purchases). A word of warning for those purchasing new headlights. For the UK at least, check the lights are designed for the UK market or roads, many UK people fall into the trap of purchasing new headlights; only to find they can only be used on roads in countries that drive on the right-hand side of the road, based on a fixed beam settings in manufacturing of those units, so ask the supplier, if they are suitable for the UK roads before purchase. Another point, the additional wiring, especially for the passenger front headlight indicator or bulb connector on one end and a connector to the connector further up into the engine bay. Manufacturers have made the new lead a little too short by only about 3cm, (inch). This will require a wire extension spliced into the existing lead, so much for Chinese quality control....?
As to the brackets for the bumper, it was difficult to see where the problem lay, and will require the bumper to be totally removed from the vehicle before proceeding to rectifying the problem, again waiting for warmer better weather and to be given the ALL CLEAR with this Virus Lockdown, not much can be done it seems at present.
25.04.20 We are still in Government lockdown concerning the virus that is spreading the world and very little can be done about it, however I have managed to sort out the spacing or to at least camouflage the spacing between the front bumper or fender with indicator strips. I did initially replace them, and I ended up reverting back to the older tubular direction indicators as it was more visually pleasing - I have also placed the newer sequential strips on the lower part or under the headlight, (remembering that these light units have been replaced) it doesn't look too bad, however the daylight running light on both sides have decided not to function, (worked ok, when on the test bench, possibly a poor connection somewhere). (photos to follow).
It is all down to maintenance during this period it seems...during a regular inspection I decided to check the Cut-off exhaust as it had failed to operate, (also mentioned in another entry). After a crawl under the car, there was a total mess with damaged wires and exhaust direction spout was either missing or it was wedged somewhere, some of the exhaust heat bandage was also unravelled, parts may require replacement. (I was surprised this was not pointed out at the MOT session, A full more thorough inspection needs to take place when it is viable concerning lockdown. The vehicle itself is not noisy and is still drivable. I have been quite conscious to the virus situation, as this year I have been suffering with allergies or hay fever, so it is a precarious time, considering our current circumstances, one is not getting any younger and one is also reminded of ones age and mortality...
07.05.20 After an intense inspection of the cut-off exhaust, it appeared that the flood I went through a number of months ago, had burnt out the cut-off exhaust motor. Knowing I would need to replace some parts I had ordered replacement of the suspected parts and they arrived quickly from a London warehouse. The spout on the end of the cut-off was still attached to my exhaust system, however the wiring had seen better days and most of this will too, need to be replaced. (watch this space)… I am now aware that the virus lockdown will most likely be lifted the starting of next week commencing the 11th May 2020, as the country is now on the decline from the virus peak, however if the weather is good tomorrow I will venture out to my lock-up and start the repairs.
08.05.20 A nice early wake-up to a beautiful morning, the chores are done and a pleasant stroll to the lock-up. Since the lock down; due to the virus, the car has not really been out on a run for a number of weeks, (one loses count to how many weeks, 'cabin fever'). I must say, I am not looking forward to this repair of the exhaust cut-off, even though I have all the replacement parts however, it is a better option than being locked down in self-isolation as I will be outside in the fresh-air again. It's not as if I will be around people where I will be situated, so no harm. From the earlier inspection there is something telling me this job will take awhile. So without further procrastination, the Z3 is jacked up and a portable ramp is placed under the rear, nearside wheel. (make sure you have your handbrake on when you do this, I didn't and nearly ended up having the car roll off the ramp, risking the smashing-up of the backend, I was lucky this time - I think I had been away from this environment for much too long, my excuse anyway, rookie).
So, I my instinct was correct concerning this job. China had done it again, the wiring from the exhaust cut-off motor and the rest of the wiring had opposite male and female connectors on them , this meant either replacing the 'moulded' connectors or pulling out the old wiring and re-routing the new. It was obvious at this point it needed to be the latter, This also meant dismantling some of the heat shielding to get to the wiring, 'happy days'....
I was also going to check the old motor; to just see if the failure of the motor was just down to the stripped wiring or the motor itself, as this would have saved me some time however, with the reversed male/female connectors the motor needed to come off and to be replaced either way. The weathered chrome spout on the end was also looking a little worse for wear, discolouration and a few dents, where it hit the uneven road, this was also taken off as a matter of the dismantling process to get to the motor, I did notice the replacement one supplied was a little smaller in diameter, the screw holes on the plate itself was a standard measurement and did fit, so I was thankful for that. Those in China, are getting it from all sides politically aren't they....this includes on manufacturing picking line, obviously overlooked the sizing process, so much for quality control. In this case it wasn't such a bad problem and really it worked in my favour this time, OK! If push comes to shove, I could have used the old one, (but that is not really the point, is it...) since space under the vehicle was low and tight, the replacement spout was of a smaller footprint and would work just fine, if not better, in my case.
Undoing the bolts on the cut-off motor was fiddly as space to work goes, especially the bolt nearer the floor pan, this was very close to the exhaust with little to no access for spanners and it was even more fiddly to put on the new replacement parts, (as one needed three hands) I did use the new bolts, gaskets and ring or spout retainer for the new spout supplied...
Stripping the wiring; did take some time and threading the new wiring through, took even longer, this was mainly down to assessing the reasons why the first lot of wiring failed in the first place and adapting the process accordingly. I know I had driven through a flood and this was the initial cause of the connections becoming disconnected, dangling and scaping along the road, wearing off the connector in the first place and in addition, of course, the water also getting into the cut-off motor and blowing it. I digress, so, this leaves the threading of the wiring into the dash area where the switch is located. This did present a pleasant surprise, as the connector from the switch was compatible with the external wiring connector that was threaded through, so no soldering at the switch end fortunately, as all that was required was to plug the two ends together, phew!
Ignition on and the press of the switch, I could hear 'life'! Music to my ears, it did sound a little sweeter with the smaller spout attachment on the end of the cut-off, the exhaust seemed to purr in harmony with the engine, as one could hear the air-intake, a nice touch.
With all of the dash dropdown put back together, the car was lowered and off the jack, a general tidy up, I did decide to go to the shop to restock on some groceries, I commenced driving down the road, only to hear a sound reminiscent of the days when I was a child, with the bike, washing line peg and a playing card attached to my wheel, imitating a 'put-put' motorbike... In reality, it sounded to me, as if a heavy zip-tie tail that was left on, was getting caught on something rotating. I decided to check this out and noticed the nearside, (passenger) tyre was a little flat and this only enforced my reminiscent thoughts, so this was re-inflated, it was not down to that. Back to the lock-up, back on the jack and a head scratch after another inspection of the work carried out, it was quite puzzling and it took a good 30 minutes, until it hit me! The heat-shield touching or scraping on the prop-shaft of the transmission...another rookie mistake. A long breaker bar sorted this out and with a couple of tests and no playing card sounds, the job was done. Another tidy up and a wash-up and I was ready for the journey to the grocery store, with the soft top down, a play with the switch, a few head-turns on the way, a play with the harmonisation, a 2 meter wait for twenty minutes, pick-up of consumables and it was back home for a long awaited beer. (unusual, as I don't usually drink alcohol nowadays). The job started around 12:30 to 16:25, much longer than anticipated. Note: It is a good idea to place a heat shrink on at least one of the connectors to prevent them from disconnecting, also, if possible tuck them under the heat-shield for added protection retaining the wire with zip-ties where possible, keeping them away from moving parts and one last thing, don't drive through floods or at least try to avoid them as one will be repeating this job! Enjoy!
- Not currently needed and stored for another time
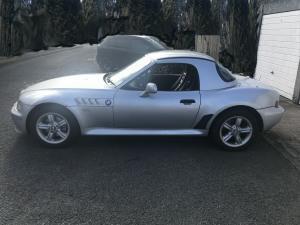
Down with the hardtop and in with the soft top for summer
Headlight revamp - one can see at night!
BMW Seatbelt covers and the air-brake screen for when the soft top is down...
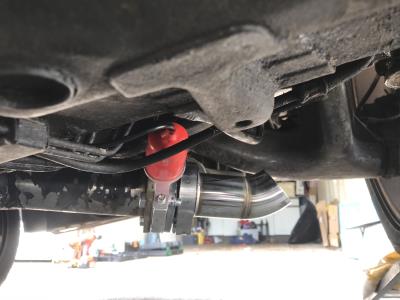
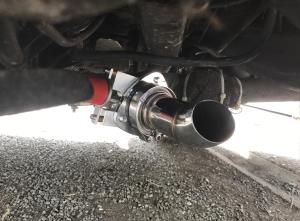
Replacement spout (smaller diameter) assembly and motor
Indicator strip tube
Sequential Indicator and daylight strip
Angels
Click on Cover For Chapters
Can't go without marking this year as a low productive year on restoration, so far at least; concerning COVID-19, mainly during the period from December 2019 to the easing of lockdown from late May 2020
BMW Z3
2.2 Straight Six 5 Speed Manual Convertible Titan Silver 2171ccm 170HP 125KW Petrol
04.07.20 It is the following month already, where has the time gone? And no, it hasn't taken a month to come back from the grocery store... I have some new A/C seals at last, arrived a day or two ago, a long delay in the deliveries due to the 'Covid19 virus, it has put a hold and disrupted many work schedules, I am just waiting for the right weather as it looks like rain today, very overcast and I really need, to get this job done soon.
06.07.20 I decided today; I would have a good look or at least review the forthcoming job of replacing the A/C Pump Unit, with further inspection I was not totally 100% on the A/C Condenser. After a number of hours of personal debate, I decided to do a search on the internet for a replacement unit. The prices fluctuated and most were at ridiculous prices prior to the quotations I had found a year ago or less. One German company proved to be my salvation, as they offered a new unit for around £62, and it was manufactured for this particular model Roadster, a little more than what I wanted to pay however, some secondhand units were double this price and were looking a little worse for wear. Now we have the good weather, I am now having to wait for delivery. On a positive note, I have had time to fulfil other small tasks...
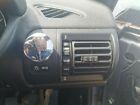
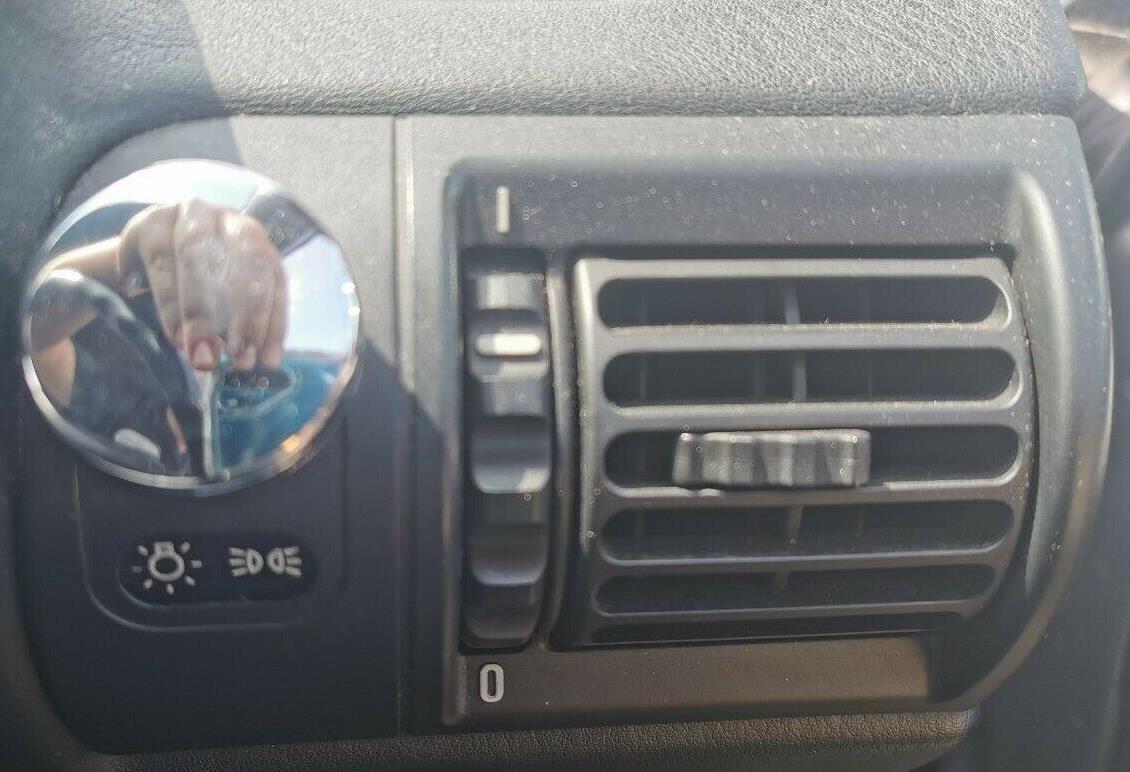
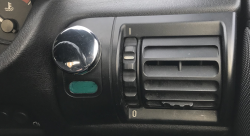
18.07.20Today, not too hot and not too cold, no rain, ideal day to start some work on the Z3. All the parts are in, Condenser Unit, the A/C pump ready to fit, the seals, gas, gauges, vacuum pump and a scrapyard recycle part the headlight switch and vent with the headlight decal, so one can now do away with my previous green spot fabrication on the current headlight switch. The headlight decal had gone missing on purchase of the vehicle, so this now brings it back to a more authentic manufacturers look.
Jobs are never straight forward are they, hence the love, hate relationship with cars generally. Let me start off with the switch, it proved to be faulty. After inspection and an attempt to repair it, it just didn't want to play the right game. I did mention this to the supplier and he did get back to me on a number of occasions, he had thoroughly checked the item before despatch, shame he didn't check the bulb too, as this was also blown as well, so much for quality control. The switch with it's rotary mesh design, (not the best of designs, but was very much in the retro draw of a design) this coiled 'spring', for the want of a description, had become displaced from the switch, there was an indication that something had gone into the delicate housing part that had caused the displacement of the coiled spring and this was needed to be reinserted back into it's housing. As many will know, it is not easy to reshape a damaged spring and it was a hit or miss. Fortunately, I had got the old switch and just ended up changing them over, the vent housing was better than the one I had, the decal and bulb housing were good. It proved to be a pricey part for what benefits I had gained on the purchase again it leaves a bad taste. An expensive decal.
To move on to the AC pump. I managed to get the pump via jacking up the driver's front side of the car to place it on a portable ramp, partially removed the plastic cover plate from underneath the vehicle to gain access to the lower part and then commenced with unbolting the bolts. (Note: The A/C pipes were checked for refrigerant before commencement and as far as one could judge; via the low pressure release, there proved to be no gas within the pipes, previous reading must have indicated the atmospheric pressure, so one made a judgement and the pipes were detached. The pump was definitely empty. Going onto the two of the splined bolts holding the pump onto the housing came out without a problem, the third one was in solid within an aluminium mount, even after an hour of attempting to release it. The tight space proved to be a problem; especially for getting the tools aligned to the job, ratchets were blocked by other components, such as the steering rack, cross bars, you name it... Small tools were useless for exerting the correct torque required to undo the bolt, without breaking them. This halted the job for the rest of the day and everything was put back except the two successful bolt extractions. As time goes; I had further jobs unrelated and they took priority. A frustrating mid afternoon, but that is life, it gives me something else to do another day...
Image from the new donor
Correct decal
My Earlier Fabrication - some tell me it looks better, however one tries to restore back to manufacturer's spec. (ok as a spare)
Is that reflection showing a middle finger? Sums it up... Thanks Cornwall, Exeter
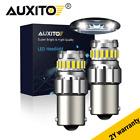
11.08.20I know I sound like a weather forecaster, so I will not spoil the illusion, hot, hot, hot, thunderstorms in the late afternoon with torrential rain. Well this has been the pattern for a few days so far... This afternoon I ventured out to the garage with a new set of reverse LED bulbs and they do what they say they do, and they are bright. (Check purchase section for details)..
I also ended up getting the illusive demister switch for the hardtop demister; an eye watering price considering what it is - one consolation, it is new :>>> Looking at the trends on those that sell this switch, (if you can find the correct one) I should be able to sell the older and different type of switch with the different or pin connector socket, (as featured in another entry,for roughly the same price and at least get some of my money back....in theory. Prices have shot up for taylored or original switches...Why? A statement rarther than a lead to an answer...
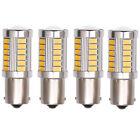
I was pleased with the LED bulbs at least, these were purchased and I have ordered 4 amber direction indicator bulbs and two bulbs for the fog lights, they are from China or as the Chinese would say; "they are from a UK warehouse", (yes, I know!). So should take a number of weeks and the desert to freeze over by the time they are delivered. My major concern as always with Chinese manufacturing, is....will it or they work when I get them? So far so good; with the bulbs at least... The demister switch, by the way was manufactured in the USA, so no problem there, mind you early days.... it's just that Germany are feeling the pinch within the EU at present and it seems anything goes concerning costs to the UK, but this is only my opinion concerning a political rant, without a full scale soap box drama, but I digress.
4Pcs 33LED 581 BA15S PY21W TURN SIGNAL YELLOW REAR INDICATOR 12V BULB New A
BMW Z3 E36 Heated Rear Screen Demist Switch Push Button
2x BA15S P21W 1156 7506 Super White 6500K Bulbs LED Reverse Backup Tail Light
?
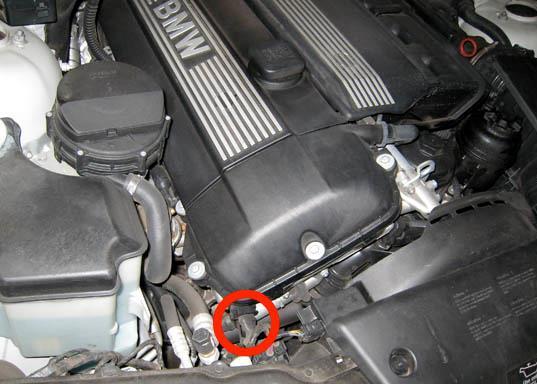
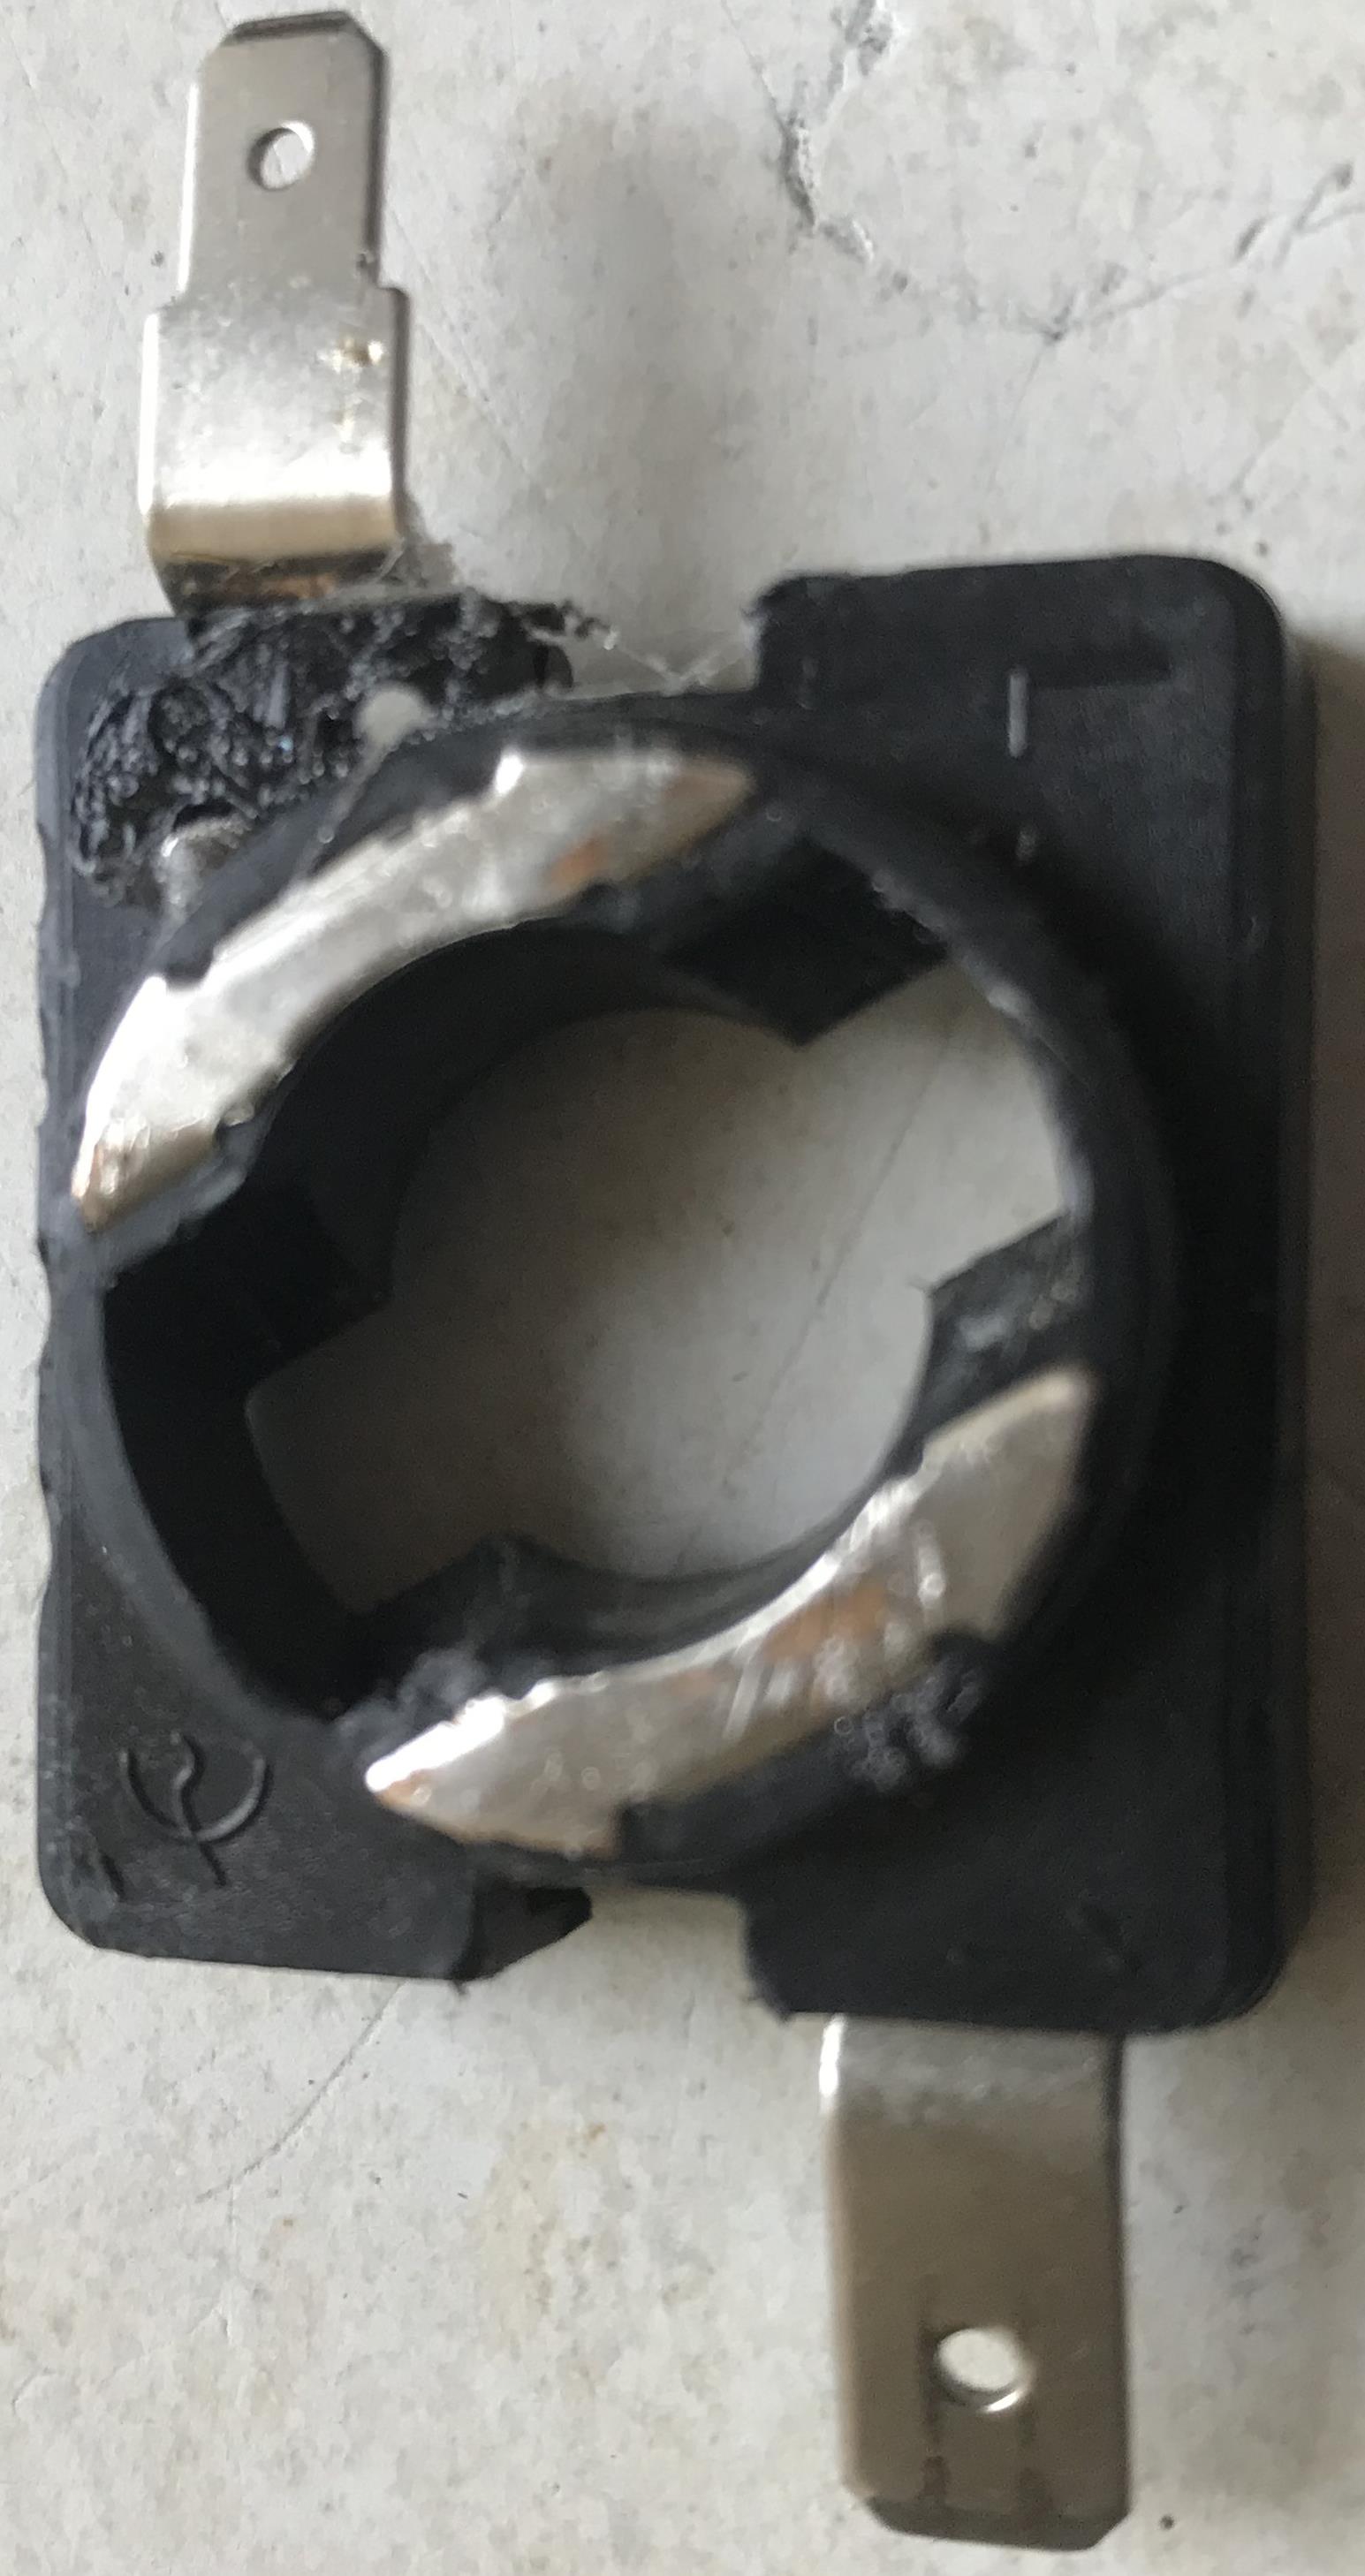
The demister connector slipped into the new switch nicely, this saved me time and effort into having to splice into my original wiring loom, only to put in a bespoke switch that was designed for earlier Z3s prior to 2002. Less time in trying to identify and marry up the correct wiring sequence for the old switch terminals, diagrams are far and few between if there are any to be sought, I didn't have much luck with my search....? New switch now installed. One needs to be careful when making the connection at the hard roof end, there are just two terminals
Looking at my hard roof wiring there are two wires brown and black. BMW coding is Brown Earth. One can only assume black is the live. Use a meter to determine.
Be careful with the terminals and the thin plastic retaining clips on the two sides as they can break off easily as in my case, from the image you can see the 'L' side terminal had broken off as with the plastic clips I had to make do with heating the terminal and then melting some of the plastic, forcing another terminal into the existing housing, this is not ideal. One hopes once back in position, the weight of the hardtop will keep it in position and the metals together forcing a full contact, until the following summer when the hardtop is taken off.
One could replace it, pennies I hear you say.... wrong! BMW want £70+ (it is only a cap!) the price does include additional wiring, however most will already have this wiring within the car within the interior if one searches for it. Unfortunately there is no alternative to this extortionate purchase, unless you can find one off a donor car and those chances are slight and that is if they have a hardtop fitted. Or you can do what I have done, botched it! As long as it works... A bitter/sweet situation until one original replacement drops onto my lap...
Some may ask, why go to all the trouble in getting an A/C unit for a convertible? A good question and one I have also asked myself on many occasions.... During the hot days, (when we, in the UK get them) I did find out and a cool air blower was useful, even with the top down or off, Sometimes the heat can be worse with or without the hardtop. Hence! My change of mind, concerning having the option of a working A/C Unit and possibly another reason why BMW added one to it's range of models manufactured in the US. Climate fluctuations varies in the USA from State to State greatly and has proven a must in hot climatic regions with or without a roof of any kind.
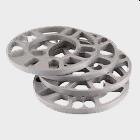
Replacements 4? X 10mm (or 1? pending....) Universal Set Kit Alloy Wheel Spacers Shims Spacer 4 & 5 Stud Fit
Note: This was the image used in the advert
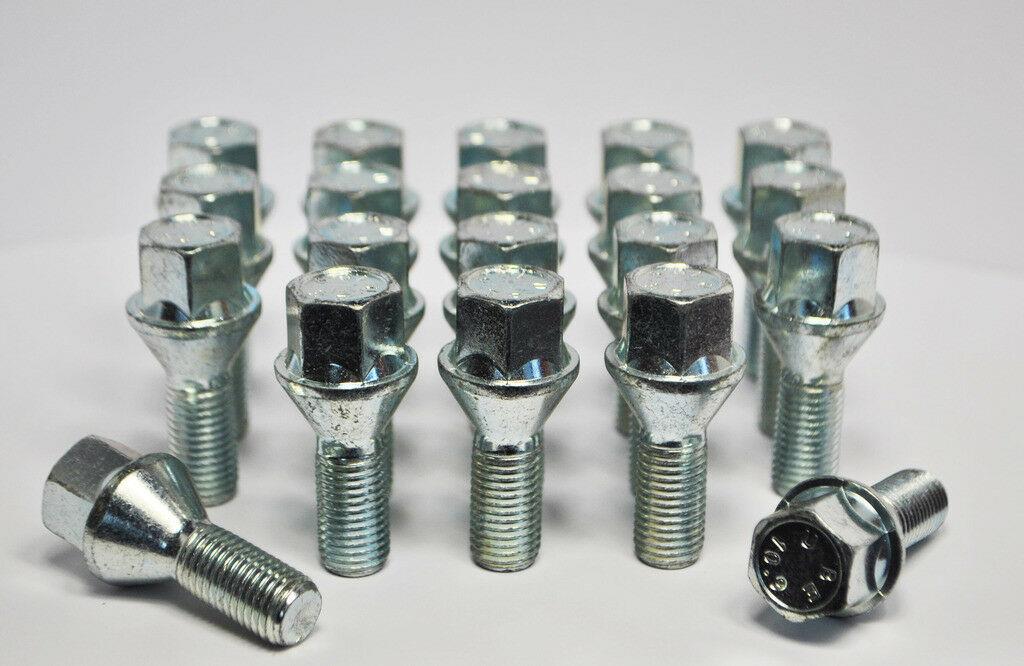
These will be the replacements 20x M12 x 1.5 40mm Extended Wheel Spacer Bolts, Tapered Seat, initialy for the BMW 5 Series, should fit the Roadster with the spacers - a good difference in length.
20 x Alloy Wheel Bolts Nuts BMW Z3 12x1.50 26mm 17 Hex. B12
These are the bolts that are on the vehicle now
This image resembles the amount of 'ridge' available to resting the wheel, note: the screw pillars are absent from the Z3 normally. However would have made life much easier in retaining the spacers in position during the lineup and wheel replacement - Tempoary cut-off bolts heads could be another solution? Note: Some spacers have independent threads attached and the original bolts are just used to retain only the shims. The shim threads retain just the wheel - shop around as these can be expensive.
examples:
21.06.20
30.05.20 I have been putting off replacing the A/C fan, stored away in my bedroom, (of all places) with the secondhand A/c Unit, this also needs to be done today, if one can find the new seals! We will see... I need to make some room as I also have my Hard Top also stored in my bedroom too! (The joys of living on one's own...that's probably why, you say!) The weather today is very much like it was in 2018, very warm for 8:30 in the morning, not a cloud in the sky, it looks like it may even get warmer it is 24.6c and this is on the indoor thermometer, watch this space...
01.06.20 Hot! Hot! Hot! 25.6c inside today. After inspection of the A/C fan on the 30th May I concluded a mismatch with the connector for the electrics, being a two pin rather than the required three pin from the condenser. There was no trace of the rubber replacement seals for the A/C unit either, purchased a few months ago and stored away somewhere, (I will no doubt find them when I least expect to) these are needed for the AC pump to complete this job; so this job has been postponed for now, until these items can be resourced, a little frustrating, but it is what it is... The Government have now eased the lockdown and things are slowly getting back to 'normal', even though it is far from normal concerning the political and economic climate. This only leaves enjoying the weather, a local drive to the grocery store and a couple of cans on return, sounds like a plan.
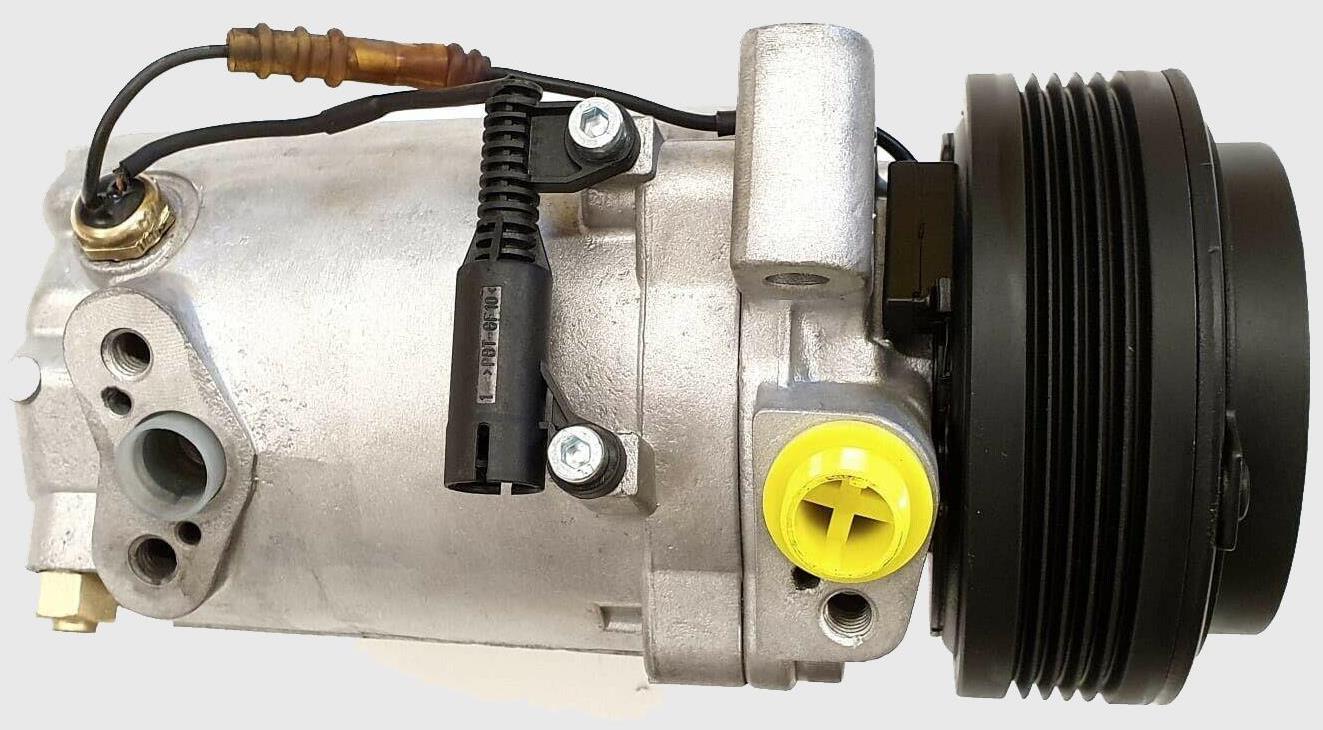
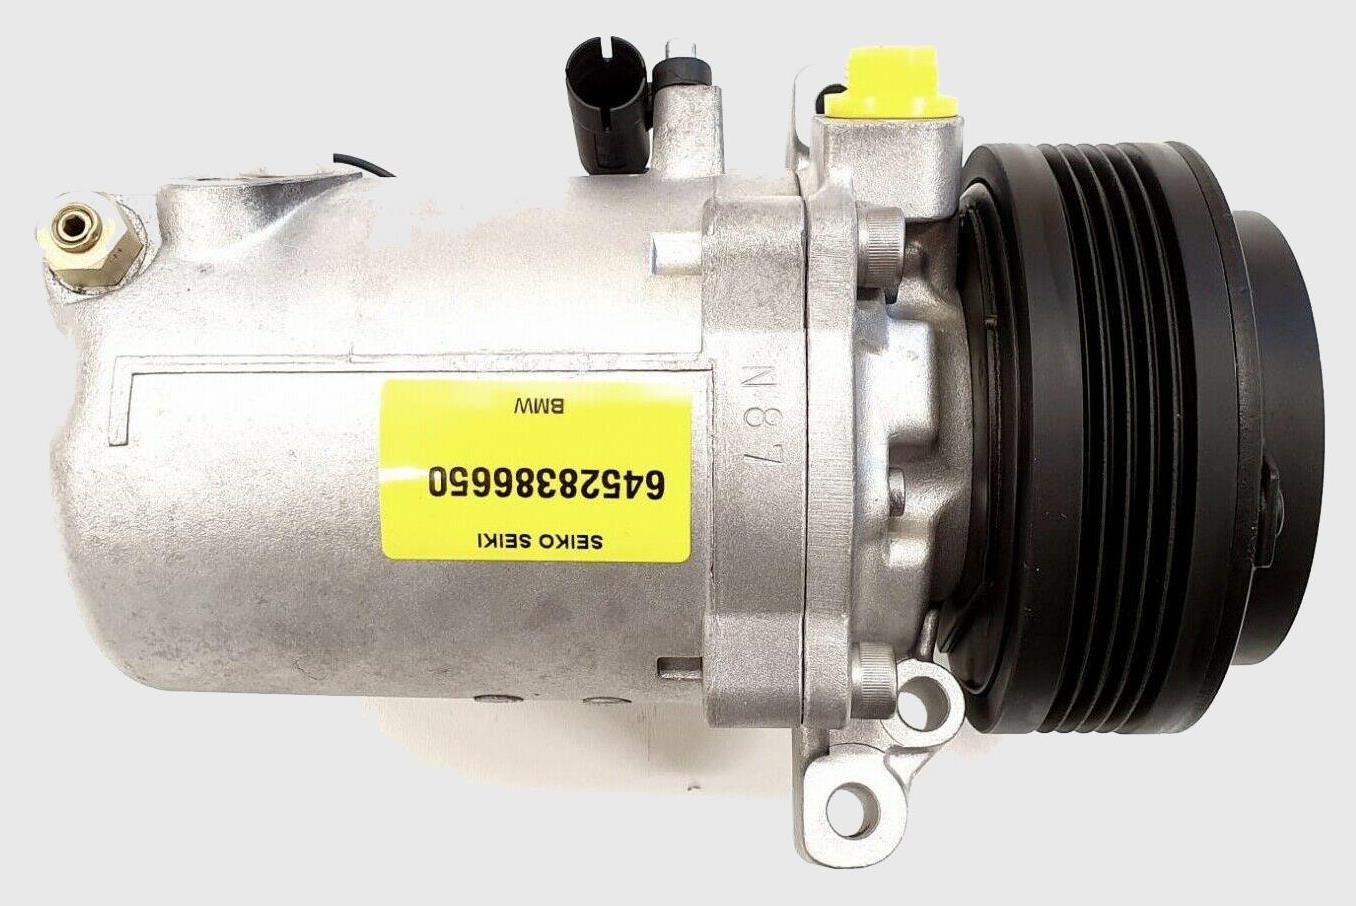
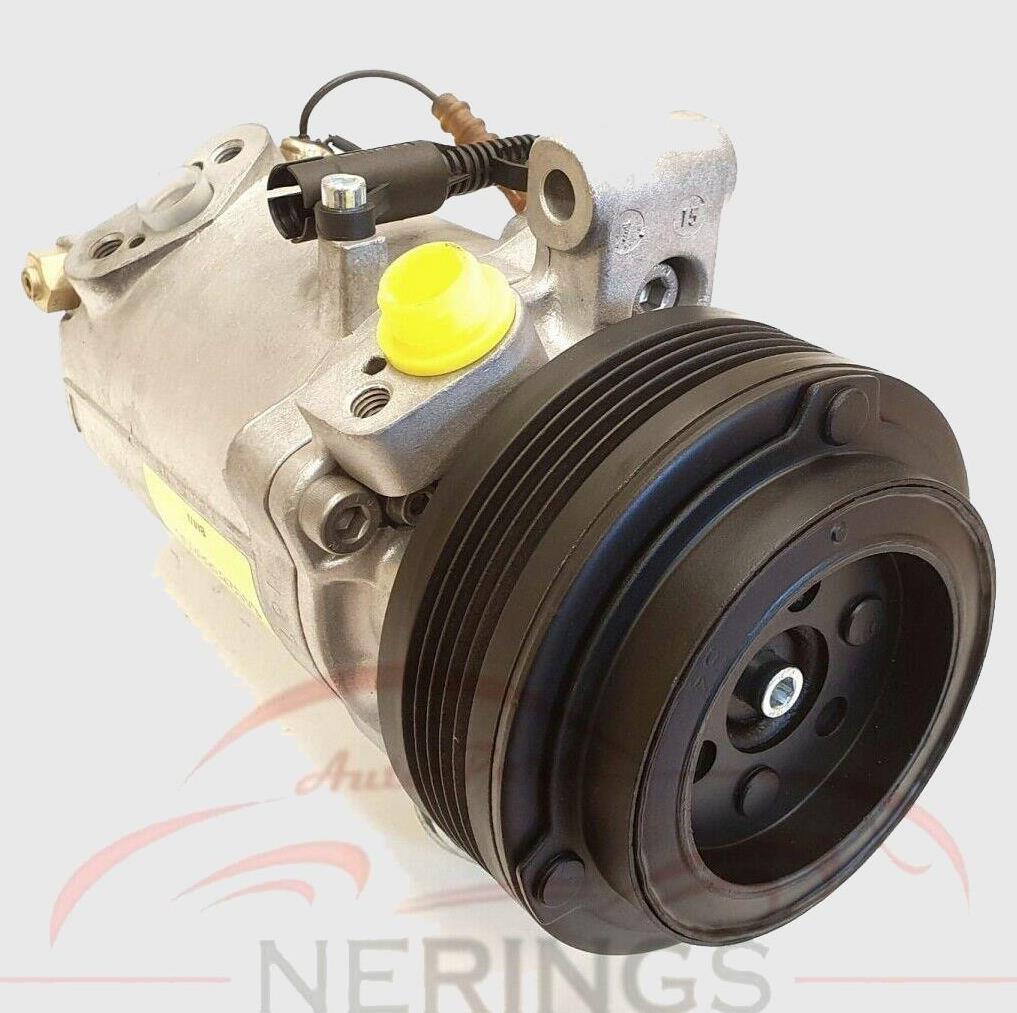
AC Compressor BMW BMW 3 E46 / 5 E39 / Z3 E36 8390646 Genuine Reman A/C “This AC is fully repaired and tested. We have equipment on which we can check if AC makes cold ” (comforting to know)?
Ordered: 24.09.20 Arrived:28.09.20
When choosing bulbs it can be difficult to choose the correct 'size' or the right code. The standard or conventional bulb fitting on most cars are fitted with, (up to 2002 as far as I can see), is the P21, it is very easy to order the smaller size by mistake, that is a 10 or 15. if in doubt, take your bulb out of it's fitting and take it to your dealership; if going retail or just compare before making the order online.
With the purchases taken care of, today under the heat, after fitting the reverse bulbs; I had enough guilt to convince myself, I needed to have a go with the A/C Unit as it has been nearly 12 months since originally purchasing a recycled replacement. What was holding me back was getting out a stubborn retaining bolt from the old unit off the vehicle, it has put me back a further number of weeks. I tried everything and I just could not get enough leverage to move the one bolt with the tools I had. It only left me one alternative and that was to go to one of the tyre fitting garages to see if they could help me with my problem, they also had a hydrolic lift ramp. They normally don't want to know, however 'PLUME TYRE SALES' based in Shirley, West Midlands did offer to help me out and after twenty-five minutes they got the bolt out, the main problem was getting enough access to get in with the tools and do the job, the result was a success and a lifesaver and initially no charge. However, I did give the fitter something to put in the staff tip jar. My decision was definitely the correct one considering the work I witnessed to get the bolt out, since they had vehicle ramps and all the correct tools, there was very little chance of me, doing the same as I was scrambbling around on the ground back at my place. It was also obvious, by now that the one bolt needed also needed replacing. It was off, and next stop to the BMW dealership for new bolts. After checking the bolts on their pc systems, I was told that the bolts were discontinued, not surprised really, considering the hassles with this type of designed bolt, normal square headed bolts would have been a better option by the manufacturer...but that is now history and not much help in my present situation. The bolts were not superseded by anything else it seemed, my bolts were just discontinued without the manufacturers finding an alternative bolt for my vehicle, well done BMW! They did however have in total, two existing choices, a few bolts off previous year models and their lengths, one could almost say were the typical pick and mix one would find in a DIY shop, not really fit for purpose. There was a 90mm, (would have gone through my block), my bolt measured 55mm in length with a hex head and not a full length thread, I did try ordering the 50mm, (square head, full thread) as the end thread did seem at the time to overlap my 55mm hex bolt when the length was compared. Theoretically and practically they can end up as being like chalk to cheese, they just did not have the appropriate length so, I decided to reuse the existing two better bolts out of the three existing original bolts I had kept and will no doubt; have to find another one from somewhere else. (The old ones will have to hold the compressor unit on until then, the biggest problem will be, most likely getting the old bolts out at a later date, to replace them if and when alternatives are found. At least they are in, the more accessible positions than the one I had trouble with and I did place some anti-seize on them rightly or wrongly).
The belt and the system is back on the vehicle with new seals, I will need to put some 'pag oil' on the seals and then bolt down the pipes to then use the vacuum pump to evacuate the AC system. I have estimated about three syringes full of the 'pag-oil' into the system and then will re-gas the system. I still have the choice of also fitting the new reconditioned condenser and the new fan, this will mean more work and I am at present giving this some thought as the weather is clamy, warm and just downright uncomfortable, hence the wait.
16.08.20 Moving on for now, I was very pleased with the bulbs I have fitted and decided to get a couple more of the *100w 1156 BA 15S 382 P21W Cree XBD Bright LED Stop Reverse Light Canbus Bulbs, they were bought originally for the fog lights, however they work well as tail/brake lights, so I used them for that. The new ones will obviously be fitted to the Fog lights when, or if I get them from China or the so called Chinese UK warehouse? (update: I must eat my words, they came on the 19.08.20 now that was good....) The one supplier, so far has been quite good considering all Chinese political problems todate. The direction indicator LEDs doesn't seem any different, other than they are yellow LEDs and they are not coated by an amber paint solution, they do seem to be a little lighter in colour as one can expect, (pardon the pun) but this maybe down to the brightness through the colour coated diffusers, one may see a difference at night. I did find the old amber coated bulbs, (that were not all that old) with their amber coating, this coating was cracking off the bulb and crumbled off when handled; exposing the standard clear bulb, (most likely designed for the garages to be able to replace them during an MOT inspection, in return, charging an arm and a leg for the privilege at the customers expense. Yes! Of course I'm being cynical again)! The prices of the LEDs from China were good in comparison with everywhere else. I will most likely change all my appropriately, remaining bulbs to LED, there is no urgency or real rush at the moment. 04.09.20 Today, I decided to return the hardtop to the Z3, not an easy job and required another pair of hands from a total stranger that was passing by. My earlier attempts of man-handling the top was not totally damage free unfortunately, as a chip off a corner on the passenger side of the hardtop, after a small contact during the manoeuvre from where it was stored within my 'bedroom,' (found the small corner bit later on that day). Quite annoying really and could have been avoided no doubt, but that is life and fortunately in this particular case can be repaired, hopefully, possibly... it has now had a paint touch-up and is not too noticeable from a distance in it's present unrepaired condition. The top is now on and will no doubt remain on unless I have someone available at hand to help me lift it on and off. It is not really a one man operation as I have come to gather... The electrical terminal cap; as mentioned in an earlier entry has gone back on and is connected up, hopefully to the correct terminals, the demister switch does work and illuminates, we need a few early cool mornings to check if the demister works properly, that is pending the change in weather, no doubt that will be on it's way soon enough. It may need the wiring connections turned around if found not to be working correctlyand if that doesn't work I will cry unconsolvably...
The A/C new rubber seals have been lubricated and the pipes re-connected to the A/C pump. Just waiting on the correct Vacuum pump oil to arrive before draining the A/C unit and then refilling the system. Hopefully this will conclude this job and the A/C will work correctly ready for summer 2021?
23.09.20 Over the past few days, I have been looking at the cost of R134a refridgerant gas and it has tripled in price and that; is just for the small can within the last 12 months. Looking at my local specialised garage dealers with mobile facilities, they offer diognostic and gas refils, plus other services. Weighing out the costs and re-doing the gas myself, it would just about break even or in some cases more, if resourced myself, so it was sensible to call a local specialist: coolcaraircon.co.uk and they could also check my AC system out. (seemed to know what they were doing, polite and priced the job fairly. It seemed that my reconditioned compressor, (from a scrap yard) was just that, 'scrap'! So much for the reassurance that it worked, was just what one comes to expect in this day and age unfortunately. As many will know, I had hung onto this part for near enough 12 months plus; before fitting it so, no 'valid' warranty. (I believe they only offered a 2 month warranty, thinking about it). It looks like it will mean another purchase, disconnect the old one, fight with the bolts and then reinstall the replacement. The totally new one are far too expensive within this current financial climate, for me at least; so it will be another resourced unit.
24.09.20 I believe I have now found a replacement A/C Compressor, 'factory re-manufactured', with 12 month warranty at a reasonable price, somewhat more than I had originally wated to pay, however 'one gets what you pay for', it seems in this case... (details will be placed in 'purchases' section)...At least this new purchase will have a new clutch and the unit is now on order.
So why bother having them in a convertible, I hear one ask again within the UK... ? My experience also suggests: Perception of open spaces, freedom of hearing the open sounds in the countryside? Why does anyone choose a convertible? It does look sporty, compact, fast, again it is down to the streamlining and there is also the way it is marketed, intentions of the manufacturers and to whom they wish to target, reflecting and pushing an ideology on past designs, developments in terms of the race track or from yesteryear, so there is also an element of past-time romanticism to the concept of what seemed to be an innocent world then, of camaraderie and exploration, 'a Bird Puller', (to use an ugly term) even though we know it was far from that into today's reality, (or dependant of one's looks...) so it was a dream or an ideology. (Enough of the 'Top Gear' styled rhetoric)… The truth? We just need an A/C to just stay cool in hot weather - period! If there is one fitted, we just want it to be authentic and also work as it should on a renovation...
Some vehicles may have the A/C integrated into systems via the onboard computer and without a working A/C, some systems may become partially null and void; as some operations my require it as an integral part of the operation. In other words the A/C Unit that is not operating, may effect the over-all performance of your vehicle - I don't think the 2.2i model relies on this scenario, as this Unit may have been an option for the 2.2i, you will need to research respectively; your vehicle, manufacture and model, to establish this. Personally, I can go by my Z3 as it has been working fine without a working A/C system for near enough 3 years, so passing experience on this and keeping a very open mind, I don't mind being proven wrong on the odd occasion. In other words the AC unit is not integeral to my Z3 as far as I can see.
07.10.20 The weather was ideal today to continue working on the replacement A/C Unit. As many will know the 1st replacement A/C had failed in it's operation and therefore scrap; a further replacement was sought and today I fitted it, ready for the vacuum and re-gassing. I will hang onto the old one; as I have a nagging doubt that it does work, and it may be an error in diagnostics. I believe it just needed more gas injected into the system. When I did take this A/C unit off the vehicle, I had been previously told there was some gas within the system, however, it did seems empty. A leak perhaps that Lee had failed to identify? Or the fact he had arrived with an empty gas cylinder that was causing a few problems at the time of the refill! I will probably get Lee the specialist from: coolcaraircon.co.uk back in to do the re-gas. If it was not the old A/C unit then I will be miffed to say the least...
Also sorted out and replaced the wheels and tyres on the Z3, they look really good, all Bridgestone tyres 255/35/18 rear and 225/40/18 front - rim, multi-spoke configuration BMW stock low profiles, so, this has brightened my day. There was damage to one of the tyres, (my original set) with further close inspection of the remaining three of that 16" set, the sidewalls had started to show the appearance of cracking. So I am definitely justified in replacing them, bearing in mind these are the original from the first day I had purchased the vehicle, (I normally replace tyres on receiving another vehicle, mainly to fulfil safety of passenger(s) and me! This time around, it was due to the lack of finances and other priorities that took presidence - however, scrimping and going without for a while; one can eventually reach a target, even though it has taken well over twelve months. I ended up sourcing the new combo set; as this proved to be the cheapest option and probably worked out cheaper than just purchasing the tyres on their own. Weird really, as they have premium tyres all round, however they are now safe and they do fit well, I was a little dubious but really had nothing to worry about...concerning the size jump from 16" to 18", could have put 19" rims on possibly? But! I will not get ahead of myself, quite satisfied with these 18s. (see Publications for Tyre/Rim compatibility listings - Photos to follow) I plan to refurbish the old 16" wheel rims and will replace the tyres one by one once the rims have been prepared and resparayed, this will be no doubt sometime in 2021.
13.10.20 Darn! I could use other words...it seems I did get a little ahead of myself. After a number of days of driving on my new 'rubber boots', locally. I have found the wheel or brake dust shields have started to close in on the rotors, it very much looks like I may have to get some wheel spacers after all, not sure at this point in time and will need to shop around online. The symptoms are a periodic scraping sound, not servere, but irritating non-the-less and could most likely get worse. I may get away with it on pushing the dust shields back slightly, possibly, perhaps? (Pending my inclanation at this point)? So far; it just seems to be on the offside, rear. (Check out the PDF Publications - Section on Tyre Specs, this should help others wishing to replace their wheel rims). Further inspection is needed. This has only happened since renewing and replacing the rims, so it seems to me, as being the main culprit - to add insult to injury, as I have a tearful crying episode' recollecting the following event, a high kerbstone came into contact with my front offside wheel rim, during the reversing into a parking space with narrow parallel kerbs on both sides, with parking bays on one side and a major road on the other with a bus stop and pedestrian way inbetween the edge of the main road...; other drivers were waiting for me to complete my parking manoeuvre into one of the vacant bays; and I rushed it, only trying to be considerate to other drivers concerning the time taken, this proved to be a mistake and not a good outcome, (as one can quote "No good deed goes unpunished"), more chosen words and a periodic sulk as I replay the event in my mind....paint was scraped off one of my new rims... where's the rough paper and spray can! Que Sera...damn it!
14.10.20 Ordered a set of four, of 5mm universal wheel hub spacer shims from 'wish', (Cheap at £6.49 a set? - chinese, online equivalent to eBay) so no doubt these shims will take at least a month to get here, that's if it does get here and it is what was actually ordered?)... hopefully 'they', if 4 doesn't change to one, will turn out as being durable enough to solve one part of this current problem I currently find myself in...?
05.11.20 Well! China has done it again! Misleading and manipulated advertising and no doubt targeted around the current political 'climate, the UK also has a shared responsibility to protect the consumer too! The only one's to suffer are the people, like you or I, in my case, the 'Western' customer.... they sent me one shim! Out of a set of four shims that I had ordered, (I know money is tight over there, however, come on fair trading... Yes right! China and fair trading in the same sentence... mmmm!) a complaint to the company and supplier 'Wish', but one does not holds one's breath, a refund or the other three shims? I await their reply and no doubt they will suggest as they have done before, via a script, their advert was correct. The Quantity of 1 is part of the set of 4 and comes as an individual piece? or the Set of 4 is the set of individual pieces that comes as 1 complete set of 1... They can dance around that descriptive scenario until the cows come home and win everytime because the law seems to be on the side of the corrupt... (I checked the advert at the time and it read a set of 'four shims'. On purchase; the web page most likely reverts to how they wish you to perceive the advert, a little like the way a 'gate logic chart' works, (if one is familiar with logic gates of yes/no options based on binary) and will change according to your chosen option. So! Once the item has been purchased, decides to what gate is opened and the next route to take. When one complains, you see what they want you to see, a manipulated webpage on so on... - they will lose a customer; especially if they go down that particular scenario road; as this can be interpreted as a scam. However; this is only my opinion...one suggests a photo taken via a mobile or print screen via the PC and saving of the original advert in the future, if there is one for this company long term after burning so many bridges of trust) and my photo is saved for the eBay new order at least...
I decided one shim was not going to be any good on it's own, so I decided to revert back to eBay and found again indirectly, the same possible scenario emerging. OK, better looking shims for £7.09; (they were not available when I first looked for them on eBay and some of the information to the wherabouts of the product origins was also absent, like the location! This was missing initially, to my recall) The company was this time, based in London and the shims order indicated delivery within the next five days. One gets a gut feeling that this will be a repeat of the first experience with 'Wish', however, I did take a photo of this advert with eBay suggesting in the advert of the 4 shim package, there is also the 'QTY 1', placing doubt again to the purchase, the 1 set of 4 or 1 piece of the set of 4? So, we will have to wait and see... I have uprated from 5mm to 10mm spacing, hoping this will be a good choice. I know that the scrape sounds from the dust plates is minute, however based on my diagnosis over the past week, the spacers should do the trick to eliminate the problem; (that's if I ever get the set of shims, I had the same problem when ordering two cup holders with built in USB ports a few months before...that is another story? The other question will be: ...'will the wheel fit within the wheel arch; when the shims are in place?' OK, Yes! It was a guesstimate, at least if a get another shim I will have a 5mm and 10mm to gauge the correct sizes, possibly..).
Today, is the start of the new pandemic month lockdown by Boris, so this means more time to sorting out the last small irritating problems other than the lockdown, and the ording of parts for my Z3 renovation. (one never stops if one is totally honest, if one is improving on a vehicle....isn't that part of the fun?) My, what seems a non-logical approach to purchasing items it seems, even surprises me at times basing it on the law of averages and the corruption we see today! This is where one tries to rely on 'trust,' when it comes to the seller. (No doubt that is my problem it seems; trusting the seller). One MUST remember, many suppliers today have lost their values as well as their moral compass, accompanied by their unfortunate 'dog eat dog mentality of, 'competivness,' for greed, money and not forgetting the narssacism, or power complex over the 'little man', a little like today's politicians, media and business. (I again, getting political, I digress).
I have rechecked the advert again and quess what? Registered in Hong Kong! So, more info is now available, (it was not available on the initial reading of the advertisement, as I looked for it! They have an office in London. The questions now is: 'how long will it really take for delivery?' - 'What do they class as a set?' 'One, or four shims....?' The outcome is pending. It can only get better and up......can't it? How long does a person have to endure their nose in the dirt? The last time I asked that question deeply was when I was a child it seems....there is a message there somewhere. One can be thankful it is only just shims....today at least!
10mm
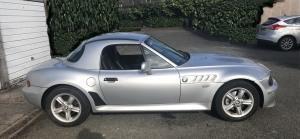
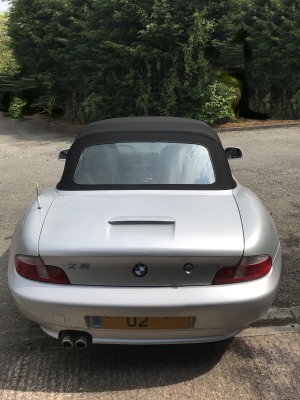
Let me get upbeat! Doesn't she, (Z3 looking at the picture above) look good? She has come a long, long way from the first day of picking her up from Hastings...one always needs to look at the positive side in this game! And not let the 'System' beat us down, being thankful for the small glimers of light that periodically touches our reality.
11.11.20Today, I have received ALL 4 spacers, WOW! They had eaten through their packaging on the verge of escaping by the time they were delivered via the courier, at least they were all there, four and not 1 as with the 'Wish' scam, so one is thankful. Rain has been persistent over the past day or two, however I will try and fit them as soon as there is a break in the weather. I have used the vehicle as the scraping sound is almost non-exsistent, however, for me; that is not good enough and therefore should be remedied shortly and will be another job done.
13.11.20 It is late afternoon and the rain has laid off and a chance to fit the new spacers for the wheels, to cut a long story short, the wheel nuts are too short and requires some longer ones all round. With the one rear wheel off, I also took the opportunity to inspect the hub and push the dust plate back slightly, thinking that is down to being pushed onto the rotor, just to see if the scraping problem had been rectified, on rotating the hub, it seemed ok, however a local journey maybe needed to conclude.
20.11.20 By bending back the dust plates did ease up the scraping sounds, however this was not a satisfactory solution, I had already ordered the extended bolts and they had arrived on the 18th and are ready for the spacers, that is if the rain ever decides to stop for a breather! The lifting of the 18" wheel and some garden flower tubs during the wait for parts seemed to have also caused me some internal damage and today, feeling it, so I have eased off the lifting for awhile to decide on if it is serious or not, as at one point I was considering an ambulance - not getting any younger, it seems.... or I need to start doing some more exercises, most likely the latter. My elder brother suggests it is trapped wind, but what does he know?;)
The cut-out design of the spacers can be a hit and miss case scenario when it come to lining-up, however, by rotating the spacer when the wheel is off, (if the blu-tak method is not adopted) it is doable and the spacer can be rotated a little with the aid of a flathead screwdriver and with at least one or possibly two of the new bolts inserted, when everything is aligned, even though a little awkward with the wheel on and limited scope to manipulate, when it comes to rotating at this point, until all of the new length bolts are in postion via the wheel, spacer and hub; can the bolts be further hand tightened. It did take me a good ten minutes to complete each of the back wheels. The delay was mainly down to the spacers rotating. (The blu-tack, double sided tape or a short-term adhesive was only an after thought and after completing the rears, this method could have helped in controling or even illiminating the spacer rotation problem; making life much easier. Worth consideration when it comes to the front wheel spacers or better still, another thought, looking at the image of those wheel pillars....one could try inserting long, thin bolts through the aligned holes leaving the aligning to just the hub holes, as the wheel is pushed close together, feeding in each of the undersized bolts to the hub, the thin bolts can be systematically replaced, one by one with the proper bolts and tightening them as one goes around maintaining their alignments - take your pick, further ideas can also come from this).
With the wood removed from under the wheel, the car was lowered to the ground, the new length bolts must be fully tightened at this point to their appropriate torques, a quick short test run around the drive area and the job was done for now at least! This job did sort out the initial scraping sound problems that could be heard from the rear of the vehicle. By bending back the dust plate a little did also help, (emphasis on not too much rebending, as this can also distort the metal causing the scraping sound to form elsewhere). I will get around to doing the front wheels another day; as I will be starting a new project whereby the wheels will need to come off again soon or when the weather permits so, other tasks besides the Z3 that have now arisen, will take priority. The new bolts are the correct sizes and one should also consider replacing the locking bolts, (if you have them fitted) this is something I did overlook at the time. The original standard locking wheel bolts have proven to be too short, for the 10mm spacers on this job. This exercise in all, may have seemed to be a simple job and it is usually for those on the TV, (YouTube) but it is the simple jobs that normally gives us the most grief, well it has in my experience anyway!
07.12.20 Today, I get to do a drive around running errands and this has given the Z3 a good run, the spacers and rear wheels at present are rotating fine without the scraping sounds. Some effects on the front via the steering is a little noticeable, by adding the two remaining spacers onto the front should improve on this. I will also add the wheel locking nuts when this job is carried out at the first opportunity, as the days are wet, dark and not ideal currently.
14.12.20This afternoon, the rain had stopped, that had given me a small window of opportunity and it also gave me an opportunity to redirect my thoughts to something else after receiving and experiencing some bad news within the past three days. I had decided to have a go at the front spacers, at the same time inserting the new locking nuts. Cutting a long story short. the O/S wheel was done, checked and OK, as was expected, after a few problems with aligning the holes. The N/S was a tedious problem however, to say the least, the wheel was taken off a number of times based on a clonking noise sounding when the wheel hub was rotated. The only explanation I could think of at the time, was somehow, the balancing weights or something was making contact with the brake rotor or the dust plate, no matter how one could hear the problem, it was one of those situations that one could not see the 'wood for the trees'. The dust plate had been manipulated in all directions and seemed OK when the hub was turned, (with the wheel off). It was another story when the wheel was re-attached. One could only say a few meaningful words at this point and then to put everything back as it was, as I was needing the car the next following morning, early. So, without the front spaces on and by the time I had finished; it was getting a little too dark to rectify the problem anyway. The only accomplishment I had today, was unwanted exercise and the replacement of two locking nuts in the rear rims and the original bolts and locking nuts returned to the front wheels rims. This had taken a number of hours. I had also an O/S replacement seatbelt planned for an install, now another job for another day. A simple job turned into a folly... the joys of motoring.
Going back to 2018, the Start of the Renovation - See 2021 diary entries pending....
Powered by S-AM3l1A
<<<2020>>>
Signing Off This Year
update
23.11.20 A little mist this morning, (and that is just getting out of bed) with the sun trying to break through; I thought of trying to sort out the wheel spacers today. With the car up on the 3 tonne hydrolic jack, bolts out of the O/S rear wheel, the rear wheel is removed, spacer on and the first problem was lining up the holes of the spacers with the hub bolt holes. Why a problem? One may well ask? (foreign measurements for templates and quality control is not the priority for some countries, hence the 'low' budget project). Also, have you ever tried putting a wheel onto the hub, without the spacers moving around... whilst also trying to lift the wheel, insert the bolts through wheel, spacer and the hub? Normally one can anchor a standard wheel, (without spacers) onto the wheel hub; as most hubs are designed with a ridge, helping to prevent the wheel slipping off the hub to the ground before the bolts could be inserted. Unfortunately; with cheap budget spacers, one does not have the luxury of a ridge, lip or lug, (call it what you will) as the spacer has taken up the room within that ridge area and the wheel now, just slips to the ground. In other words one is lifting, at the same time trying to insert a bolt, as the spacer decides to turn, just enough to block the bolt hole preventing you from inserting the bolt through. This can be likend to the task of stroking your stomach and patting your head at the same time, a coordination exercise that becomes tedious as well for some, frustrating... (I am sure you have tried it at some point in one's life) and if one does not have the coordination, then you just don't stand a dogs-in-hells chance carrying out this spacer challege). However; there is a way for those that may find that they have this 'infliction'. The way I would manage this, is by using blu-tack, (a noticeboard putty-like-substance that sticks to office walls or we could use a quick drying bond glue or sticky-doublesided pads) either ways, to hold the spacers in place, during the refit. With this method it could make life easier. The next step would be to placing a wide but thin piece of wood, under the wheel of the car being worked on, (after the car has been jacked up to just off the ground). (Note: The width of this typical piece of wood; one could get from a DIY store - dimensions: 10mm thickness and around 60cm in length, I just so happened to have had a pine shelf, in the back of the garage). This is just enough to have the wheel off the ground and without the restrictions when one comes rotate the wheel a little, (this also helps in not having to lift the wheel so high when it come to reattaching it to the hub). With the wheel bolts out and the wheel leaning close against the hub, with the spacer attached with bolt holes all aligned, ready for the bolts to be inserted. Note: The car can be jacked up or down minutely, to line up the holes, where necessary, without having to keep lifting the wheel, slowly aligning with spacer and hub holes, inserting the bolts one by one. (This is a good general method to use, if one is haddicapped with back or hernia problems through lifting heavy objects in your past, in my case, it has been wheels and heavy plant pots...the latter is another story).