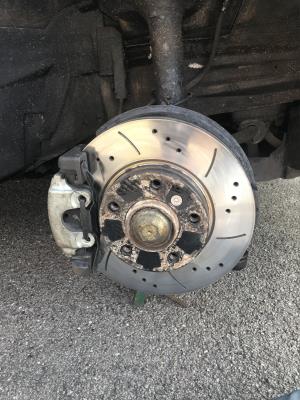
Front O/S Brake Rotor with repainted small 'top hat', spring, pad carrier, caliper and new replacement Hex Screw/bolt and dust plate...
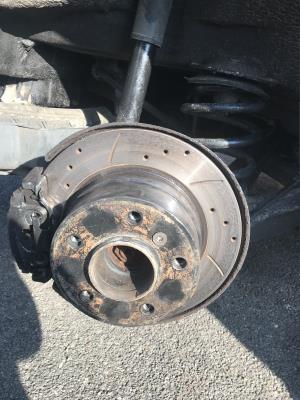
Rear O/S Brake Rotor with repainted 'top hat', spring, pad carrier, caliper, dust plate, new Hex bolt...
Note: The 'top hat's' have been painted with grey Hammerite F/R. Front Caliper with Silver/Chrome high temperature paint, Pad Cradle, spring, dust plate with anti-rust treatment/primer. Rear Caliper with black anti-rust treatment/primer and repainted silver to match the front. Wheel nut caps have also been added.
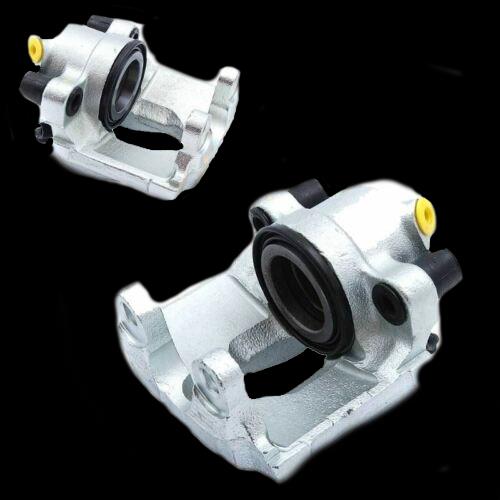
BMW Z3 Roadster E36 1995-2003 Front Brake Calipers Pair £76.95 (see Purchases for further details)
Make: BMW Model: Z3 O.E Number: 34111165029, 34116758113, 34111160351, 34116758114, 34111160352, 34111165030 Brake System: ATE Size of Piston: 54mm Important Notes (If applicable): For 286mm Front Brake Discs Only Direct Replacement Picture is for reference only and shows a representative image Brand new & Boxed Aftermarket High Quality Item, not Genuine
**1Year Warranty**
NEW Replacement Calipers
These were rubbed down and painted with High Temperature Paint. Be careful when refitting old brake pipes back on to the caliper, remembering the Brake Fluid will pour over the new painted calipers - can be a little frustrating especially if one needs to thoroughly clean them before repainting them again.- See diary notes.
By following the images above or previous page, in reverse order, start reinstalling components, when ready to insert the brake pads follow the next procedure:
Changing Brake Pads
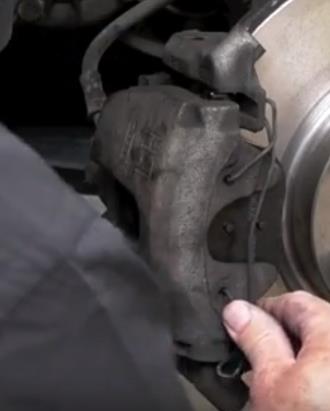
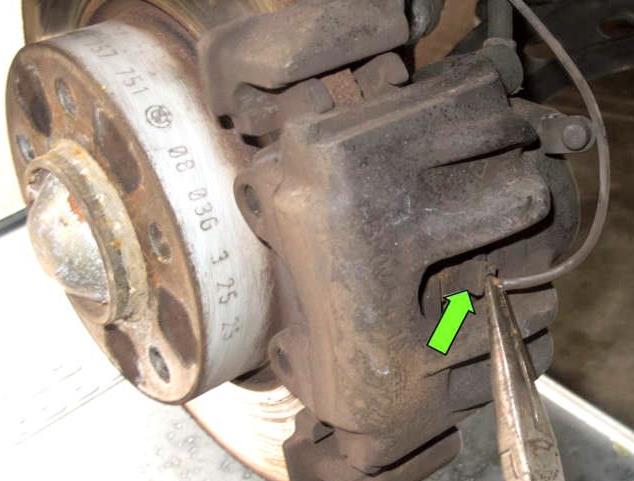
1. Remove Spring and disconnect Brake Sensor, (if applicable to the wheel you are working on)
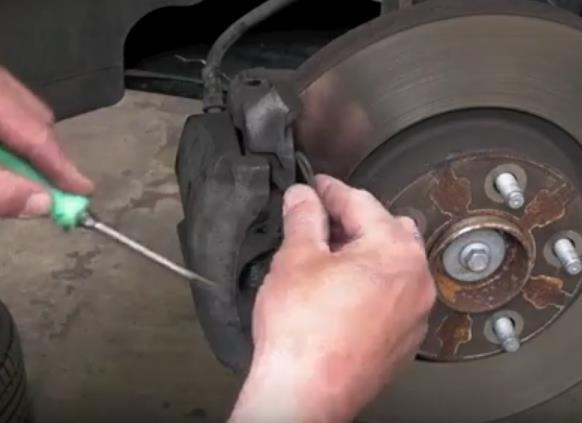
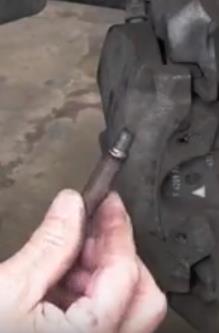
2. Remove caps off sliding bolts at the back of the caliper use ratchet to unbolt the sliding bolts and retract
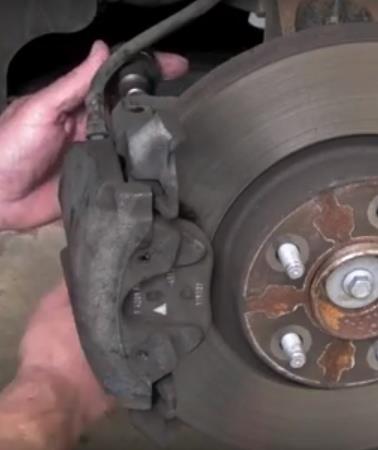
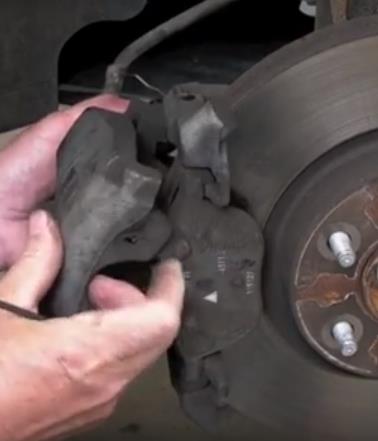
3. Slide off the Caliper & pull out the pad from inside the Piston Support the Caliper with a bungee cord, or coat hanger wire keeping the weight off the connected rubber brake pipe
5. Remove both Bolts from the Pad Cradle at rear of hub
4. Remove the remaining brake pad off the carrier
Loosen the cap on your Brake fluid Reservoir under your bonnet/hood if haven't already done so - Note: When brake piston is retracted the levels in the reservoir will rise, one may wish to keep an eye on the levels preventing spillage of brake fluid, place a rag to protect the paintwork under the bonnet/hood
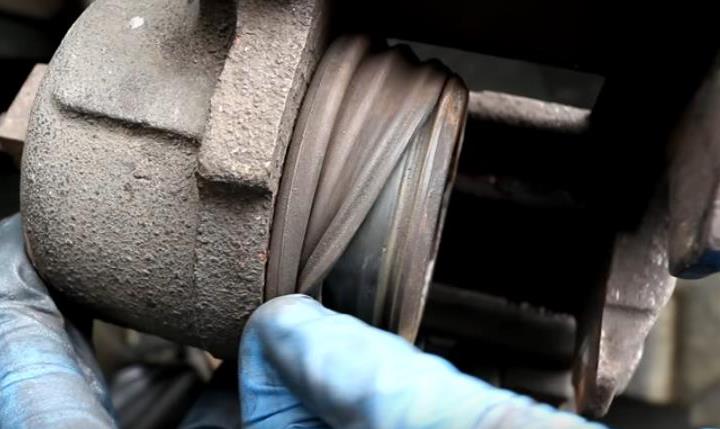
6. Check there is no debris behind the rubber - check condition, one may wish to use a light amount of silicon base grease around the piston, if satisfied, retract the brake piston back into it's housing. If cannot retract piston, try loosening the bleed nipple slightly, some fluid may leak from the nipple.
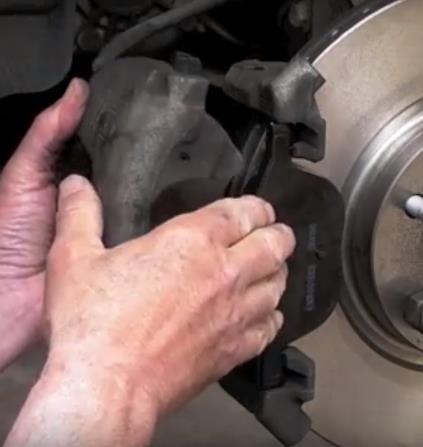
7. Insert Brake pad with clip, into piston
8. Slide other pad onto the brake pad cradle using the hooks on the top and bottom of the pad
9. Slide caliper back over the pads fully. Check to see it is on correctly.
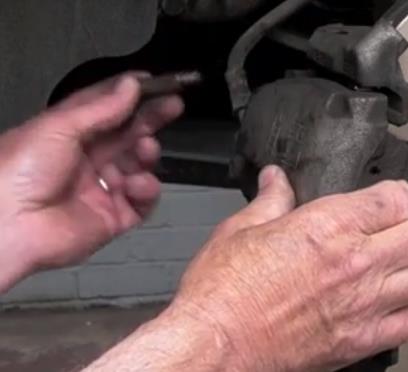
10. You may wish to secure the caliper with one sliding bolt during reconnecting the brake sensor as they can be awkward, this allows for an easier access, on completions - Return both sliding pins and tighten to correct torque, check they are correctly positioned. Return the dust caps.
12. Return the chatter clip or spring clip to the caliper.
Top up brake fluid 'Reservoir' with brake fluid if required, make sure the road wheel and bolts are all accounted for, tight to correct torque.
Follow the same procedure for the other side of the car, removal of wheel and replace the brake pads and, (sensor if applicable).
For the rear brake system, the process is the same for changing pads however, the handbrake shoes may also require changing, this does require a further process - see the next page...
11. Replace Brake Sensor or reinstall old one if haven't already done so, sometimes they are reusable depending on the amount of wear - If not, replace.
Replacing Brake Pads
JOB DONE!
Requirement for UK MOT
Powered by S-AM3l1A
Note: One recommends reading the diary first and then linking to workshop notes to maintain the continuity of the theme...