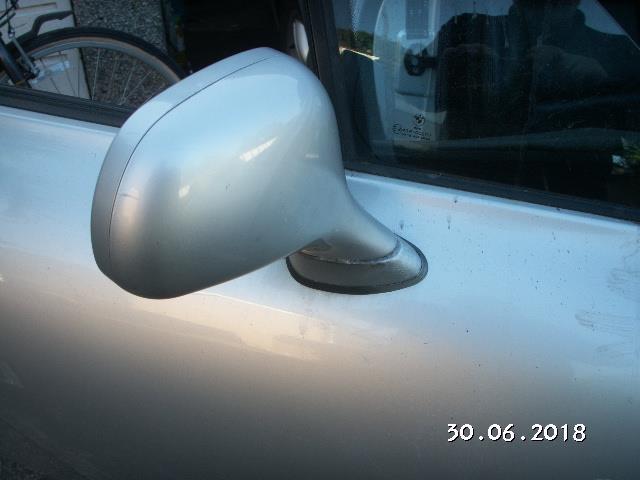
27.06.18 - I wasn't sure what I was going to do with this mirror until I had stripped it down, I also looked at some YouTube videos and a suggestion of using a bolt could possibly rectify the problem. A new driver's side mirror painted in Arctic Silver on eBay, Gumtree, Autotrader Part etc. were fetching prices of aroun £60-£185 and some had the same problem that mine had as described in the following images. This is a common break and makes one wonder why manufacturers choose inferior material to make their components. A thought springs to mind, so customers will keep paying out. One cannot have a perfect car!
The first job was to dismantle the mirror off the door. One needs to detach the inner door card from the door. Initially there is no visible bolts or screws to unscrew and this task can be discouraging for those new to the Z3.
Hopefully with a UK MAP
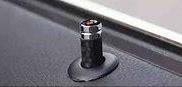
1. Slide the plastic trim away from the door hinge. 2. Use a screwdriver or plastic trim tool to prise out the switch unit on the inner door handle. 3. Inside the swtich cavity, there is a 10mm star bolt, this needs to be unscrewed using a socket or driver. (keep the screw safe). 4. Using your trim tools in-between the card and the door, prise the door card until the plastic card retainers pop out of the door. 5. You may have to lift the card up, as these cards are normally hooked over the top frame of the door and the up/down pillar lock.
1.
2.
4 4
4
4
4
3.
5.
4.
5.
When the card has been taken off the door, be careful with any electric wires that are evident, disconnect them as you are taking the card off and feed them through, clear of the card.
Note: There should be a thin piece of foam sheet or plastic membrane attached to the inner door, (if not replace it or make one). Keeps water out and it also acts as sound proofing.
Now we need to disconnect the mirror from the door. Again, 2x10mm Star bolts are used to hold the mirror onto the door, these need to be unscrewed to detach the mirror. Being careful to also pull the wire through.
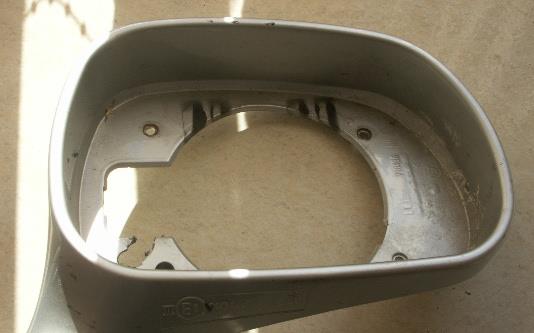
Stripping down the Door Mirror
1. Detach the mirror platform from the centre motor mechanism - it should with a little force unclick from 4 points
1.
2.
4.
3.
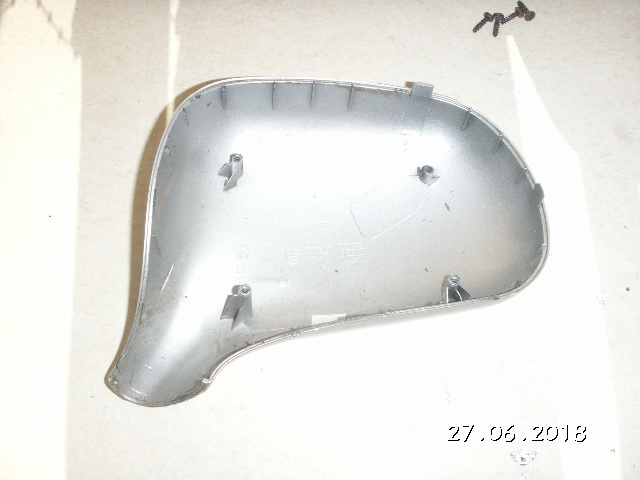
2. The two sides of the case should come apart after removing four screws
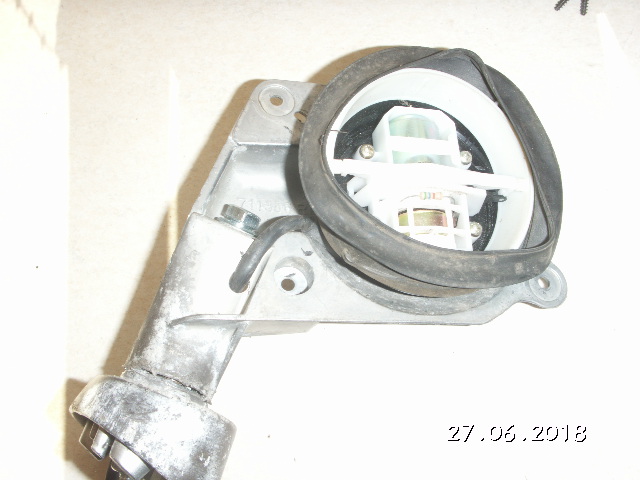
4. You may also want to take out the motor mechanism the reason will become evident as we continue... Note: How the waterproof rubber skirt or membrane goes on...
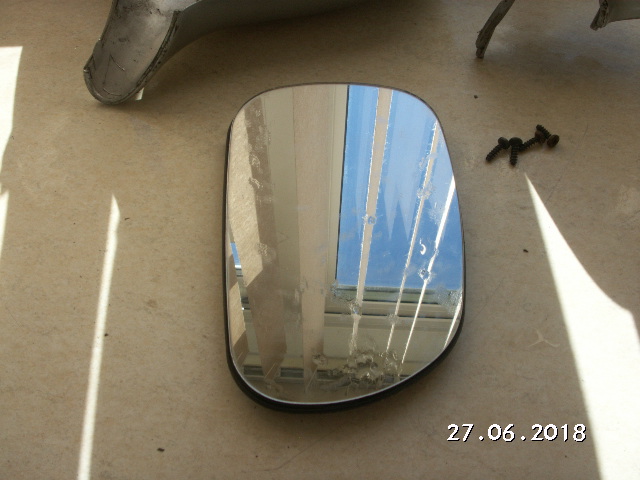
3. Keep the mirror in a safe place to prevent breakage
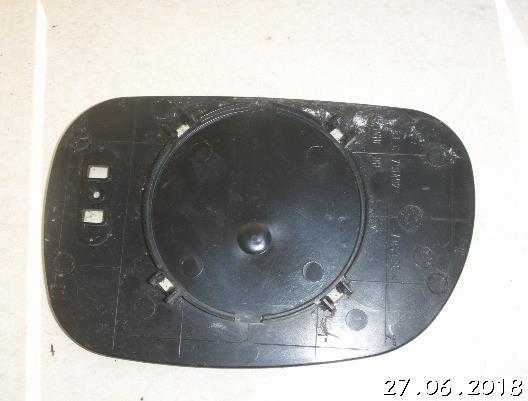
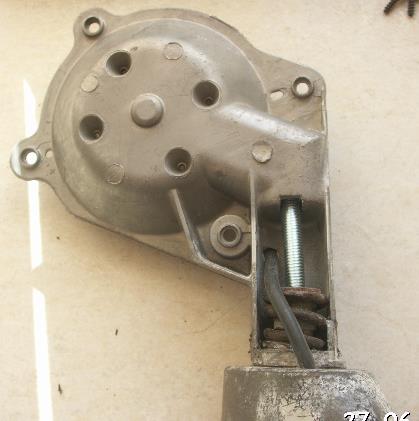
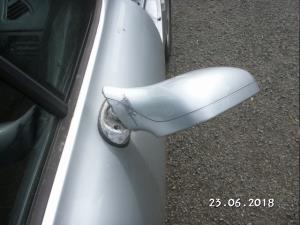
After reviewing the problem, I discovered the spindle or part of the upright stem had broken off the base - see below red arrows This is quite a common fault with these mirrors on the Z3.
1. To solve my problem, I decided to use a bolt method to attach the top part of the main body of the mirror to the stem, for this I needed at least a 10cm length of bolt to feed through the upper part and down to the stem, with enough poking out at the bottom of the stem for a washer and nut. I found most auto shops only stock a bolt of around a 3" or 7.5cm, unfortunately we really need at least 41/4" or 10cm (M8x100mm - 5/16 X4).
We also need to re-root the wire, another reason for disconnecting the motor. Note: On the back inside of the motor mechanism housing there are four wires numbered 1 - 4 write down the colour and number.
1 = White 2.=Brown 3.=Black 4.=Blue These wires have spade connectors and can be gently teased out.
The other end of the wire has a single connector and will be too wide to push through a 10mm hole. By disconnecting the 4 wire connectors, it makes threading the holes much easier.
2. I needed to drill two new holes to feed the wire from the upper to the lower part without obstructing the functionality of the mirror.
The bolt required a little bending in the vise to accommodate the upper aperture angle and again towards the lower end of the bolt (almost looks like an arc. This will require some trial and error. The bolt and the nut should not protrude below the base where the mirror makes contact with the door surface. obviously the nut needs to be able to tighten at the angle. The two plastic outer case sections should be flush as is allowable with the base, this will depend on how tight the nut is. Assembly as in the conventional reverse order.
Also some adjustment in the mirror housing to accommodate the new wiring route - this will allow the two halves of the mirror housings to seat normally together.
Note: If the paint has come off the base, as in my case, a touch of paint may be a good idea and dry and harden over night before reassembling the mirror.
The mirror base will need to be screwed back onto the car door and will need to be reassembled on site, it maybe a little fiddley but it is doable. At least it will save near a hundred and thirty pounds buying a secondhand wing mirror.
1. Required to bend the bolt. as the bolt head (top) does not rest on a level surface, there is a slight angle. 2. One needs to guage the correct angle and to allow for the outer plastic housing to be flush with the base when re-assembled. However, there is generally, a small gap between the housing and the base when put all back together, this is normal, apparently ..see Z3 photos via internet...
Note: if the angle of the bolt is not correct there will be a large gap between the base and the housing... Note: Superglue is not strong enough on it's own!
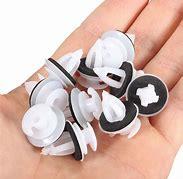
Personally, I left plastic poppers in the card - If not broken don't fix them...
After the repair......
Where the new bolt feeds through from the top, through to the base, is where the original wire travelled. Now the bolt has filled this space, a new wire route is needed.
The first hole was drilled into the downward stem and the second hole drilled into the mirror base that attaches to the door. (Some guess work is required here) The wire was then threaded through
Drilled Hole 2.
Drilled Hole 1.
Drilled Hole 1.
Back Side
Front Side
The new wire route will prevent the mirror casing closing together properly and therefore will require a little remodelling. One will need to check the wiring and where the casing touches to make the appropriate alterations. To cut the plastic accordingly, I used my drill to cut away the plastic until the casing came together correctly.
Section cut away using a drill bit.
Broken Stem or Spindle
Motor Housing
Note the slight space, this is normal on many of these mirrors I have seen...
Spacing doesn't look too bad
Repair complete
Use sticky pads to re-attach the mirror onto the back platform and reposition the mirror before pressing firmly onto the sticky pads
There maybe a little play, however this can be tightened up using the nut before assembly, if one wishes rigidity, superglue could be another added solution to lock the mirror movement.
A little play is not a bad thing, as it allows for accidental knocks, if too rigid, could cause the mirror unit to break in some way.
This repair may reduce movement in the mirror stem body. however the electrics will compensate, (manual if non-electric) the visual performance to your required settings. In other words, should work OK without the risk of the mirror unit parting company on the fast stretch of the motorway. Generally, this repair should make the mirror unit visually effective, pleasing and functional!
Inner Door Card Disassembly Method
New drilled hole
Old wiring route
New drilled hole
New inserted bolt
No inserted bolt
Inserted bolt makes for a more ridged stem
I managed to get the bolts with nuts and washers x10 from my local B&Q Store £4.99 (difficult to get single bolts with Washer and Nut) (Found them in the garden fencing section).
Broken Stem/Spindle
Powered by S-AM3l1A
<7>
Note: One recommends reading the diary first and then linking to workshop notes to maintain the continuity of the theme...