With every new or secondhand car, there is sometimes a need to purchase tools or parts for it, especially if it is a secondhand vehicle. As in previous publications within this series, there is a dedicated section covering tools and parts purchased for this vehicle:
Useful Tools
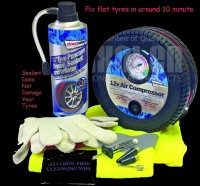
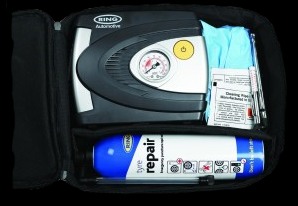
Typical Instruction On Use of an Emergency Tyre Repair Kit
More than two thirds of cars now come with a tyre repair kit instead of a spare wheel. While these kits are not always popular with drivers, if your car has one, you'll need to know how to use it. If you get a puncture, pull over and stop as soon as you find a safe place. Preferably away from traffic, apply the handbrake and switch your engine off. Turn on your hazard lights if necessary. Now take a look at the puncture. Sealing kits will only fill holes up to to about 4mm across, so if you've got a nail in your tyre, that maybe fine for a repair, but if the tyre's torn or the metalic beading is damaged or the wheel itself is damaged you will most likely need to call a breakdown service.
You will find your repair kit in the boot, (trunk) strapped to the O/S inner wing of your RX8.
The kits can vary depending on make, some have High ViZ vests, latex or reuseable gloves, wipes, the bottle of sealant and the compressor for pumping up the tyres. If you do have an object like a nail in your tyre, don't use a compressor for pumping up the tyre, outweigh the need to remove it. Some kits have 'sticks to plug the hole, in this case you may wish to try to remove the offending object. Make sure the tyre has deflated leaving approximately 1% to 2% of air in the tyre.
Take the Sealant bottle and unscrew the valve cap on the wheel and attach the sealant bottle tube to the valve. Once attached, the pressurised sealant will disperse around inside the tyre. On some vehicles and makes of kits, the air compressor for inflating the tyre is then attached to the back of bottle, however on many other cars, you will need to unscrew the bottle and attach the air compressor directly to the valve on the tyre.
Now its time to inflate your tyre. So take the lead from the compressor and plug it into the cigarette lighter or 12 volt socket inside your car. Then start the engine. Now turn the compressor on and inflate the tyre until it reaches the recommended pressure shown in your cars handbook. If the tyre is not in place correctly, try rolling the car a few meters forward to help the sealant spread around evenly.
If that doesn't work you might still need to call a breakdown service. If you manage to repair the tyre, well done. You can carry on driving, but you will need to stop a couple of miles down the road to check your tyre pressure again. Remember this is only a temporary fix, so drive gently and keep your speed below 50 miles an hour on all roads. When you get to a garage remember you will need to buy a new can of sealant and a new tyre.
Remember safety come first, especially when driving with passengers and be aware of other road users. If you feel unsafe, DON'T DRIVE.
See Tools for Kits
Published on 24 Jan 2014 How to use a tyre repair kit for Car Duration: 2:51
This kit also has, coincidently the half shape of the Rotary