Normally the replacement Fan Blower Resistor is fairly straight forward to fit. however one can get the odd stubborn nut or cowl fitting. Today, 04.01.19 I decided to have a go at replacing the resistor in a Z3 and this is what I found...
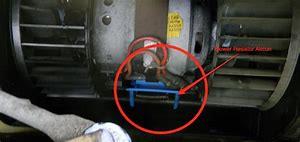
The past number of BMW's I have come to own, normally have what is known as a FSU located under the central part of the dash assembly. The FSU is sometimes referred to as the 'hedgehog', for reasons explained by the following image:
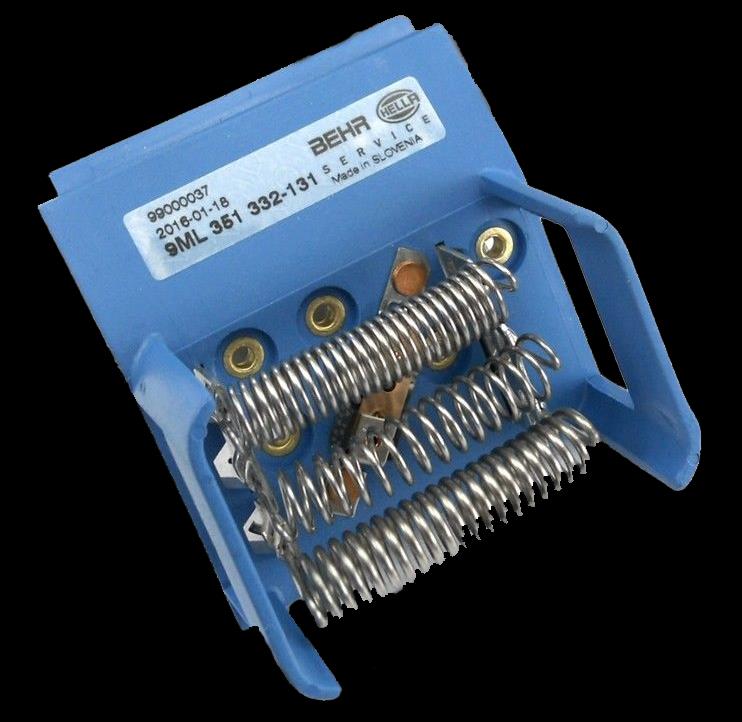
The BMW Z3 on the other hand, has a different set up:
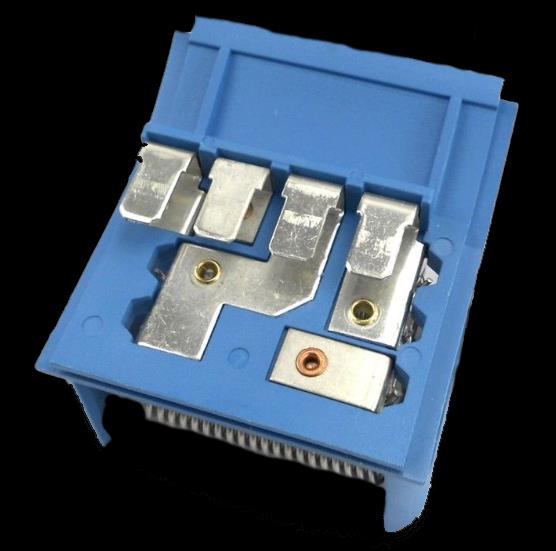
This is an example of The BMW Z3 Fan Resistor with A/C
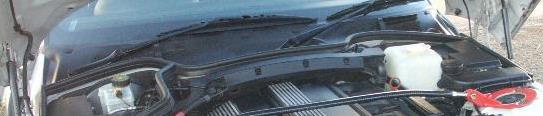
<<< This reduced image is an example of the Final Stage Unit, (FSU) found in the E39 5 Series as well as other vehicles and can be considered a large item concerning size, as they can vary; this FSU carries out the same function as the Z3 Resistor, this is not used within the Z3 as I am aware. Prices can vary from £12 to £120+ Shop around....
<<< The Z3 Resistor can also be found in the E30, E36, Z8, E52 and they can vary depending on whether you have Air Conditioning. When ordering, it is advisable to mention this if you have or have not the Air Conditioning in your Z3. The prices will also vary. For this type of resistor, I paid around £25 from eBay, I thought this to be reasonable, considering other prices, one needs to shop around as some can fetch around £80+ in some retail outlets. Part No. with A/C 64111375755 1375755
Front
Back
Accessing The Old Resistor
To fit the new resistor, we need to be able to get to it and this means a little work on dismantling some of the fittings and trims under the bonnet/hood.
I approached this by first, unscrewing the bolts on both the Windscreen Wiper Arms attached to the wiper motors, I did find I needed some bearing pullers to tease off the wiper blade arms as they were lets say a 'snug' fit.
Note: There are sometimes plastic caps on the wiper bolts that just needs gently prising off before using a ratchet. (13mm Nuts) on the Wiper Arms.
1.
2.
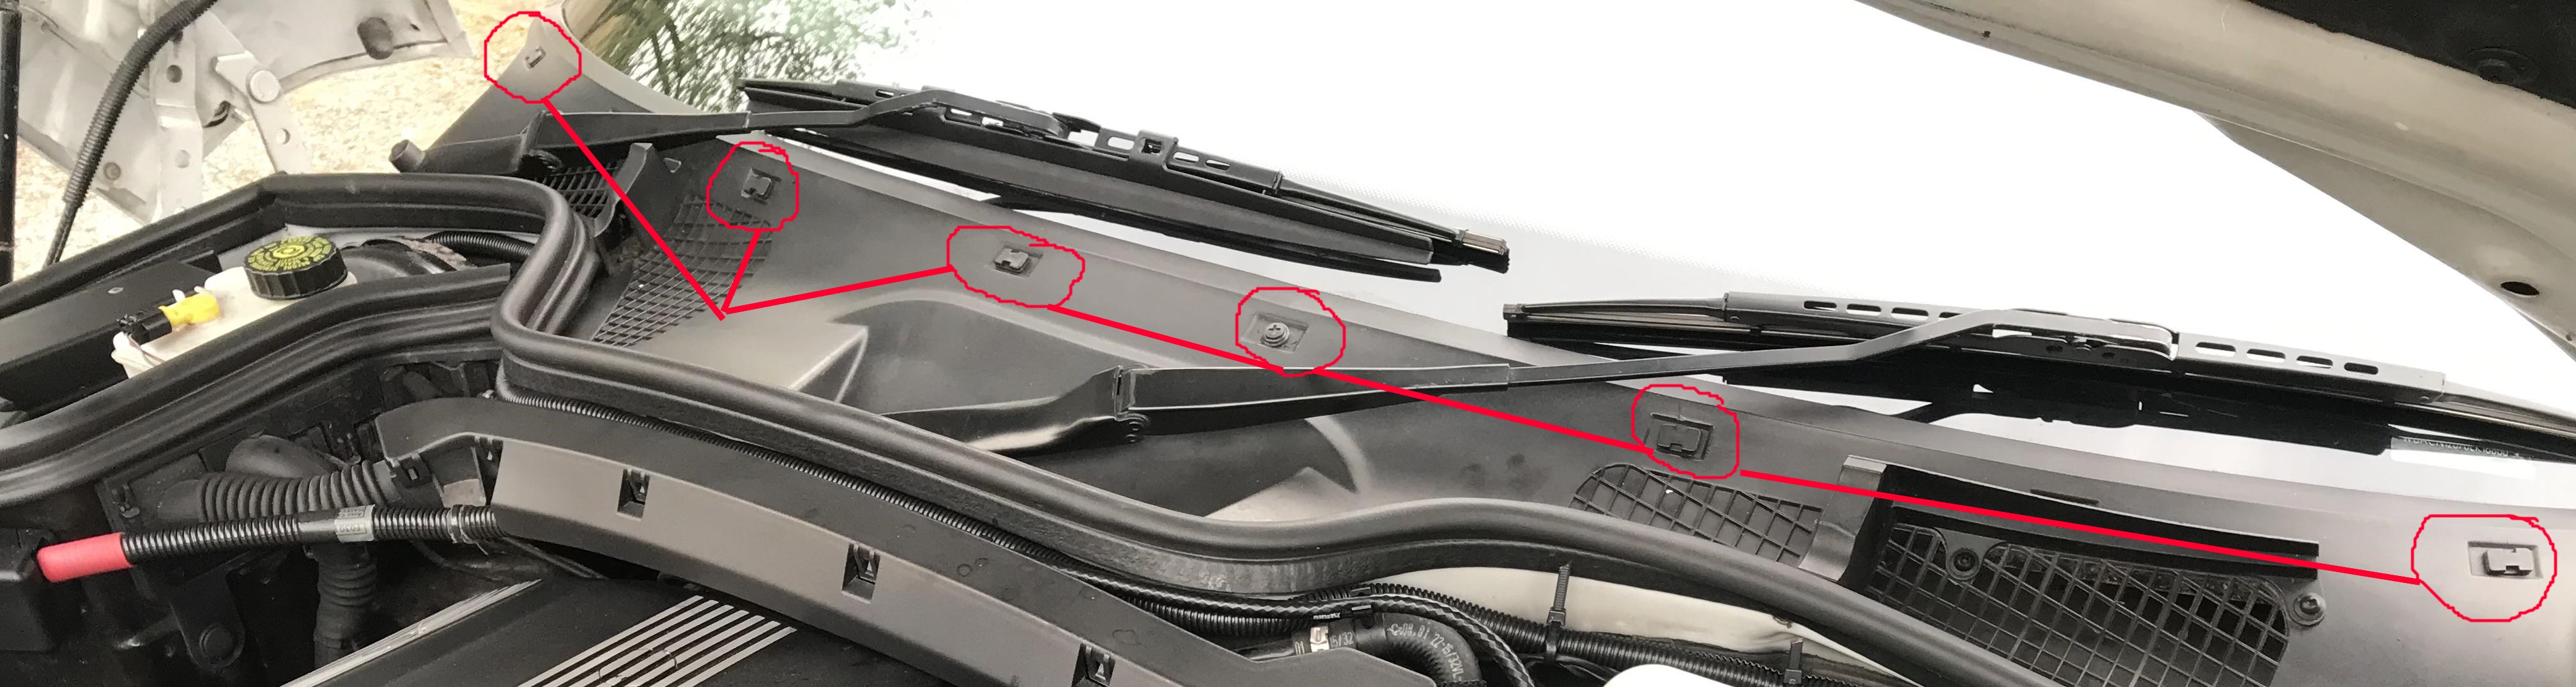
The next thing is to prise off the plastic pressed in clips, be careful as they may shoot out. The clips comprise of two parts, the clip itself and the plastic housing that it goes into. They will sometimes shoot out together leaving just the drilled hole. Difficult when coming to reassemble, if the plastic housing is lost on the floor somewhere…..
4.
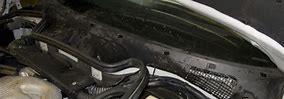
A- The rubber seal attached to the firewall needs to be fully detached, noting the other rubber seals that are parallel will also need to be partially detached from both sides of the vehicle, as to allow the cowling to be removed.
Plastic cap
4.
The black Cowling should be ready for lifting away from the vehicle to expose the Fan Motor Housing.
5.
Note: The 'lid' of the housing unit may seem awkward to remove, I found it easier to manipulate to the right or towards the nearside, (passenger side) of the vehicle. This is mainly down to the Offside, (driver's side) windscreen wiper motor mechanism being in the way. It worked for me...
6.
7.
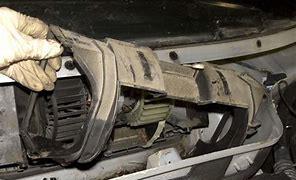
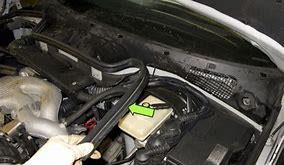
In my case, the manufacturers have been good to make the resister with a good identifiable coloured plastic in blue, much easier to identify and extract. (Other manufacturers may use other colours or neutral black). Note: a pair of long nose or needle length pliers will help to reach and pullout 'the resistor'... Do NOTE: How the resistor comes out - (Terminals at the back, springs facing forward). At this point one can inspect the old resistor and replace it with the new one - use pliers to return the new replacement resistor and be careful not to damage the springs with your fingers on reinserting, it can be awkward if not lined up.
The same procedure initially, is used to extract the Blower Fan Unit that regulates environment temperature inside the vehicle
Checking the Resistor Is Working
Detach each of the plastic straps on either side of the housing unit, don't use too much force to detach them as they can break.
It is always best to check the new replacement resistor is working before the process of re-assembly, by switiching on the blower knob inside the car. On checking the switch settings individually, they did ALL work from 0 to 4 as they should and it was time to re-assemble the fittings and trims, however within reverse order of disassembly.
Note: Prior to the Resistor replacement I could only get setting 4 to work, (full Fan Blower). This is OK in very cold countries and the UK come to think of it, it is better than nothing, however I preferred all the setting from 0 to 4 to work as it should, now it does. GREAT! Another one off the list....
8.
One of the main points I will raise at this point of re-assembly, when it comes to re-assembling the wiper arms and blades onto the wiper motors, a reminder that the wiper arms are equipped with a reasonably strong spring within the lower half of the arm, this then attaches to the wiper motor and one also needs to flex the spring at the same time as inserting or attaching it onto the Wiper Motor Shaft. It is easy to forget the pressures needed to exert the spring whilst at the same time attaching it onto the Wiper Motor Shaft, (pressures vary from car to car). If not careful it can easily flex onto the windscreen; more so when the wiper blades are not attached. The force against the windscreen will crack the glass and inevitably a replacement windscreen will need to be sourced or claimed via comprehensive insurance cover. I have seen this happen too many times and I have done it twice within my lifetime. Can be an expensive game, easily done....be aware!
The Replacement of the Fan Resistor is now DONE!
Fan Control Settings 0 to 4 >>>
Silly, I Know...But!
26.04.19 BMW Z3 2.2i 2002/UK
A
B
A- Note: The Wiper Arm may have a cap over the nut to protect it and therefore need to be removed...
Retaining clips
2.
3.
Powered by S-AM3l1A
Note: One recommends reading the diary first and then linking to workshop notes to maintain the continuity of the theme...