CLASSIC BMW SOFT TOP CRYSTAL CLEAR HOOD MATERIAL CONVERTIBLE REAR WINDOW
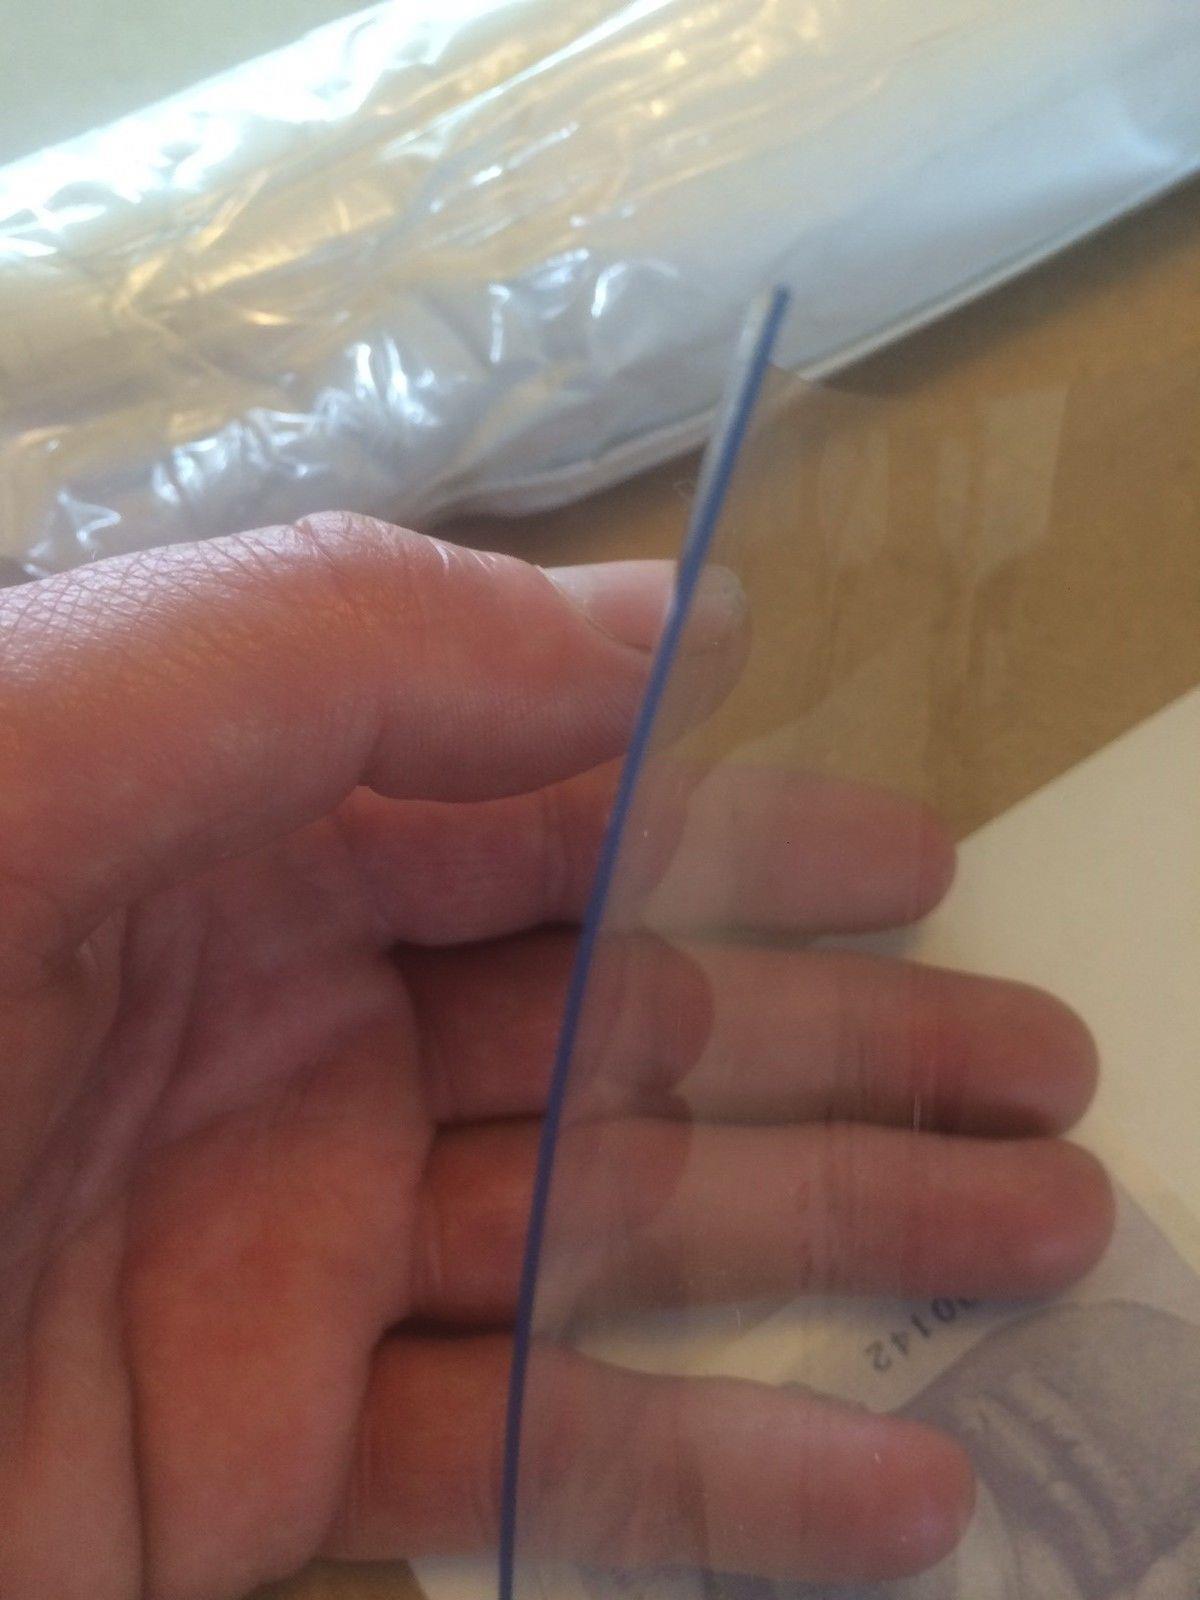
VERY EASY FIX FOR THE DIY ENTHUSIAST & (we will see.....) - Complete DIY crystal clear window material - DIY Kit Contains: Top quality stainless steel super sharp scissors - 50FT approx. black unbreakable rot proof sewing thread - 7 pack heavy duty needles - 4 metres of NO 8 rot proof spiral zip and 1 puller - 137CM x 50CM of extra heavy duty crystal clear flexible PVC plastic sheeting - 0.75 MM thick, very flexible and super tough... - We have tested this in all weathers - Ultra violet resistant, - flame retardant - rot proof, waterproof, cold crack resistant - 1370mm long approx. 500mm high - Wipes clean, weighs around 1kg, can be stitched together, easy to cut, FOR MORE IDEAS - The list is endless Other sizes available SUPER CLEAR PVC 0.50 mm etc THIS WILL COME ROLLED AND WELL PACKED IN A JIFFY BAG If your size is different or you would like more product information please send a e-bay message
To
The Kit
I do hope it comes with instructions
Check out the Workshop for installation pending arrival by post
So what does this cost, you may well ask:eBay £35.00 plus £6 economy delivery (free would have been better....)
Seller information hutchinsons-pvc-solutions-limited
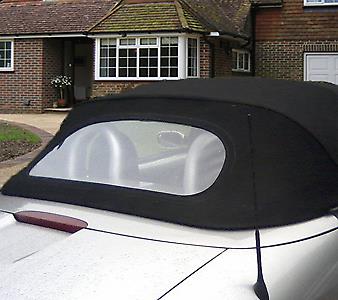
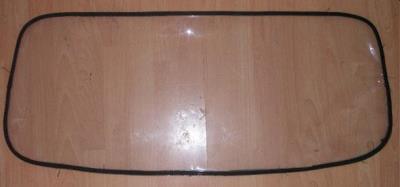
For Illustration Purposes
For Illustration Purposes
Not Z3
Not Z3
The Rear window Kit arrived on 29.06.18 - In the evening I decided to have a go at sorting it out. With the original window unzipped and in front of me on the table, I looked at the kit, and back to the old window did this a few times, as there were no instructions. There was nothing wrong with the old zip of the old window, it was already shaped and the zip was still good. To use this would save hours of time hand sewing the new zip to the vinyl and onto the fabric, so I decided to draw around the window and using it as a template, then I commenced to cut out the old window, from the centre just leaving the remains of the zip in the shape of the window.
I grabbed the new vinyl, needle and thread and spent a couple of hours sewing the new vinyl to the zip. Tip - you will definitely need a thimble to force the needle through the vinyl. It went together quite well, however the sewing was not the neatest and not one of my past-times, but needs must...
Fabricating The New Window
New Vinyl now attached to the old zip - and looks very clear.
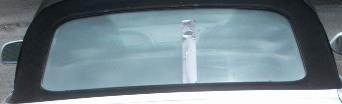
Remember the old window, it had a knife cut down the middle of it and it only kept together with some Gaffer Tape. Unfortunately, one of today's curses.
It is a good idea to check the zippull to make sure it fits on the old zip. Fortunately for me it did, give or take an odd bad stitch here and there crossing over the zip run, with a blade, to clear it's path, it went all the way around. This can be tidied up later...
Even though by using the old zip, the sewing may be a little amateurish, the soft top fabric should cover this. Another solution is to attach some fabric over the stitching to camouflage it and use a sealant.
Problems faced: The one side sewed well onto the old zip, however when trying to do the other side, I did have to spread the clumping or wave creases. It is really trial and error. Unless you have access to an industrial sewing machine, this will happen as one is having to manipulate the work by hand when using a needle and thread and it is almost impossible to have a perfect end result. It is all to do with the general aesthetics and the final result. This either works or it doesn't ? In this case, aesthetically it wasn't too bad, however not perfect, but acceptable. I did try to attach the window and found the zipper would not pull the two pieces of zip together, I will therefore need to find another small zip puller to complete this task. Failing that, I will need to start over and sew in the zip that came with the kit....
During the week. from the 31st July 2018 I had started again, as the zip pullers were not working. This meant the kit zip needed to be fixed up and sewn onto the vinyl. I spent an evening sewing the zip and completed it in the early hours of the morning.
Today, 06.08.18 it was time to sew the other half of the zip onto the ragtop. The weather was again, hot, so only completed about half of the zip onto the ragtop before calling it a day. I didn't want to spend too long in the heat as I managed to get a little heat stroke from the previous days and it took it's toll. So today was work with moderation.
Note: No Instructions
Did not come with spare pullers as seen within this image.
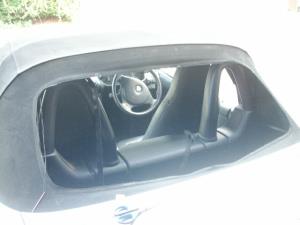
most likely a Mazda Miata
most likely a Mazda MX5 or Miata
Old zip sewn onto the new vinyl
One would think that this exercise would be straight forward, it isn't! The zip is now in and the zip puller works a treat, however the window when zipped in looks like nothing in the promotional photos. In fact it looks a total disaster...
A thought did cross my mind, rather than use small stitches, to use large ones, just to initially get the window held into position, zip up and then sew smaller stitches. Unfortunately the kit did not come with instructions or tips on installation. Hours have been wasted.
I have three areas holding me back from getting this car back on the road, this window and the bonnet and the third is finance!....
Working on a shoestring doesn't help either. Ideally the car needs a new soft top at around £800 and replacement bonnet at around £400. This will cost at least £1200. Perhaps another £300-£400 on belts, filters, oil, rotors, etc.. Currently; slow progress is discouraging.....