Diary of a Second Hand 15 year old Beamer (Maintenance - Battery Drain included..., BMW E39 520i year 2000 Engine 1995cc) M Series.
Workshop/Diary - Door Card & Checking Electrics
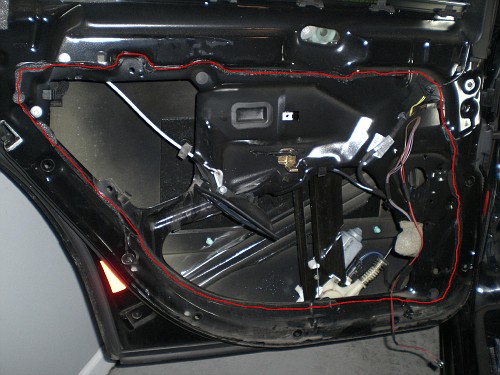
fig. Source Open/Close Door Lever
fig.
3. Inner Door 'Gasket Seal' stuck with' Silicon sealant', that is soft and can be re-used.
The rear door and card does not present any surprises:
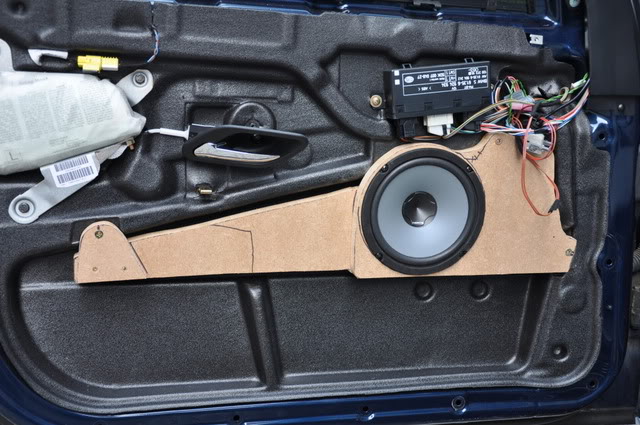
Be careful, as the 2nd screw is hidden, you may have to open the vent flap to see it. You will also have to take out three screws holding the speaker cowling. I checked the wiring at the door hinge, within the rubber grommet for breaks and signs of possible 'shorting' and continued to insulate the wiring with blue insulation tape. Once completed, the card is reattached, fiddly and with patience with a logical approach as with the rear door, job done!
I decided to also look at the glove box fuses and found that the fuses are mounted on a bar that is detachable; this allowed the wires on the back of the bar to be more accessible. I identified the wire going to fuse 4, [Red with yellow squares] and slightly pulled it and also pulled the wire harness. I also decided to take out all the interior bulbs/fittings to see if this had any effect on my battery monitor and OBC. The internal lighting did not indicate any problem as they all worked. However, by pulling the wires within the glove box did allow the monitor, (Battery tester) to show green lights instead of the amber, (This was with fuse 4 inserted within the fuse box). I can make a guess that this could indicate a problem with the wiring on route towards the windscreen washer the will see if the battery is ok tomorrow, failing that it may mean checking the wiring route through the dash, not something I am looking forward to.... 16th May 2015 - Had ago with the rear O/S door and insullated the wires with blue tape and corrected open/close mechanism on the front N/S door, a right pain.......This just leaves the front, OS or drivers door (UK)... possibly, perhaps!
fig.
fig.
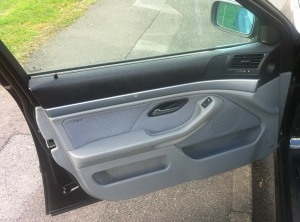
N/S Front Door
N/S Front Door
A - Screw Location
2. Remember, when putting the door card back, make sure the wire is connected within the plastic retainer clip, it is very easy for the wire to become unattached, when manipulating the lever unit otherwise like me, you will not be able to open the door from the inside and will have to take the card back off again to put right.
Notes: 1. Location of of just one screw for Lever Assembly - Pull out lever to get to the grommet covering the screw and this also allows more space for your hand and fingers to manoeuvre.
15th May 2015 - I decided to have a look at the front near side door again to check the condition of the wiring. The front door is a lot more cumbersome than the rear and there are two screws holding this panel as indicated on the image:
A - Open/Close lever 1st screw location B- Vent 2nd screw location