© Copyright Reserved - United Kingdom
Ideal Screen Composition 1024 x 768
5 Series Beamer
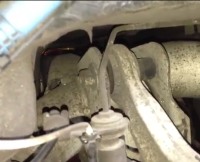
fig. Boot - Rear Fuse Cluster
67
66
Workshop
Contents Page
click
click
click
Diary of a Second Hand 15 year old Beamer (Maintenance - Battery Drain included...,
BMW E39 520i year 2000 Engine 1995cc)
M Series.
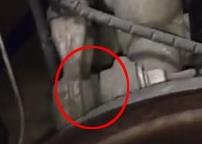
Workshop/Diary - Rear Control Arm O/S
continuation pending.....
.
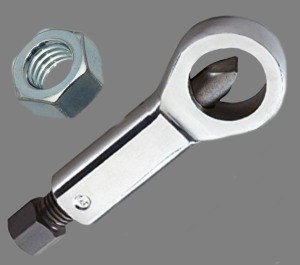
fig 3 - Nut Splitter [Retal] x 1 £13.00
eBay [dapetz] you get x 2 sizes
15-22mm , 2-15mm £6.99
Note: the 15-22mm is slightly too big and one would suggest the middle size between 2-15mm.
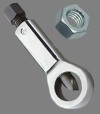
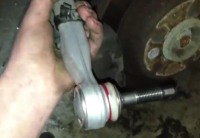
fig: 4 - Ball Joint Retainer/Remover
[x 1 Retail ] £11.00
eBay:[chelseadeals] x1 £7.99
Note: Ideally you need to get them before the incident when you are not desperate and out in the sticks to have to use retail outlets at retail prices.
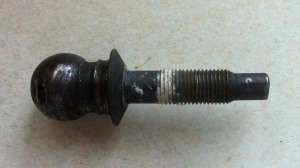
Since this ball joint 'shaft' was all but remaining, (fig.2) it was easy to attach the balljoint retainer (fig.4). Remember, we only want to prevent the shaft from turning and this can be done by using the retainer as a 'solid bulk', against the hub or as to trap at least. The retainer therefore prevents the ball from rotating.
By using the Nut Splitter, (fig.3) allows the nut to 'break' it's seal from it's original nut tightening. Even if it is only just partial, it should be enough to allow the nut to turn with the other end held firm, allowing you to extract, (when the nut is off) the shaft from the housing . Obviously, if you are in a well equiped garage you can use alternativeand easier methods.
To install the new Control Arm, I would suggest fastening the bush end first (fig 6) with the nut on the left as you face it, inserting the bolt from the right. Notice the spacer on the Control Arm to the right.


The ball joint thread part will bend (fig.7) and will be stiff, this is normal and allows you to bend with some force as you insert into the housing. You may need to tap it in using a hammer being careful not to damage the thread and then use the new nut to tighten up.
Check all nuts are tight and the control arm is seated correctly, again note the brake wiring should be above the arm and not underneath it.
Replace the wheel and nuts and lower the jack- Job done!.
fig:5
fig:2
fig:6
fig:7
To Chapters
The problem when the ball joint breaks off the Control Arm is that it will rotate within the housing. The bolt on the one end will not break it's seal and the other end is just a ball doing what it was designed to do and that is just rotate.So the problem is getting the ball joint out of the hub housing without continually rotating it, (fig6).
This calls for additional tools. After a long think and a walk to the local retail shop on the high street, (as the car was out of action on location), I plumbed for the following tools to help me out of this predicament :(fig3 & 4).
* Do not dispose this bolt or nut
* Use new nut supplied