© Copyright Reserved - United Kingdom
Ideal Screen Composition 1024 x 768
A free template by Lucknowwebs.com for WYSIWYG WebBuilder 8
5 Series Beamer
Diary of a Second Hand 15 year old Beamer (Maintenance - Battery Drain included...,
BMW E39 520i year 2000 Engine 1995cc)
M Series.
fig. Boot - Rear Fuse Cluster
Control Arms (continued saga)
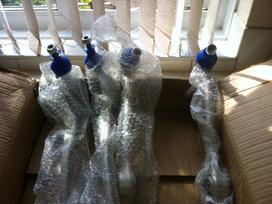
There were a number of Control Arms requiring replacement, I ordered originally 4, however needed to replace one more and ordered an additional one for the O/S Right, driver's side, the rubber around the knuckle joint was split and I hadn't noticed it prior to the first order.
One Control Arm needed to be returned for replacement as the rubber on the knuckle joint was badly damaged for some reason.... fortunately I received the replacement within a few days and was ready for the second attempt at the O/S Strut.
fig. New Control Arms
15
Contents Page
14
Workshop
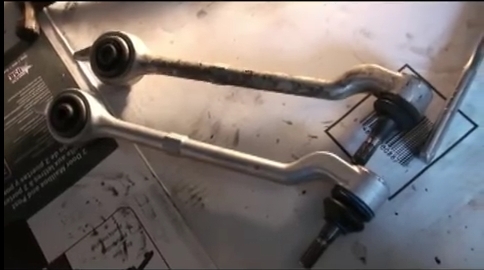
fig. Source - Replacement Control Arm
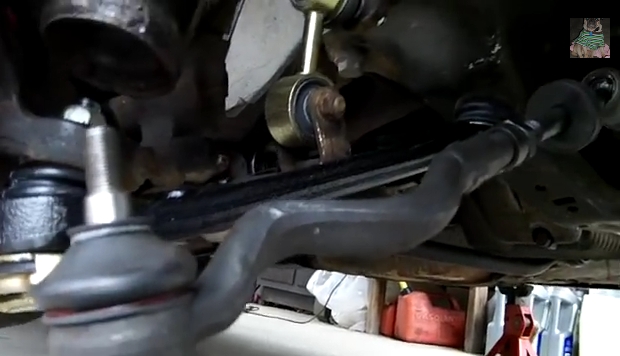
fig. Source - Lower Control Arm O/S Right Drivers Side
fig. Source - Lower Control Arm O/S Right Drivers Side
Connection Point
fig. Source - Trackrod Ends were not replaced as the originals are still in good condition
13
fig. Replacement Split Rubber
eBay - Amesplan Ltd Car4Parts1 £75.67
Additional Control Arm: BMW E39 520 I 110KW 96-00 REAR LEFT SUSPENSION WISHBONE CONTROL ARM (eBay) AZ Car Parts Wakefield £29.99
Workshop/Diary - Suspension
Note: When trying to remove stubborn bolts, be careful not to knock out a metal collar. This should not normally happen, however this did happen to me after using heavy force. If this does happen and if the collar is not too damaged it can be reinserted. (Note, in my case some metal had broken off, this must be reshaped as not to damage the rubber dust cap or boot on the control arm). Failing that for the bolt to be a tight fit an appropriate
heavy guaged washer placed on top of the apperture can be used. When this process was explained to the local dealership, they suggested it should not have happend and no further suggestions followed. The only other solution is to either: replace the whole hub, use a large heavy washer, or soak the bolt with WD40 over night and take time teasing the bolt out, (this could take some time)...
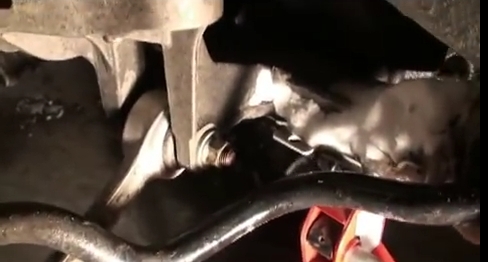
fig. Source - Lower Control Arm N/S Left Passengers
Side Connection Point